View Lists
View Lists enable GENESYS users to create lists of diagram views that direct modelers and other GENESYS users to the most important diagrams for specific purposes and stored in the best order. Example View Lists include a model overview roadmap, a list of diagrams for a design review presentation, a list of diagrams to export to share with external stakeholders, etc. View lists can contain any Entity-Centric Views as well as Table Views and Matrix Views, which are Independent Views. View Lists themselves are considered a kind of Independent View. View Lists are displayed in a table format.
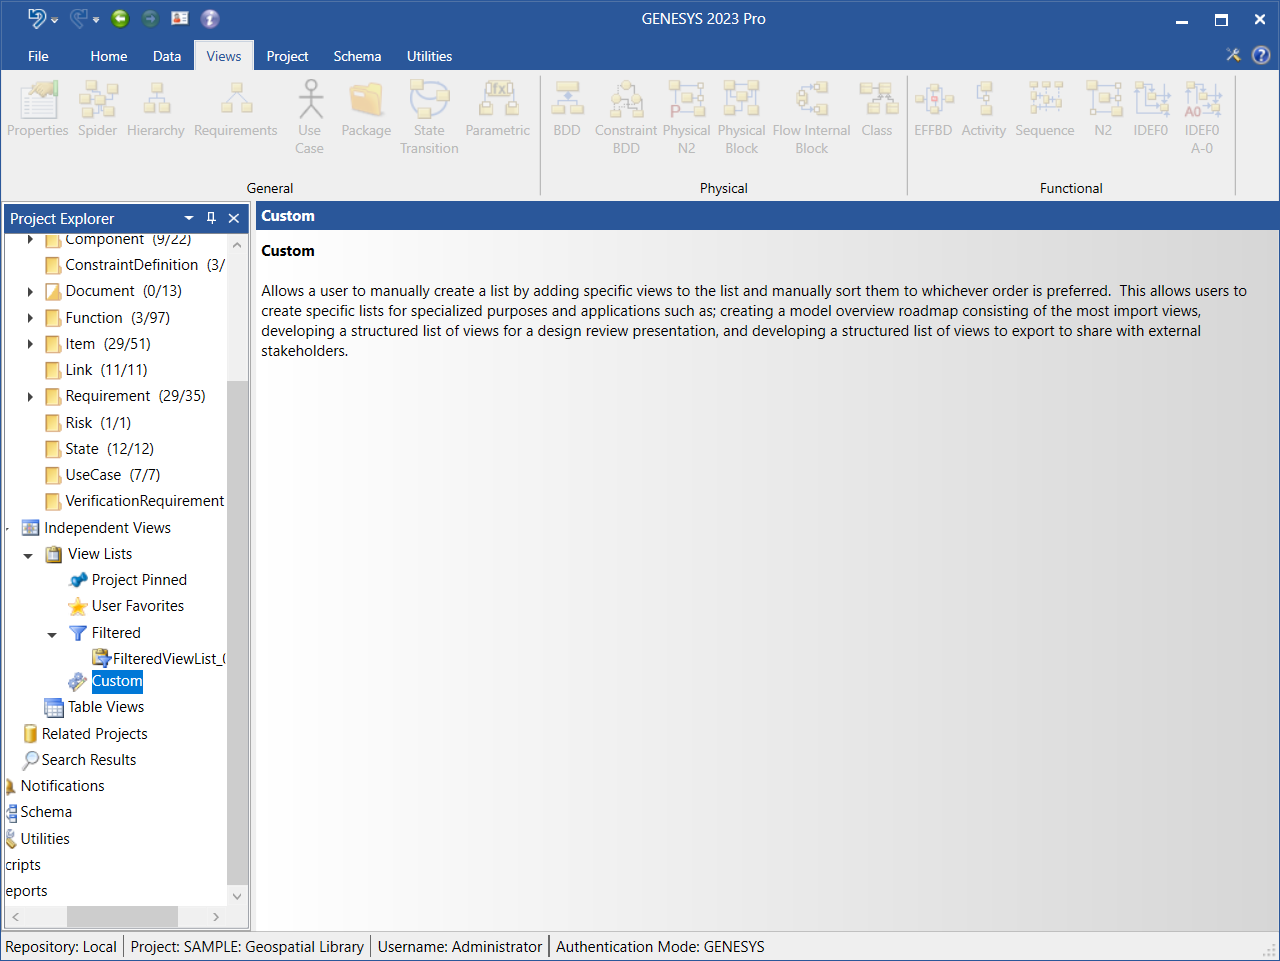
View Lists are found under Independent Views in the Project Explorer.
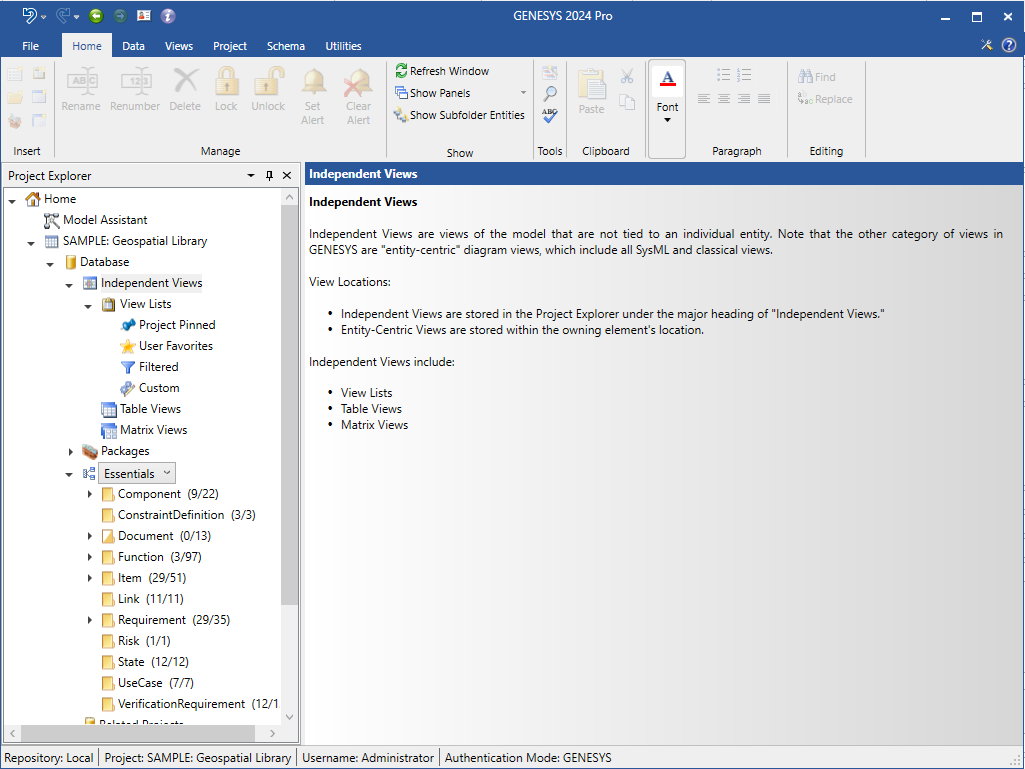
To access View Lists in GENESYS, select Independent Views in the Project Explorer and then View Lists.
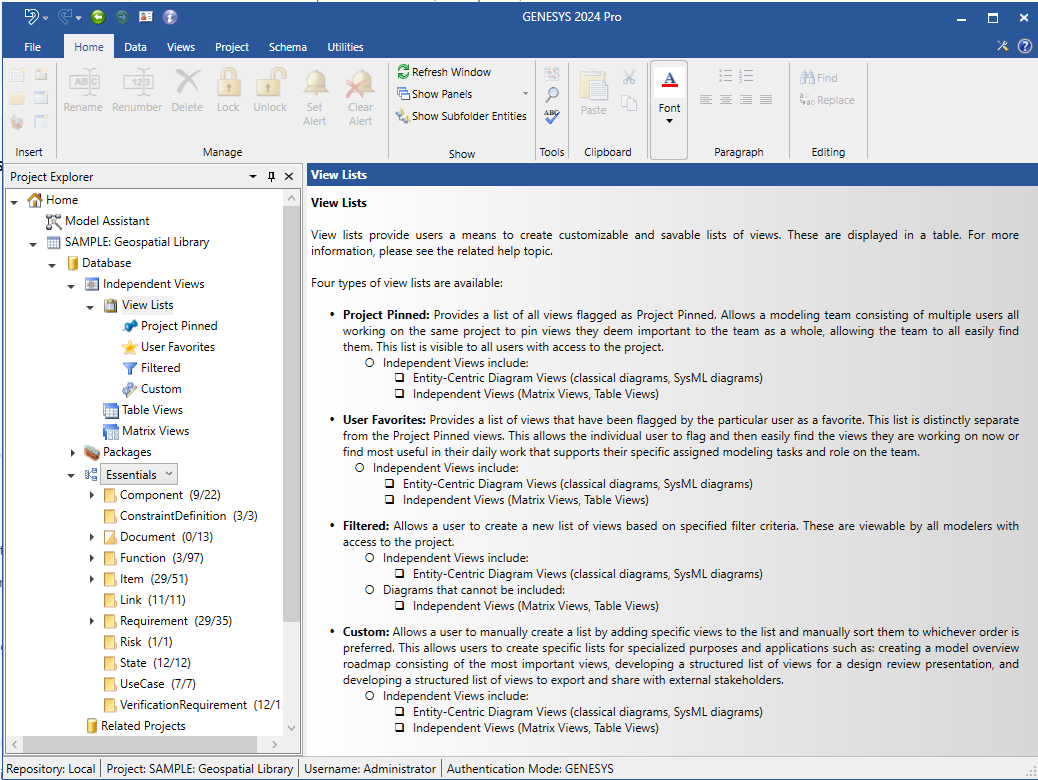
There are four types of View Lists in GENESYS:
Project Pinned  This view list enables a modeling team to pin views important to the team, enabling team members to find them easily. The views are visible to all users with access to the project. A single Project Pinned view list may be created per project.
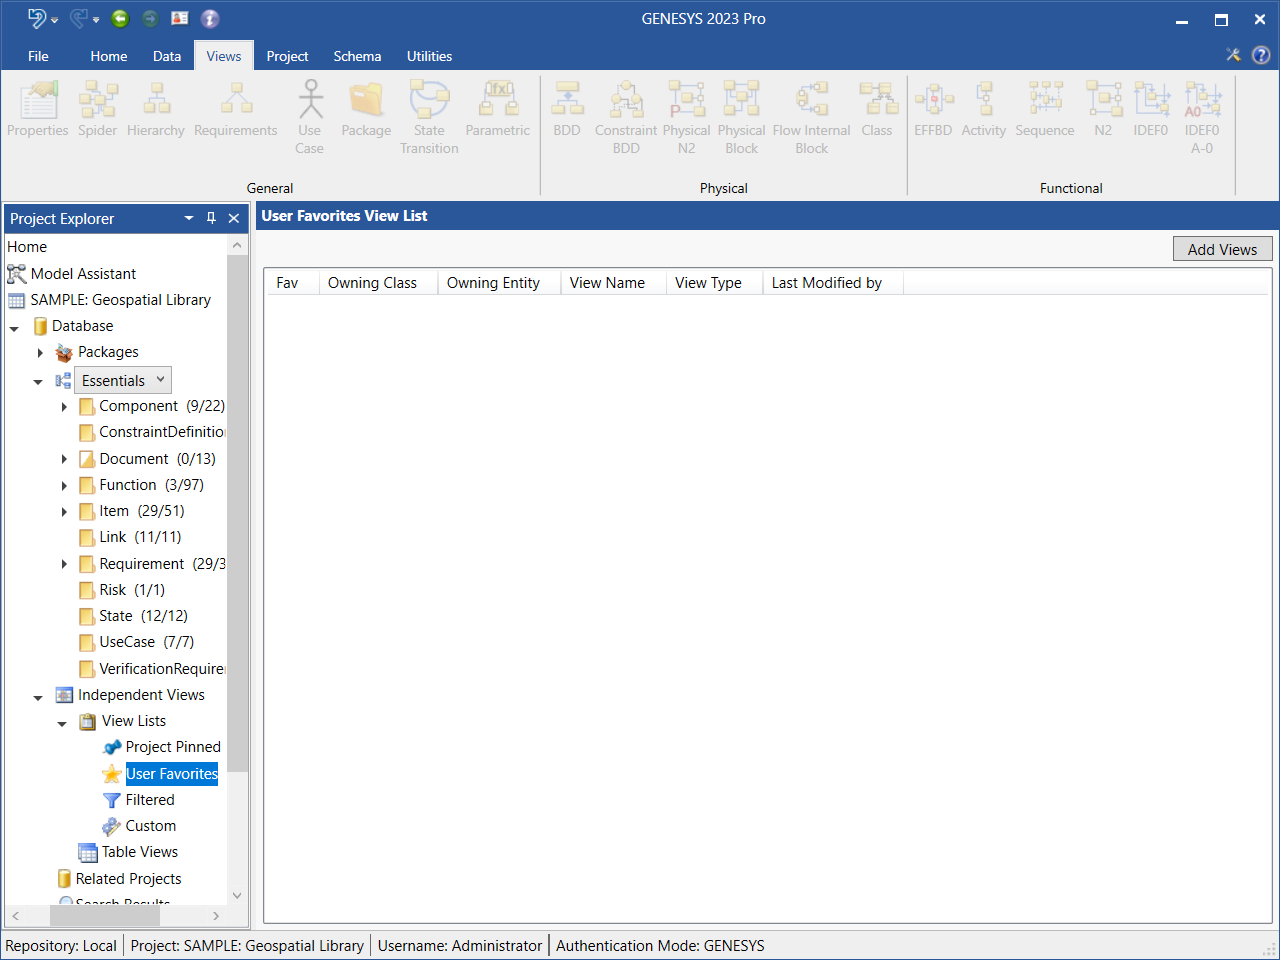
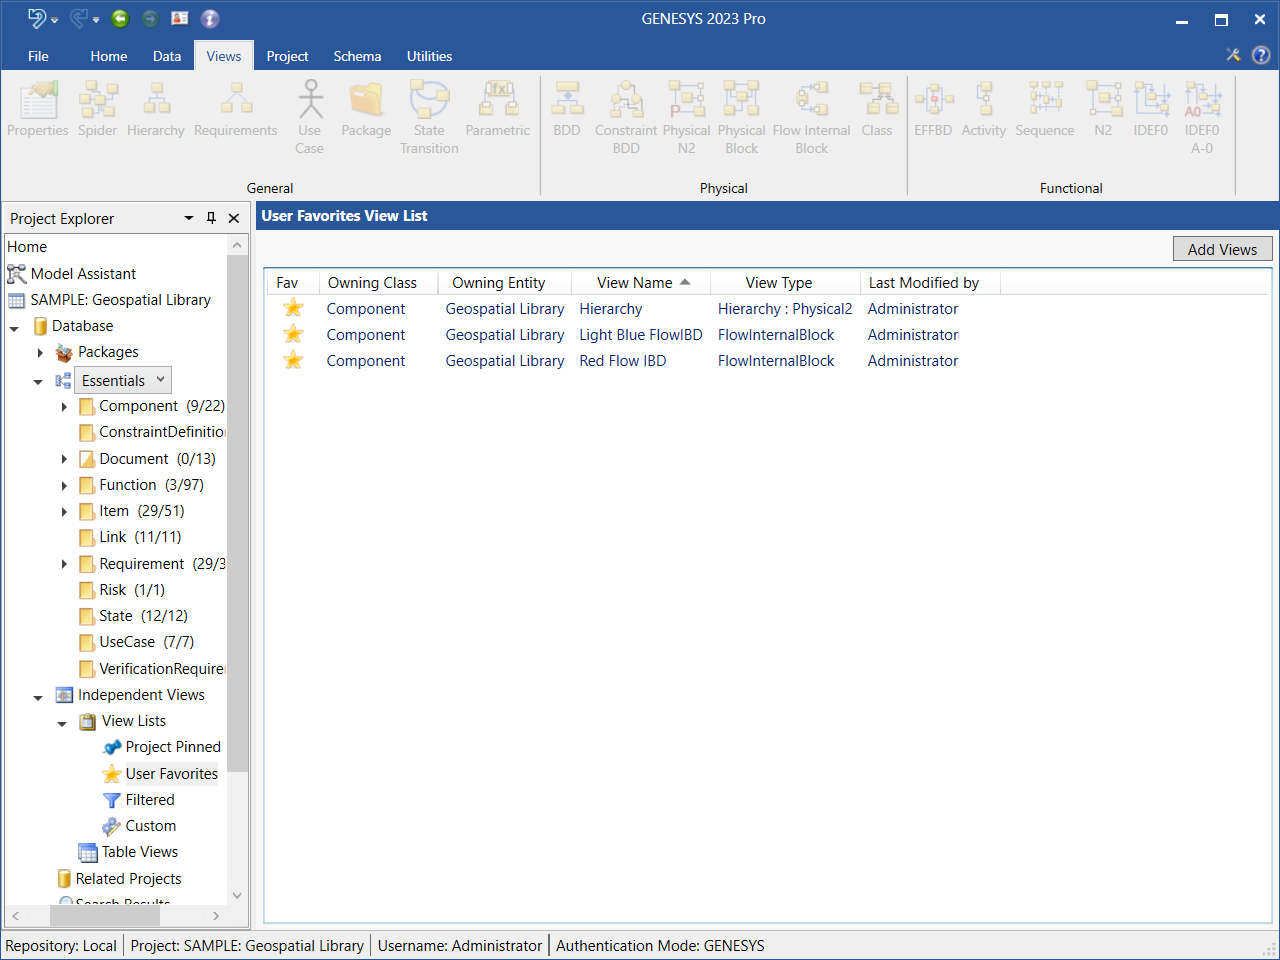
User Favorites  This view list enables users to easily find views that are most important to their work or current views that they are working on. Each user can view only their own User Favorites list. A single User Favorites view list may be created per project.
Filtered ![]() Views in this list are based on specified filter criteria. The views are viewable by all users with access to the project. Zero to n Filtered View Lists may be created in a project.
Views in this list are based on specified filter criteria. The views are viewable by all users with access to the project. Zero to n Filtered View Lists may be created in a project.
Custom  Views in this list are added individually by a user for specialized purposes. The views are viewable by all users with access to the project. Zero to n Custom View Lists may be created in a project.
Views in each list may be manually sorted by the user to display the views in a user-defined order.
To save time creating view lists, GENESYS users can modify an existing View List and save it with a new name. They can create variants of lists for various applications of the modeling team.
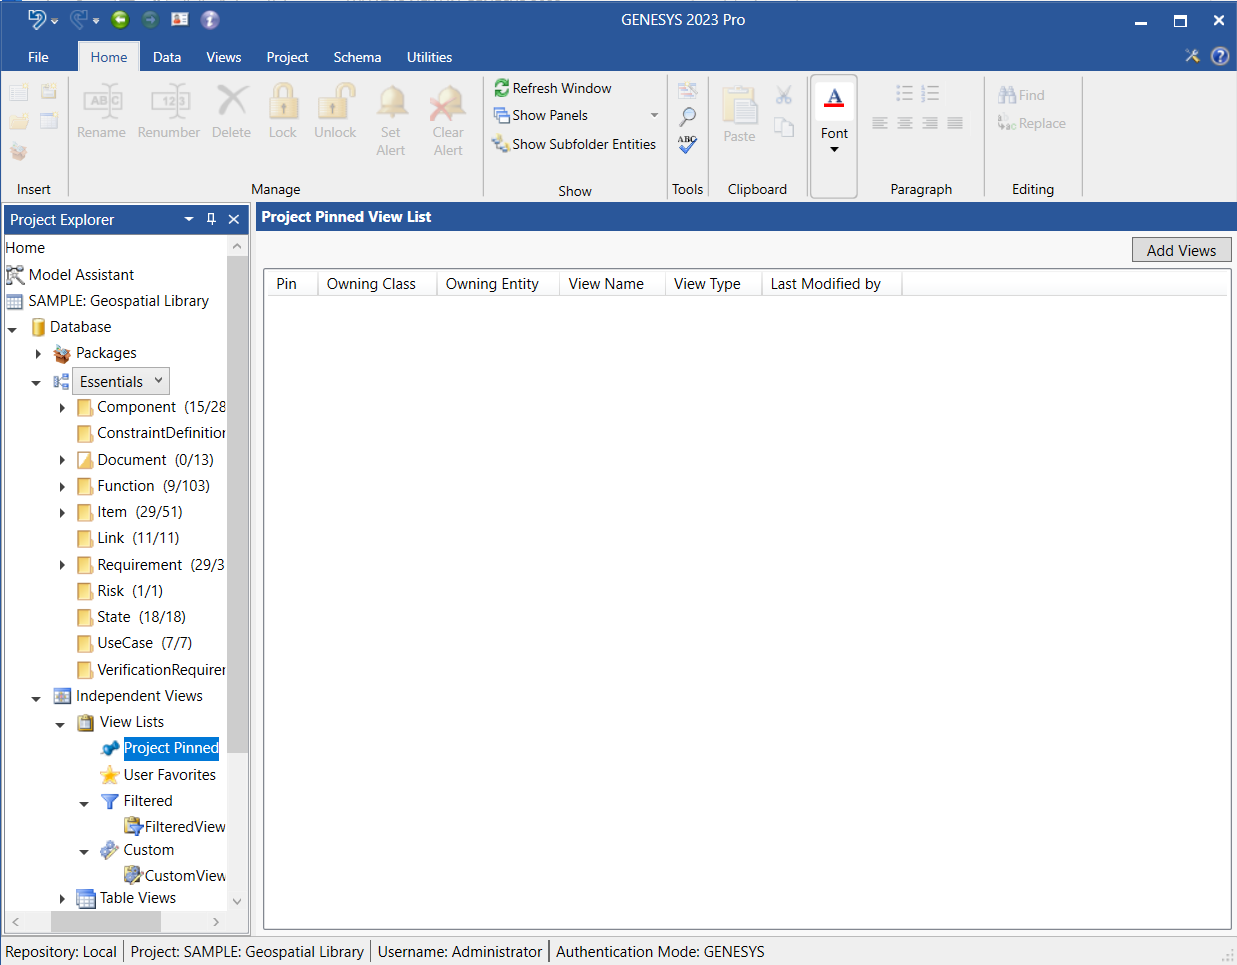
Project Pinned View List
Diagrams can be added to the Project Pinned View List in two different ways: 1) from the Project Pinned View List under the Independent Views heading in the Project Explorer or 2) directly from a diagram via a button in the Diagram ribbon.
Adding Views from the Project Explorer > Independent Views > Project Pinned Header
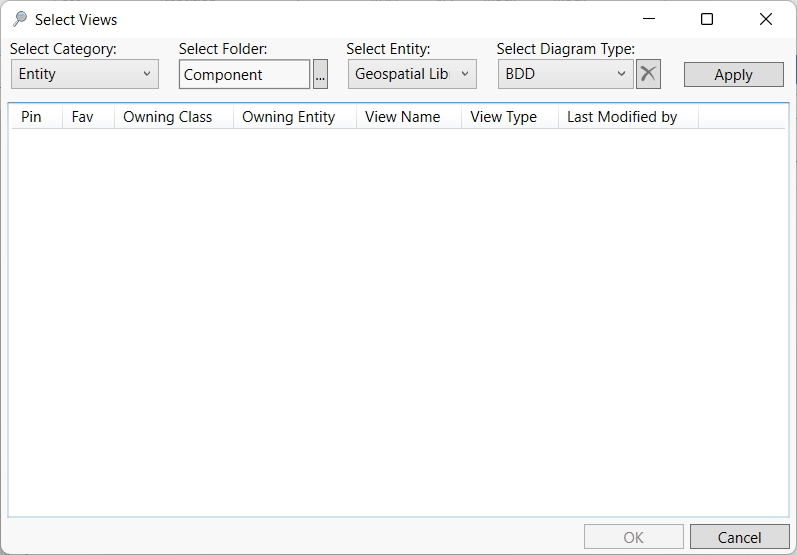
1. To add diagrams to the Project Pinned view list, select Project Pinned under View Lists in Project Explorer and click the Add Views button.
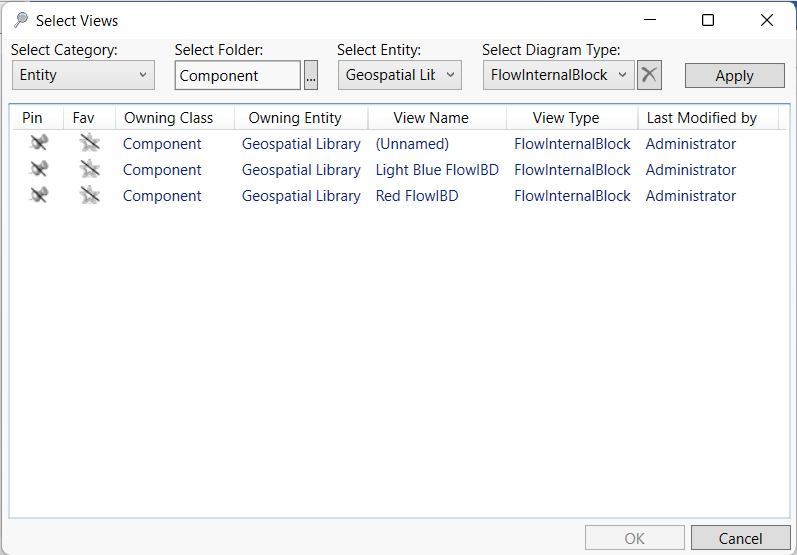
2. At the Select Views window that displays, select the Category (Entity or Table), Folder, Entity, and Diagram Type.
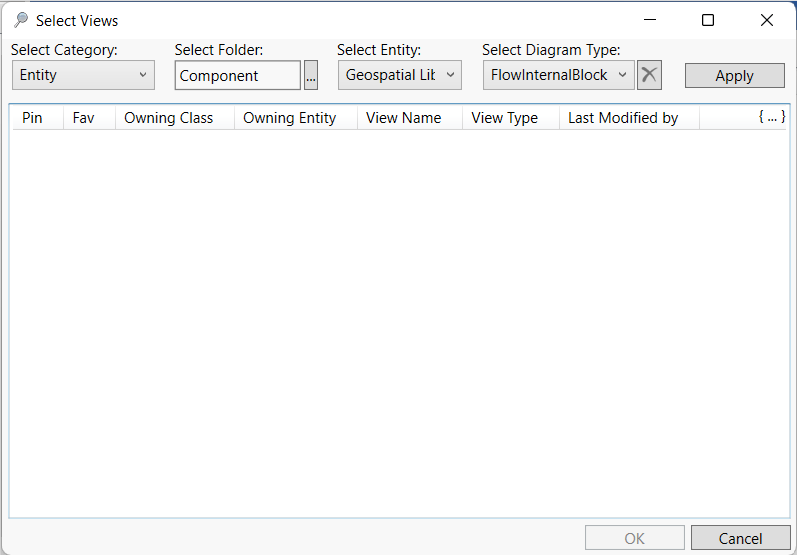
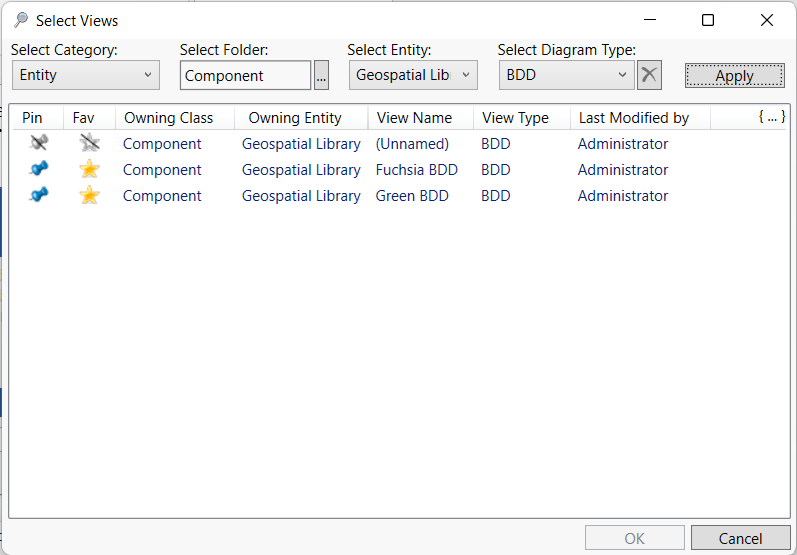
3. Click Apply and the available views will display in the window, as shown below.

4. Select the diagrams that you want to add to the list, holding down the Shift key to select multiple diagrams in a row at once, the Ctrl key to select multiple diagrams that are not in order at once, or the hot key Ctrl + A to select all of the diagrams in the window at once.
5. Click OK on the bottom right side of the window to add the diagrams to the view list.
The diagrams that you select appear in the Project Pinned View List window. The striked out gray pins in the Pin column change color to blue and the strikeout lines disappear, indicating that these are now pinned diagrams.
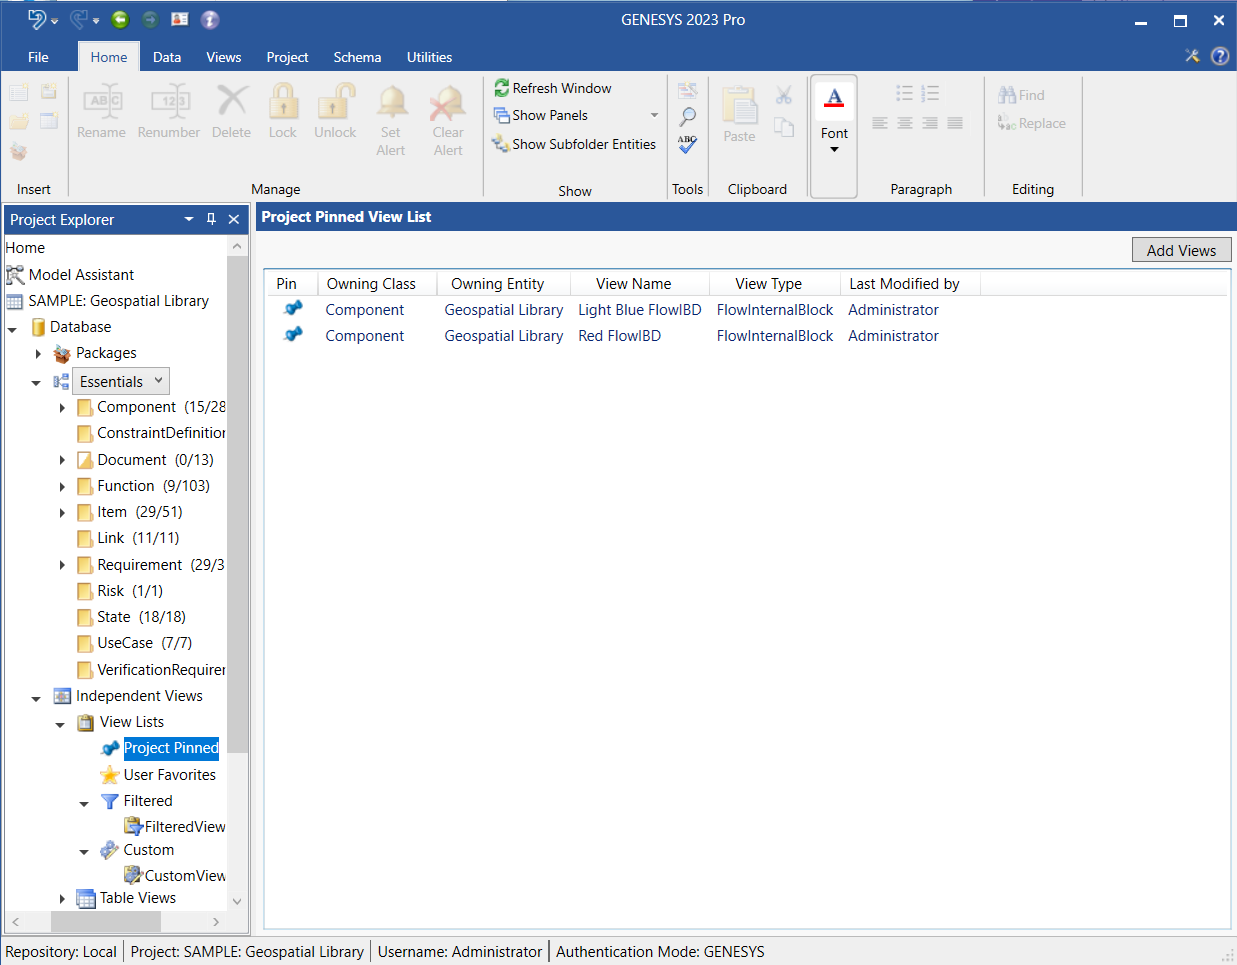
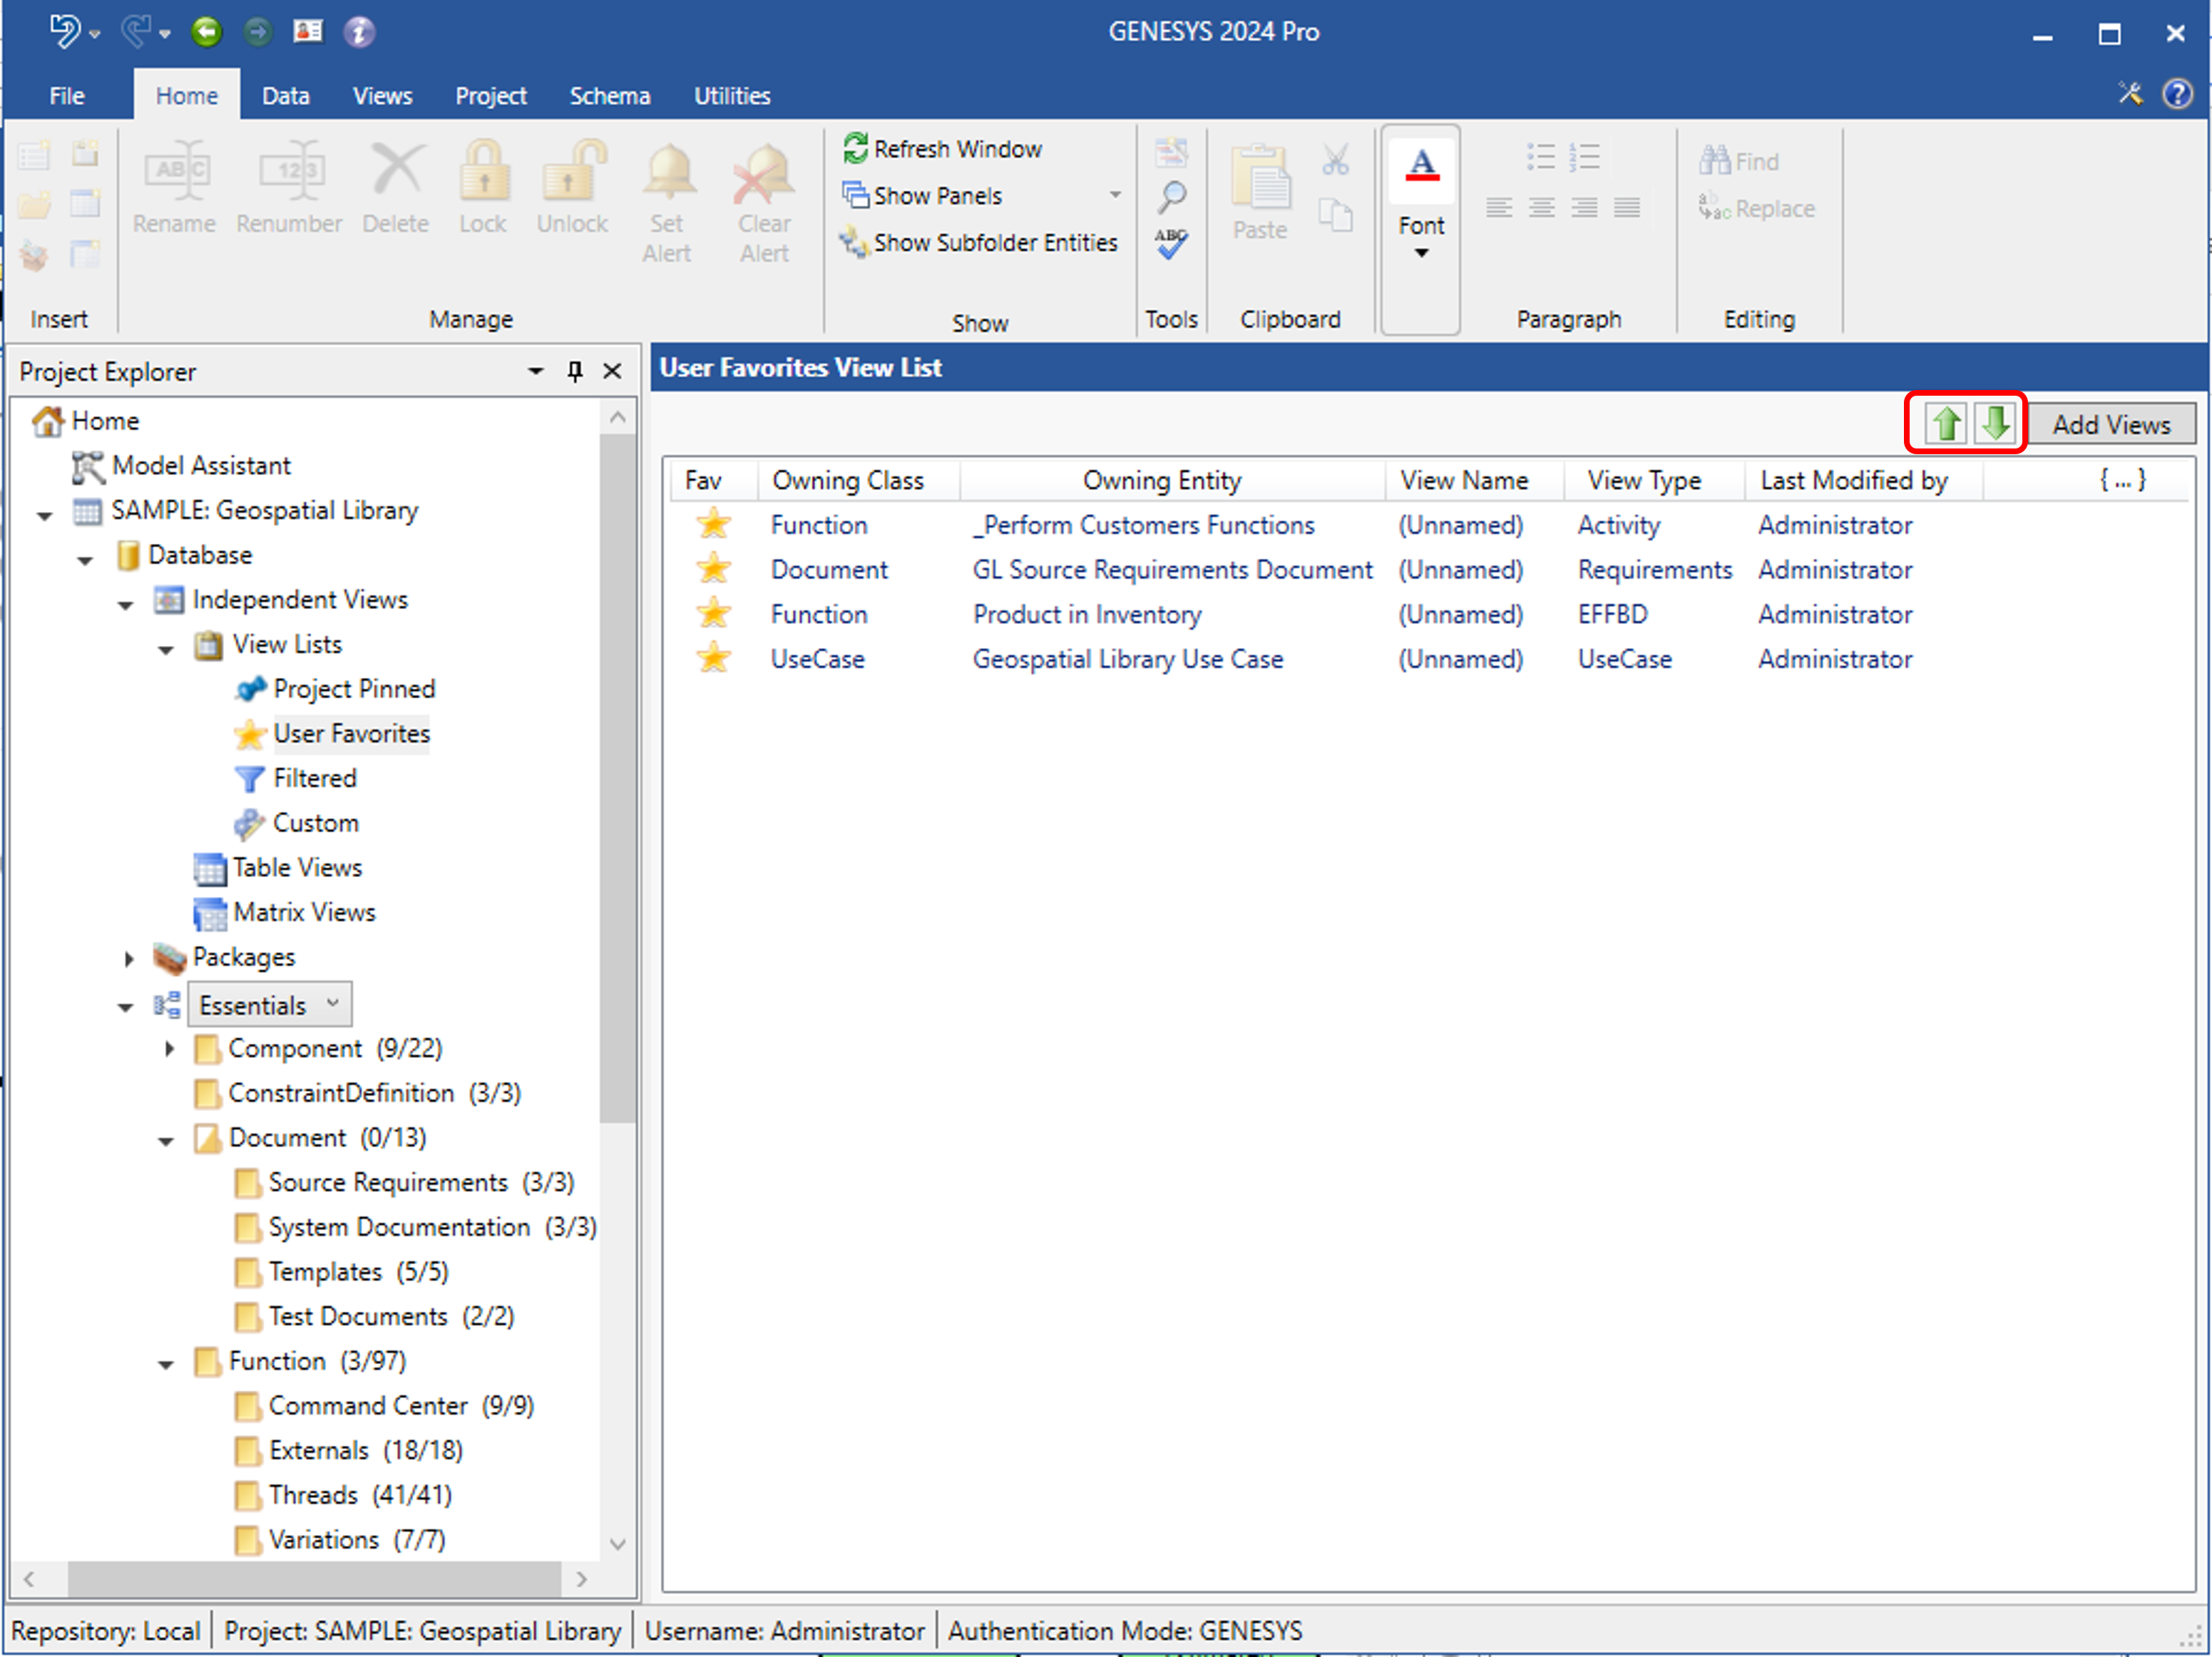
Views within the list may be manually reordered by selecting the view to be moved and using the up and down arrows in the upper right-hand corner of the screen to move their ordinal position in the list. Note this this is true for all View List types.

If another user pins a diagram, that diagram will dynamically appear in the list.
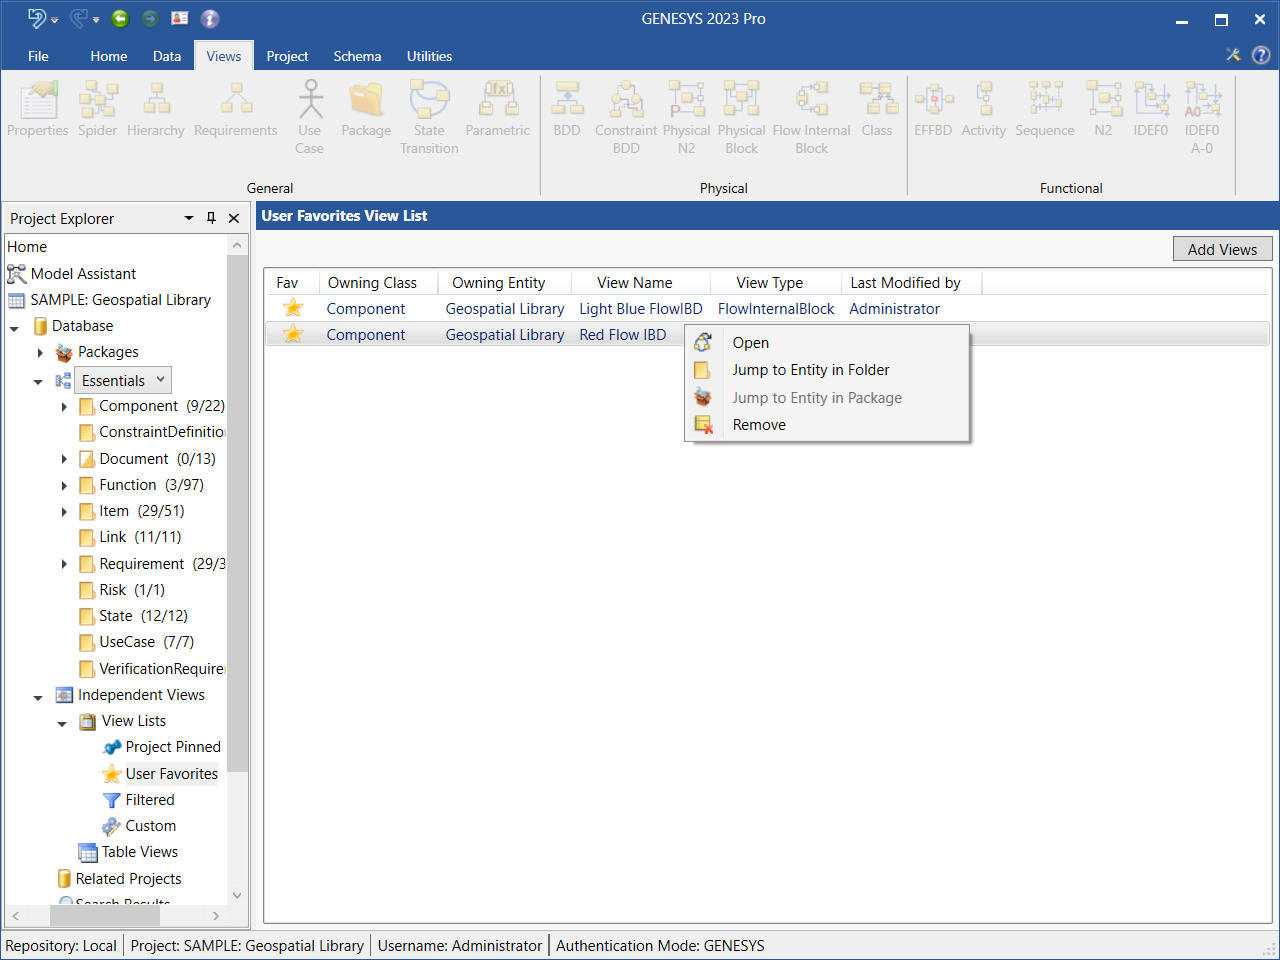
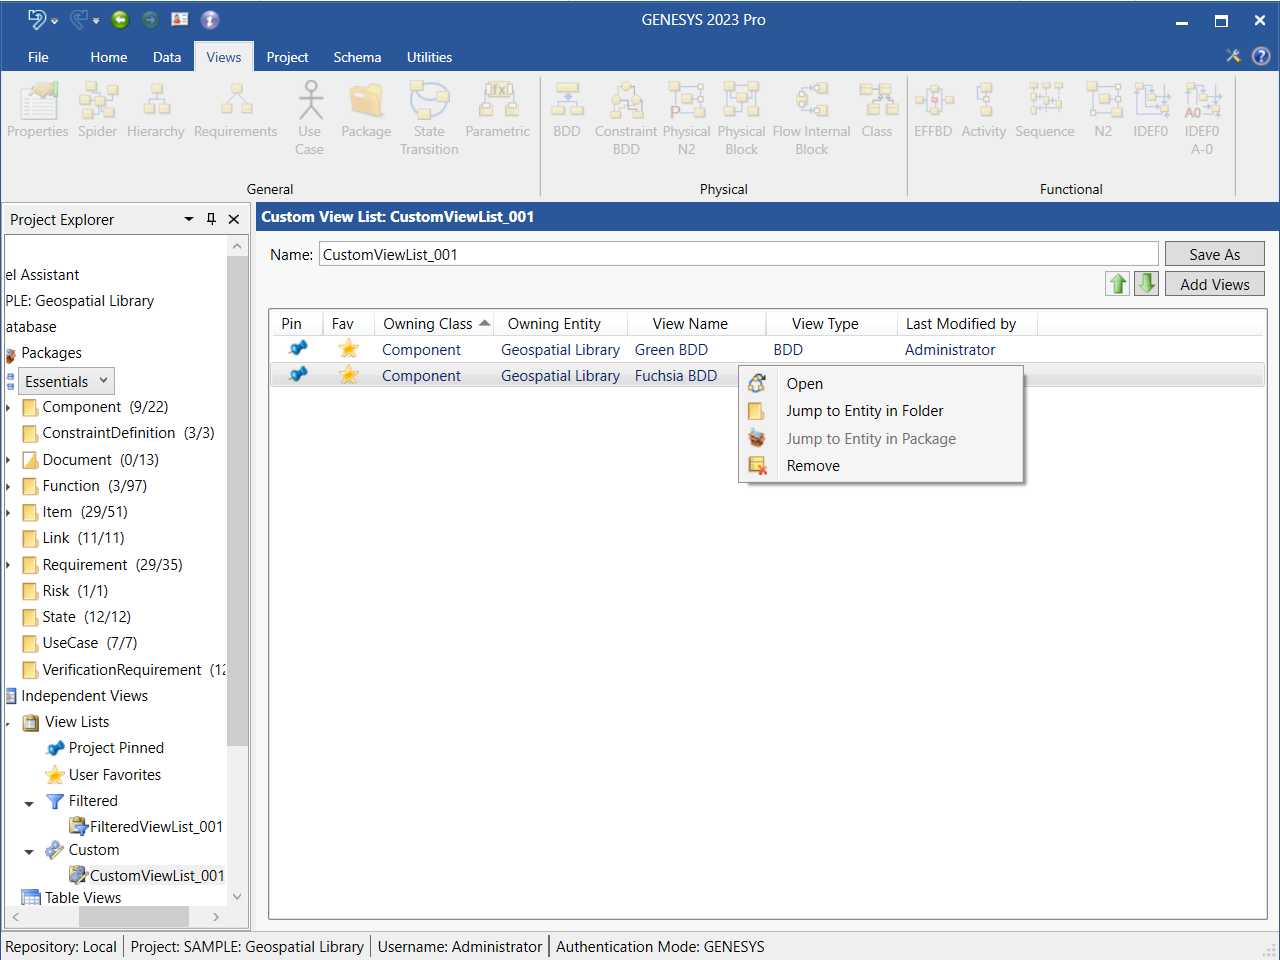
Double-click on a diagram in the view list to open it, or right-click on the diagram and select Open on the context menu that displays, as shown below.
Adding a Diagram to the Project Pinned View List from the Diagram Ribbon
To add a diagram to the Project Pinned view list, click the striked out gray Pin  icon on the Diagram ribbon when the diagram is open.
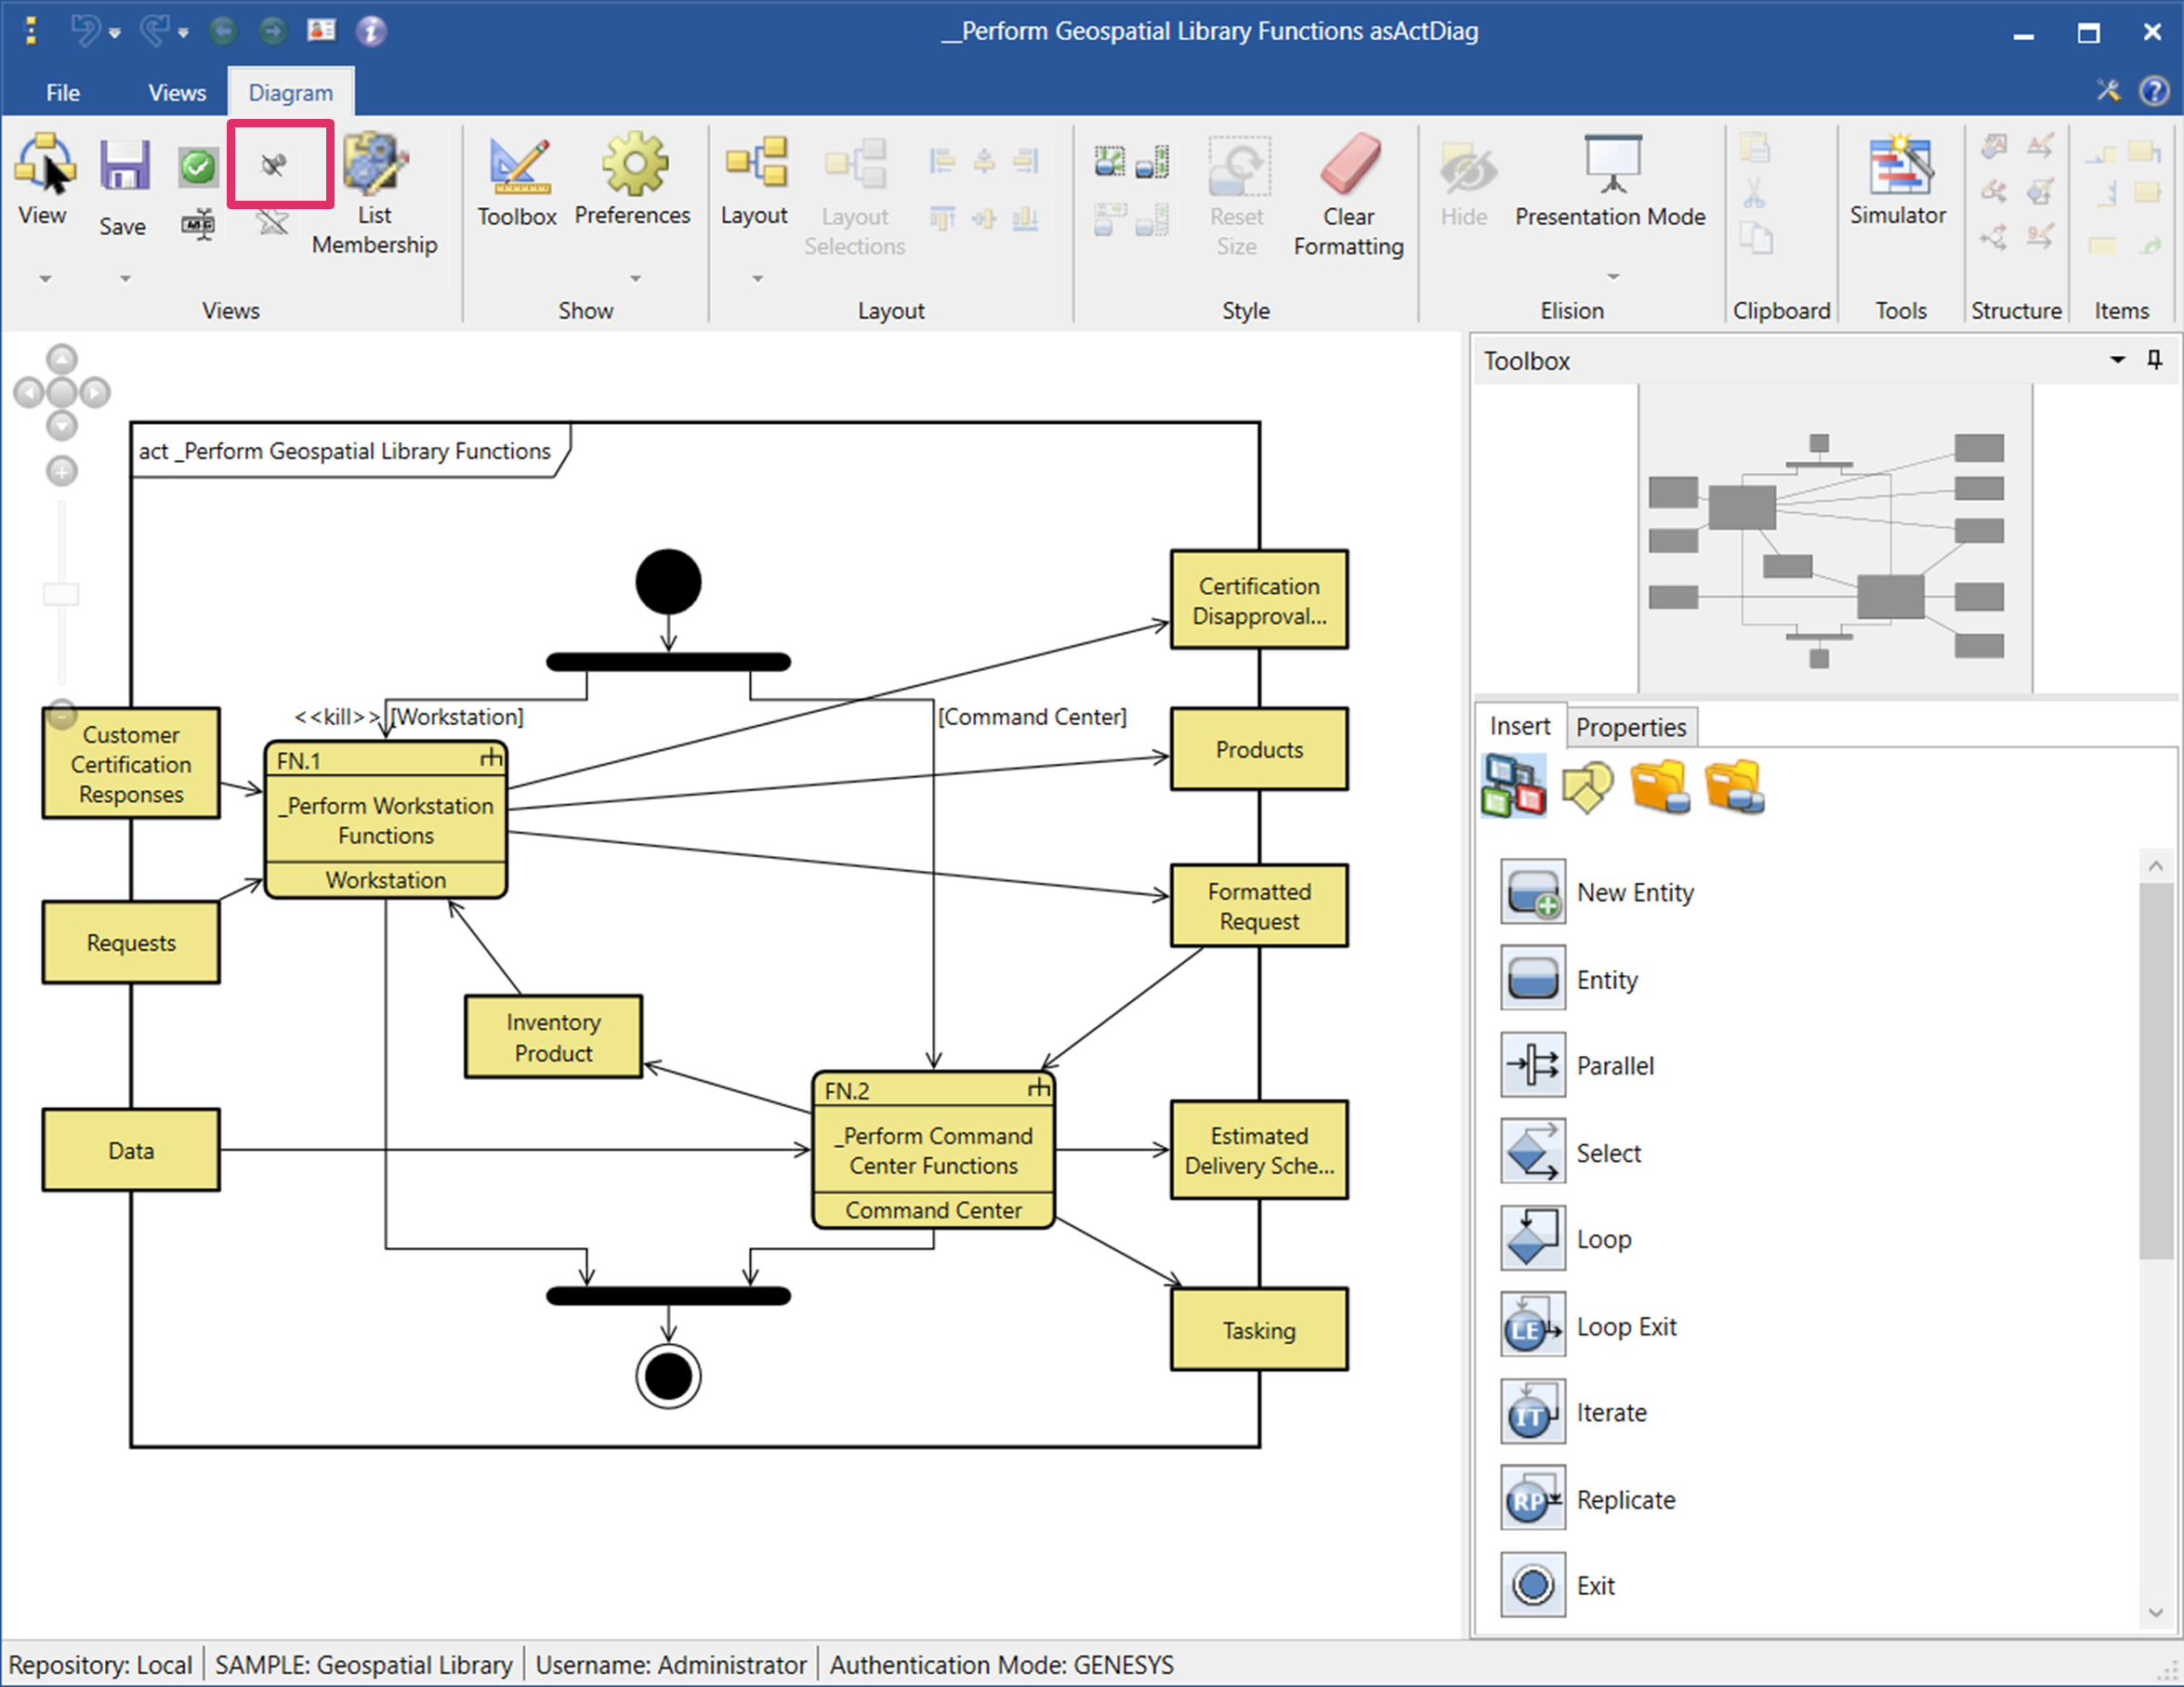
The strikeout line on the icon disappears and the icon changes color to blue  to indicate that the diagram is pinned.

The diagram will now appear in the Project Pinned view list.
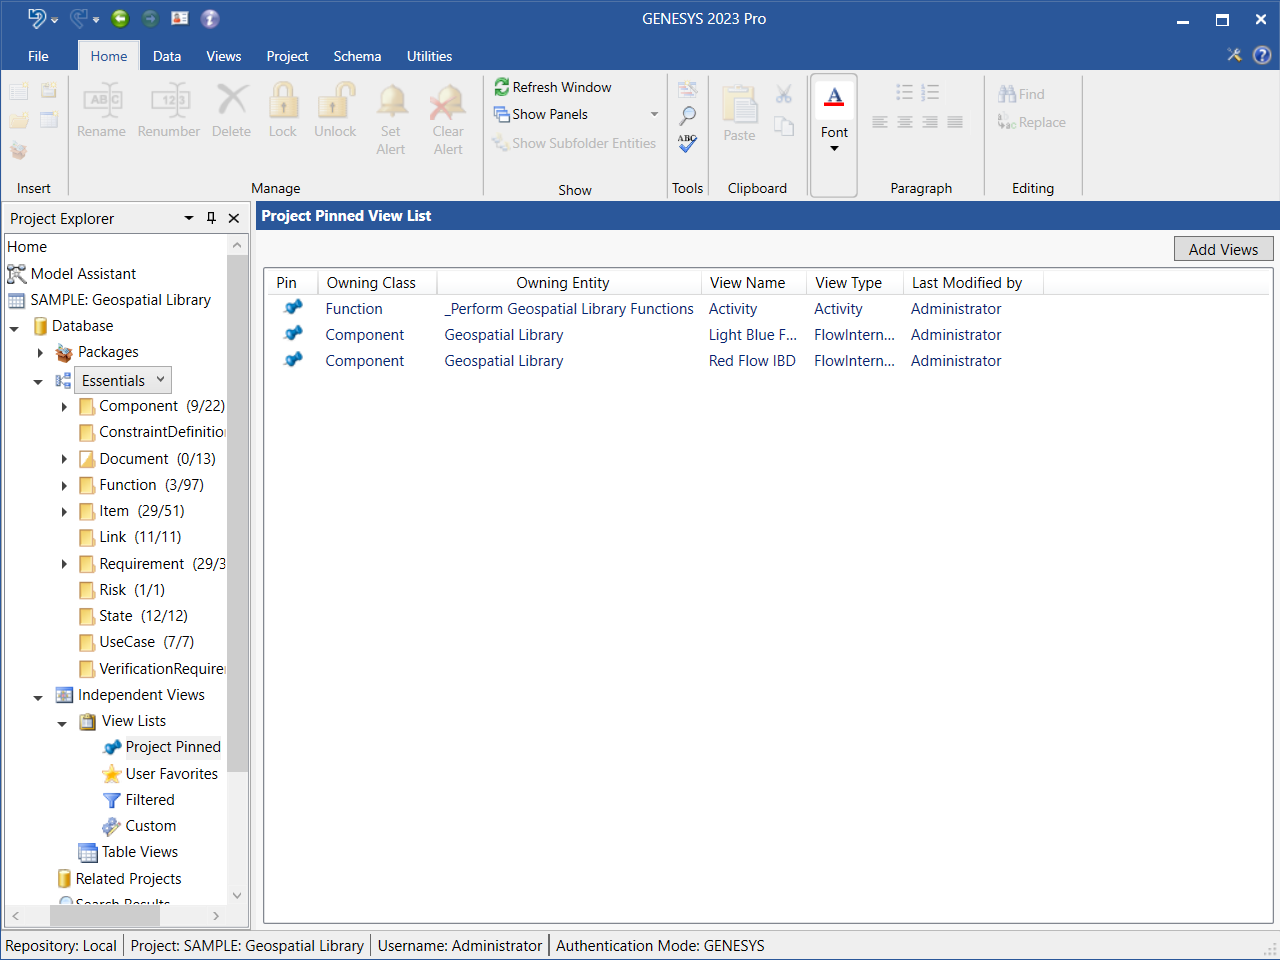
To view all the diagrams currently in the Project Pinned view list, select Project Pinned under View Lists in Project Explorer.
The diagrams in the list display in the window, as shown below.
Removing a Diagram from the Project Pinned View List
To remove a diagram from the Project Pinned view list, highlight the diagram in the view list and on the right-click context menu that displays, select Remove.
To remove more than one diagram at once, hold down the Shift key if the diagrams are together in a row or hold down the Ctrl key if the diagrams are not together. To remove all of the diagrams in the view list at once, hit Ctrl+A.
You can also click the blue Pin  icon on the Diagram ribbon, on the Project Pinned view list or on another view list type to unpin the diagram. On the Diagram ribbon and on other view list types, the strikeout line will appear again on the Pin
  icon and it will change color back to gray. The diagram is removed from the Project Pinned view list. On the Project Pinned view list, the diagram completely disappears from the list.
These actions can be undone/redone by selecting the Undo and Redo icons, respectively, on the top left corner of the GENESYS window.
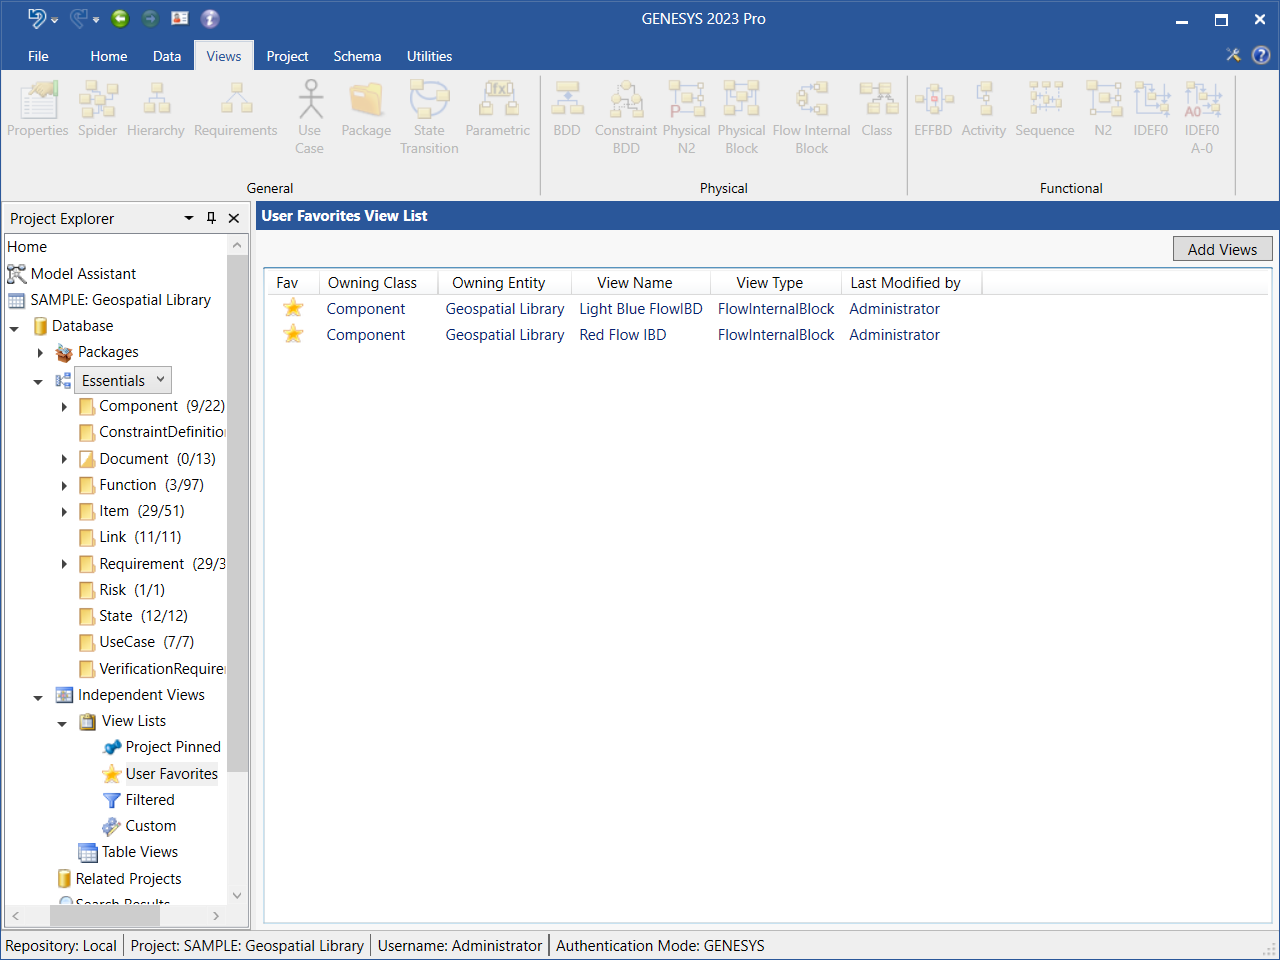
User Favorites View List
Diagrams can be added to the User Favorites View List in two different ways: 1) from the User Favorites View List under the Independent Views heading in the Project Explorer or 2) directly from a diagram via a button in the Diagram ribbon.
Adding Views from the Project Explorer > Independent Views > User Favorites Header
1. To add diagrams to the User Favorites view list, select User Favorites under View Lists in Project Explorer and click the Add Views button.
2. At the Select Views window that displays, select the Category (Entity or Table), Folder, Entity, and Diagram Type.

3. Click Apply and the available views will display in the window, as shown below.
4. Select the diagrams that you want to add to the list, holding down the Shift key to select multiple diagrams in a row at once, the Ctrl key to select multiple diagrams that are not in order at once, or the hot key Ctrl + A to select all of the diagrams in the window at once.
5. Click OK on the bottom right side of the window to add the diagrams to the view list.
The diagrams that you select appear in the User Favorites View List window. The striked out gray stars in the Fav (Favorite) column change color to yellow and the strikeout lines disappear, indicating that these are User Favorites diagrams.
Views within the list may be manually reordered by selecting the view to be moved and using the up and down arrows in the upper right-hand corner of the screen to move their ordinal position in the list. Note this this is true for all View List types.
Double-click on a diagram in the view list to open it, or right-click on the diagram and select Open on the context menu that displays, as shown below.
Adding a Diagram to the User Favorites View List from the Diagram Ribbon
To add a diagram to the User Favorites view list from the diagram itself, tag the diagram as a favorite by clicking the striked out gray Star  icon on the Diagram ribbon when the diagram is open.
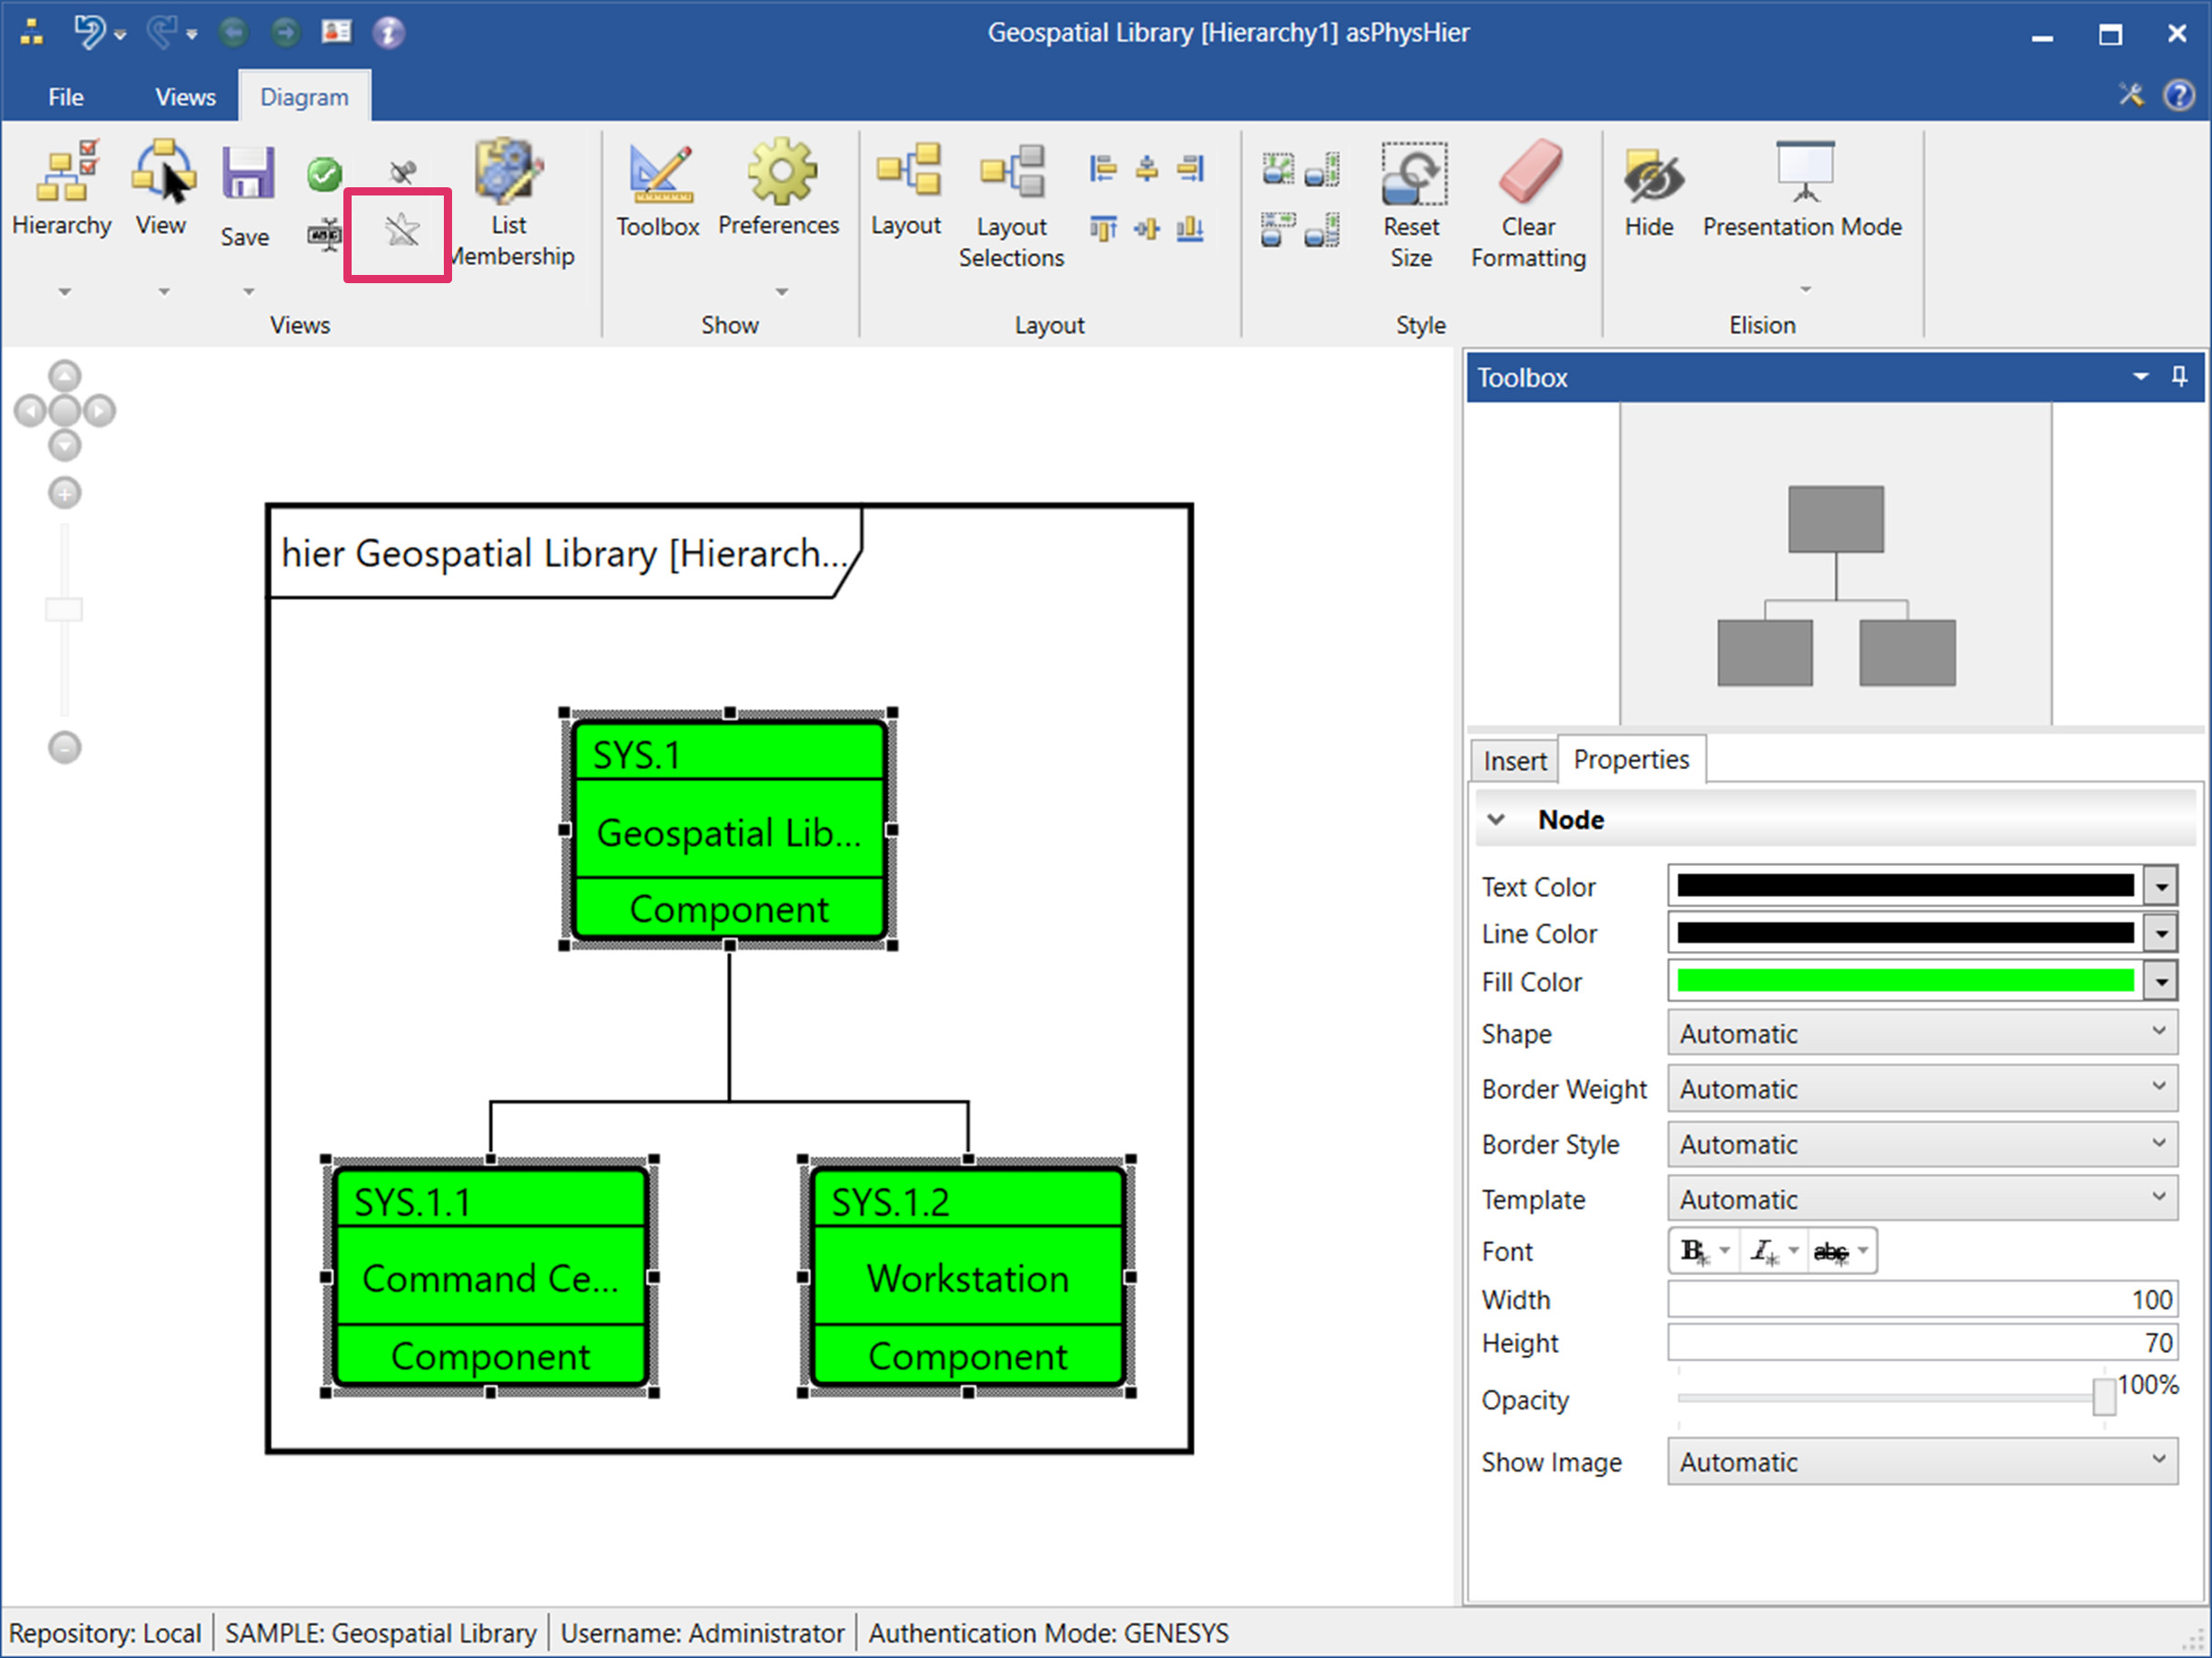
The strikeout line on the icon disappears and the icon changes color to yellow  , indicating that the diagram is a Users Favorite diagram.
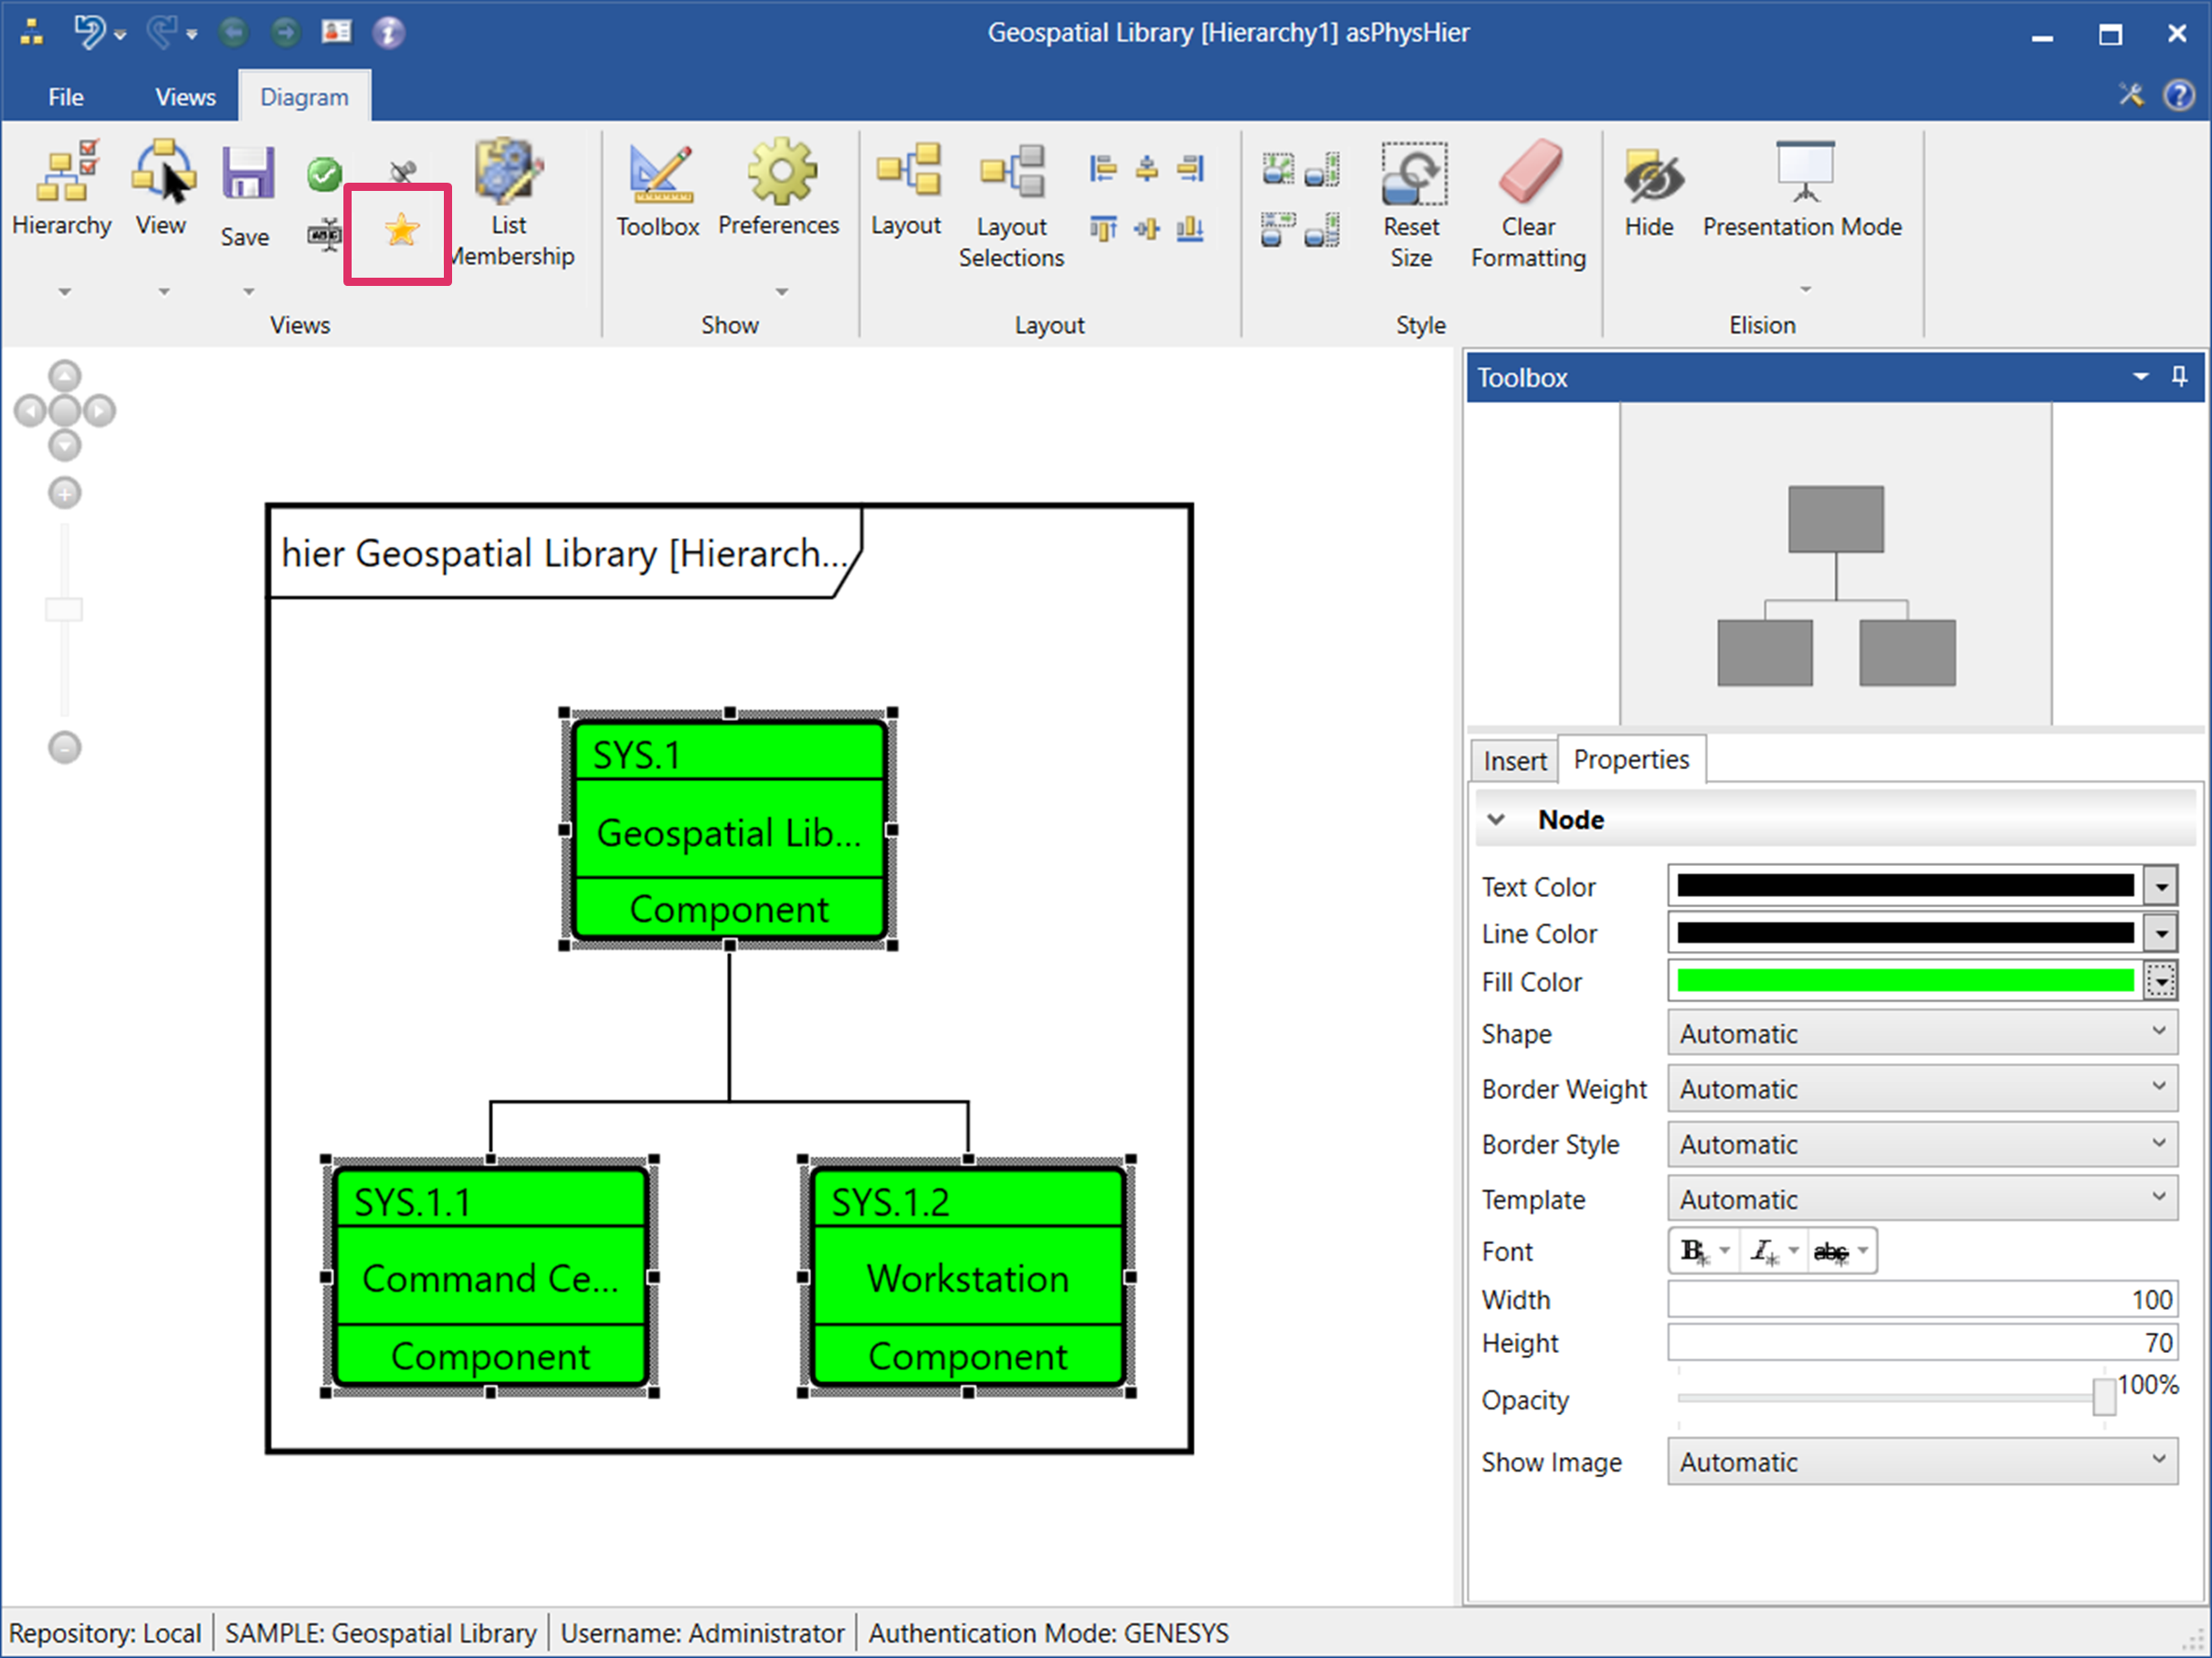
The diagram will now appear in the User Favorites view list.
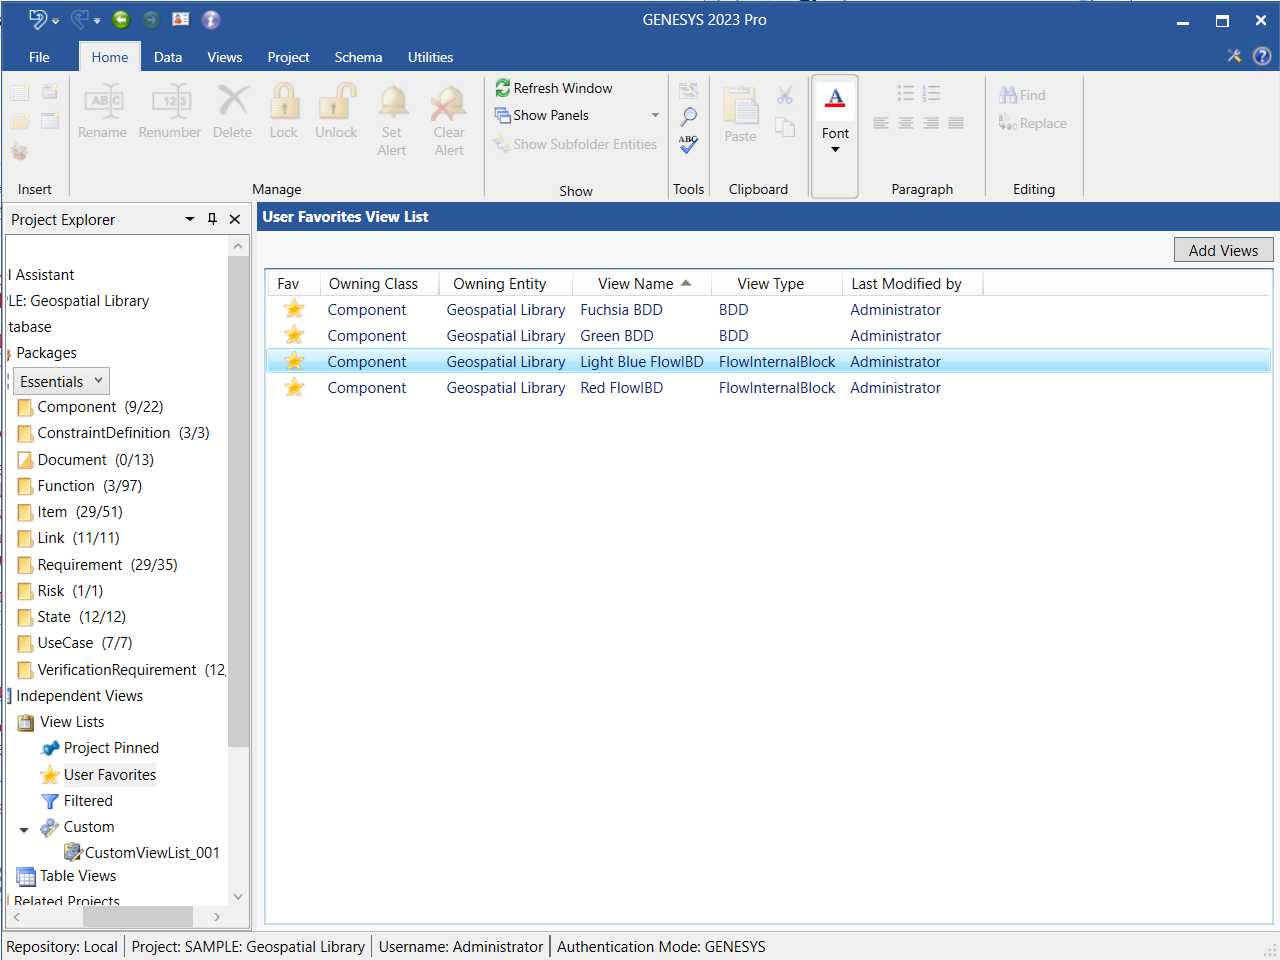
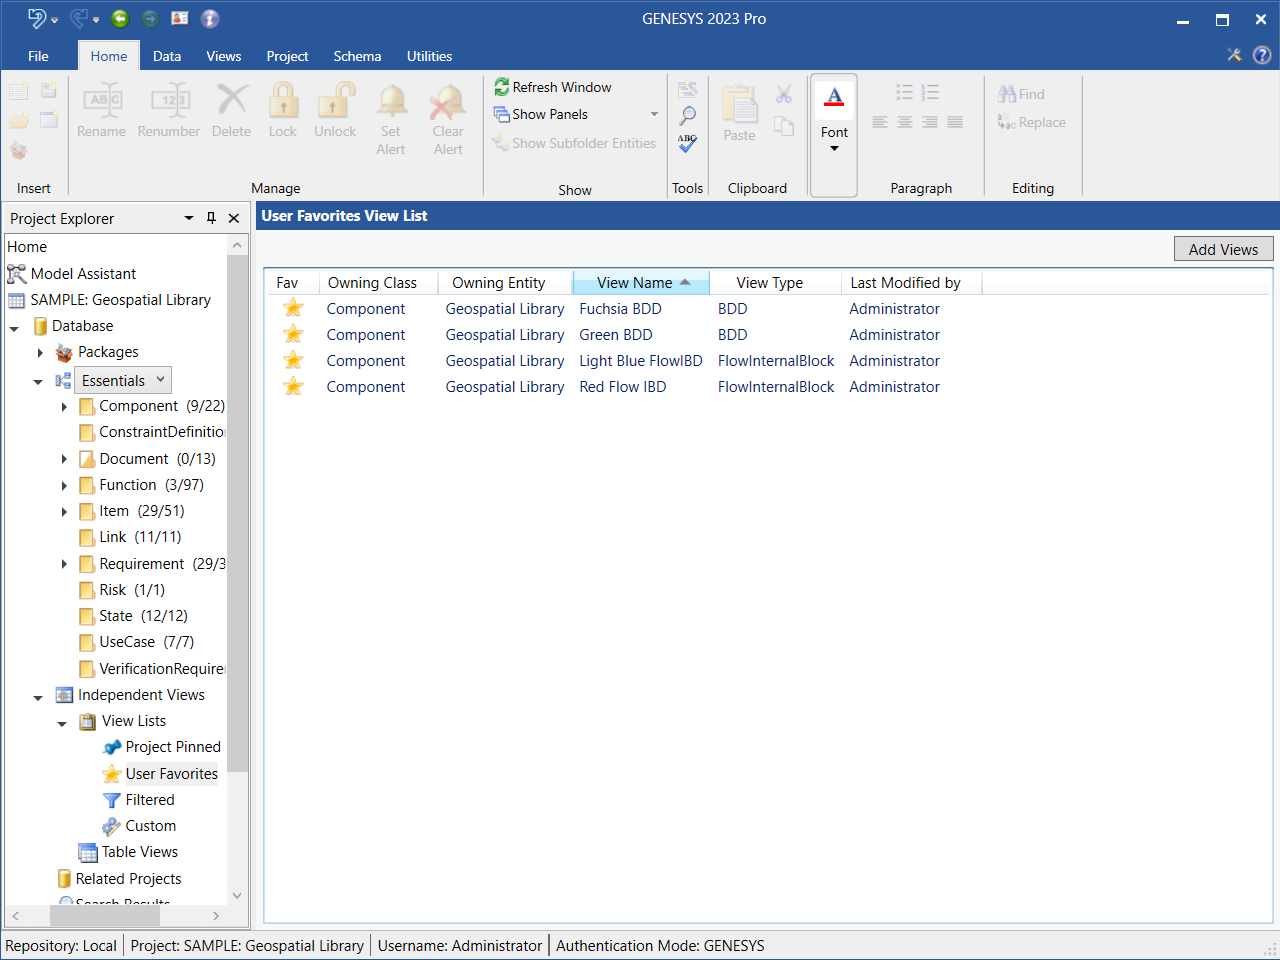
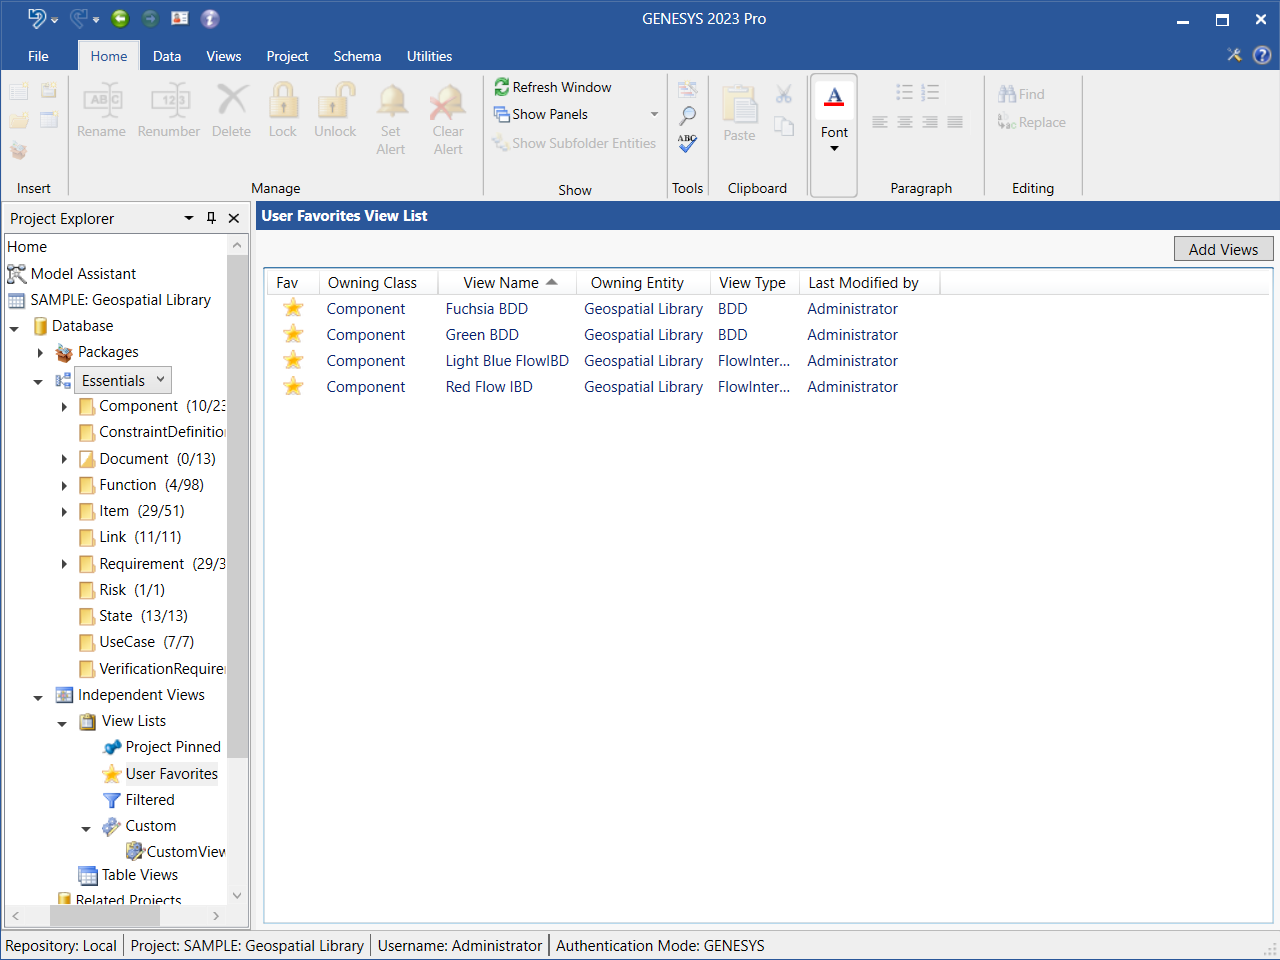
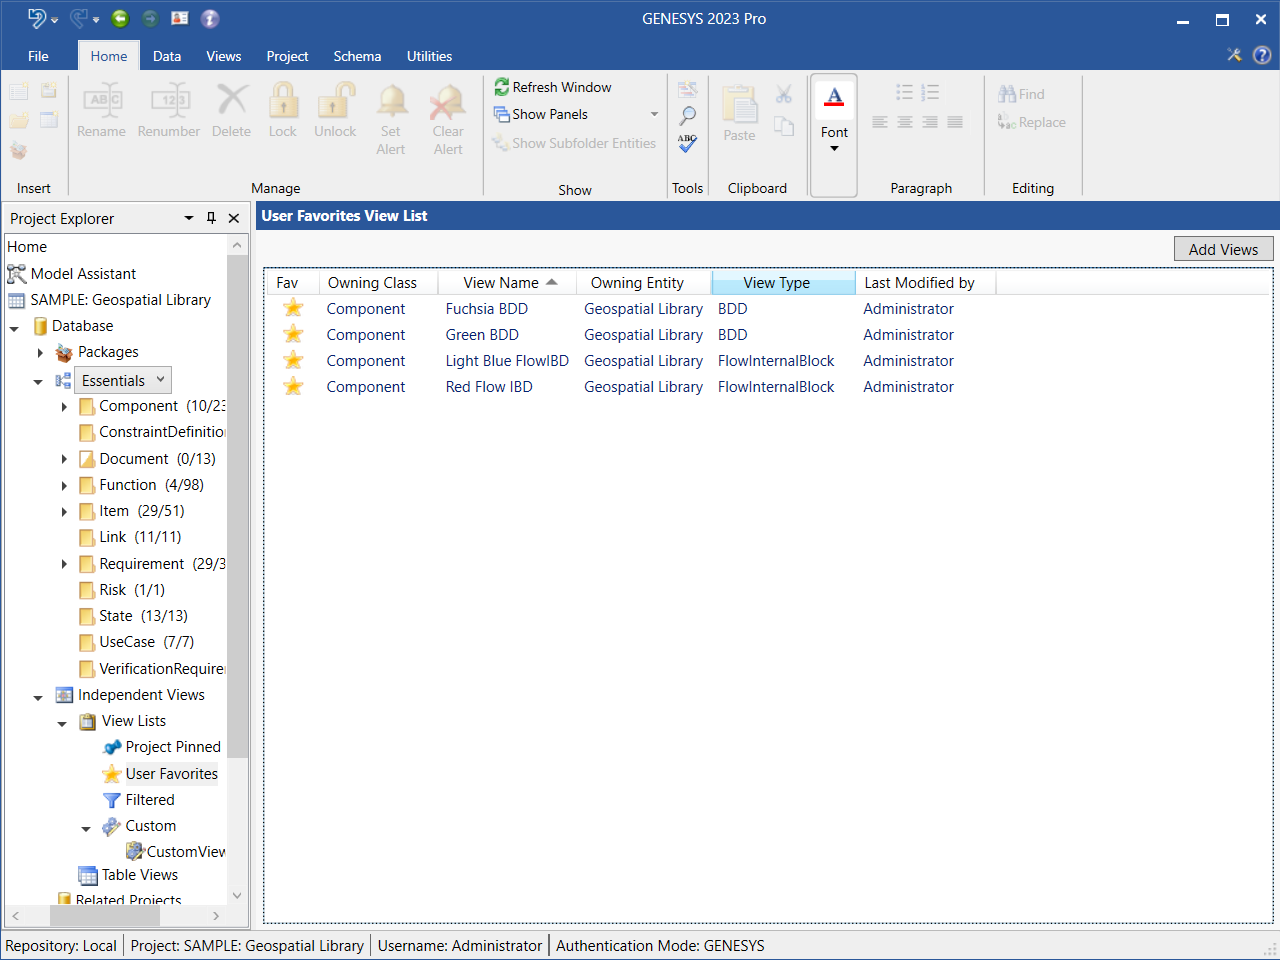
To view all the diagrams currently in the User Favorites view list, select User Favorites under View Lists in Project Explorer.
The diagrams in the list display in the window, as shown below.
Removing a Diagram from a User Favorites View List
To remove a diagram from the User Favorites view list, highlight the diagram in the view list and on the right-click context menu that displays, select Remove.
To remove more than one diagram at once, hold down the Shift key if the diagrams are together in a row or hold down the Ctrl key if the diagrams are not together. To remove all of the diagrams in the view list at once, hit Ctrl+A.
You can also click the yellow Star  icon on the Diagram ribbon, on the User Favorites view list, or on another view list type to remove the diagram from the view list. On the Diagram ribbon and on other view list types, the strikeout line will appear again on the Star
  icon and it will change color back to gray. The diagram is removed from the User Favorites view list. On the User Favorites view list, the diagram completely disappears from the list.
These actions can be undone/redone by selecting the Undo and Redo icons, respectively, on the top left corner of the GENESYS window.
Pinning/Starring as a Favorite a Diagram from Another View List Type
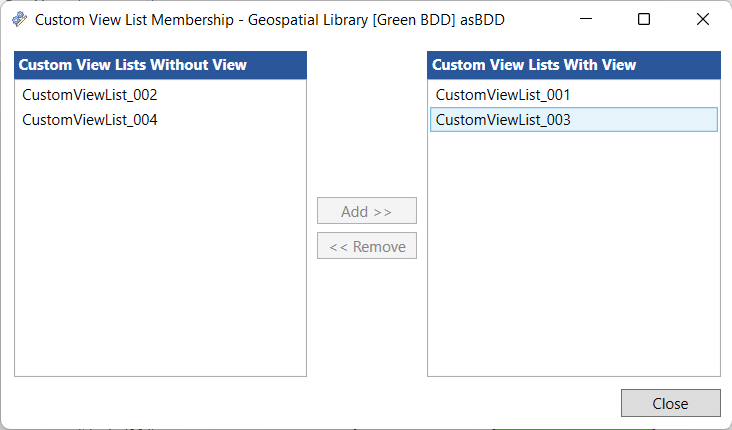
You can also pin or star as a favorite a diagram from another view list type. For example, in the Custom view list shown below, the Red FlowIBD diagram is not pinned or starred as a favorite.

By clicking the Pin  or Star
  icons in the Pin and Fav (Favorite) columns, respectively, on the Custom list, the strikeout lines on the icons disappear and the icons change color to blue and yellow, respectively, as shown in the image below. The diagram is added to both the Project Pinned and User Favorites view lists.

Removing a Pinned/Starred Diagram from Another View List Type
You can also remove a pinned/starred diagram from another view list type. For example, in the Custom view list shown below, the Red FlowIBD diagram is pinned and starred as a favorite.
By clicking the Pin or Star
  icons in the Pin and Fav (Favorite) columns, respectively, on the Custom list, the strikeout lines reappear on the icons and the color of the icons changes back to gray, as shown in the image below. The diagram is removed from both the Project Pinned and User Favorites view lists.

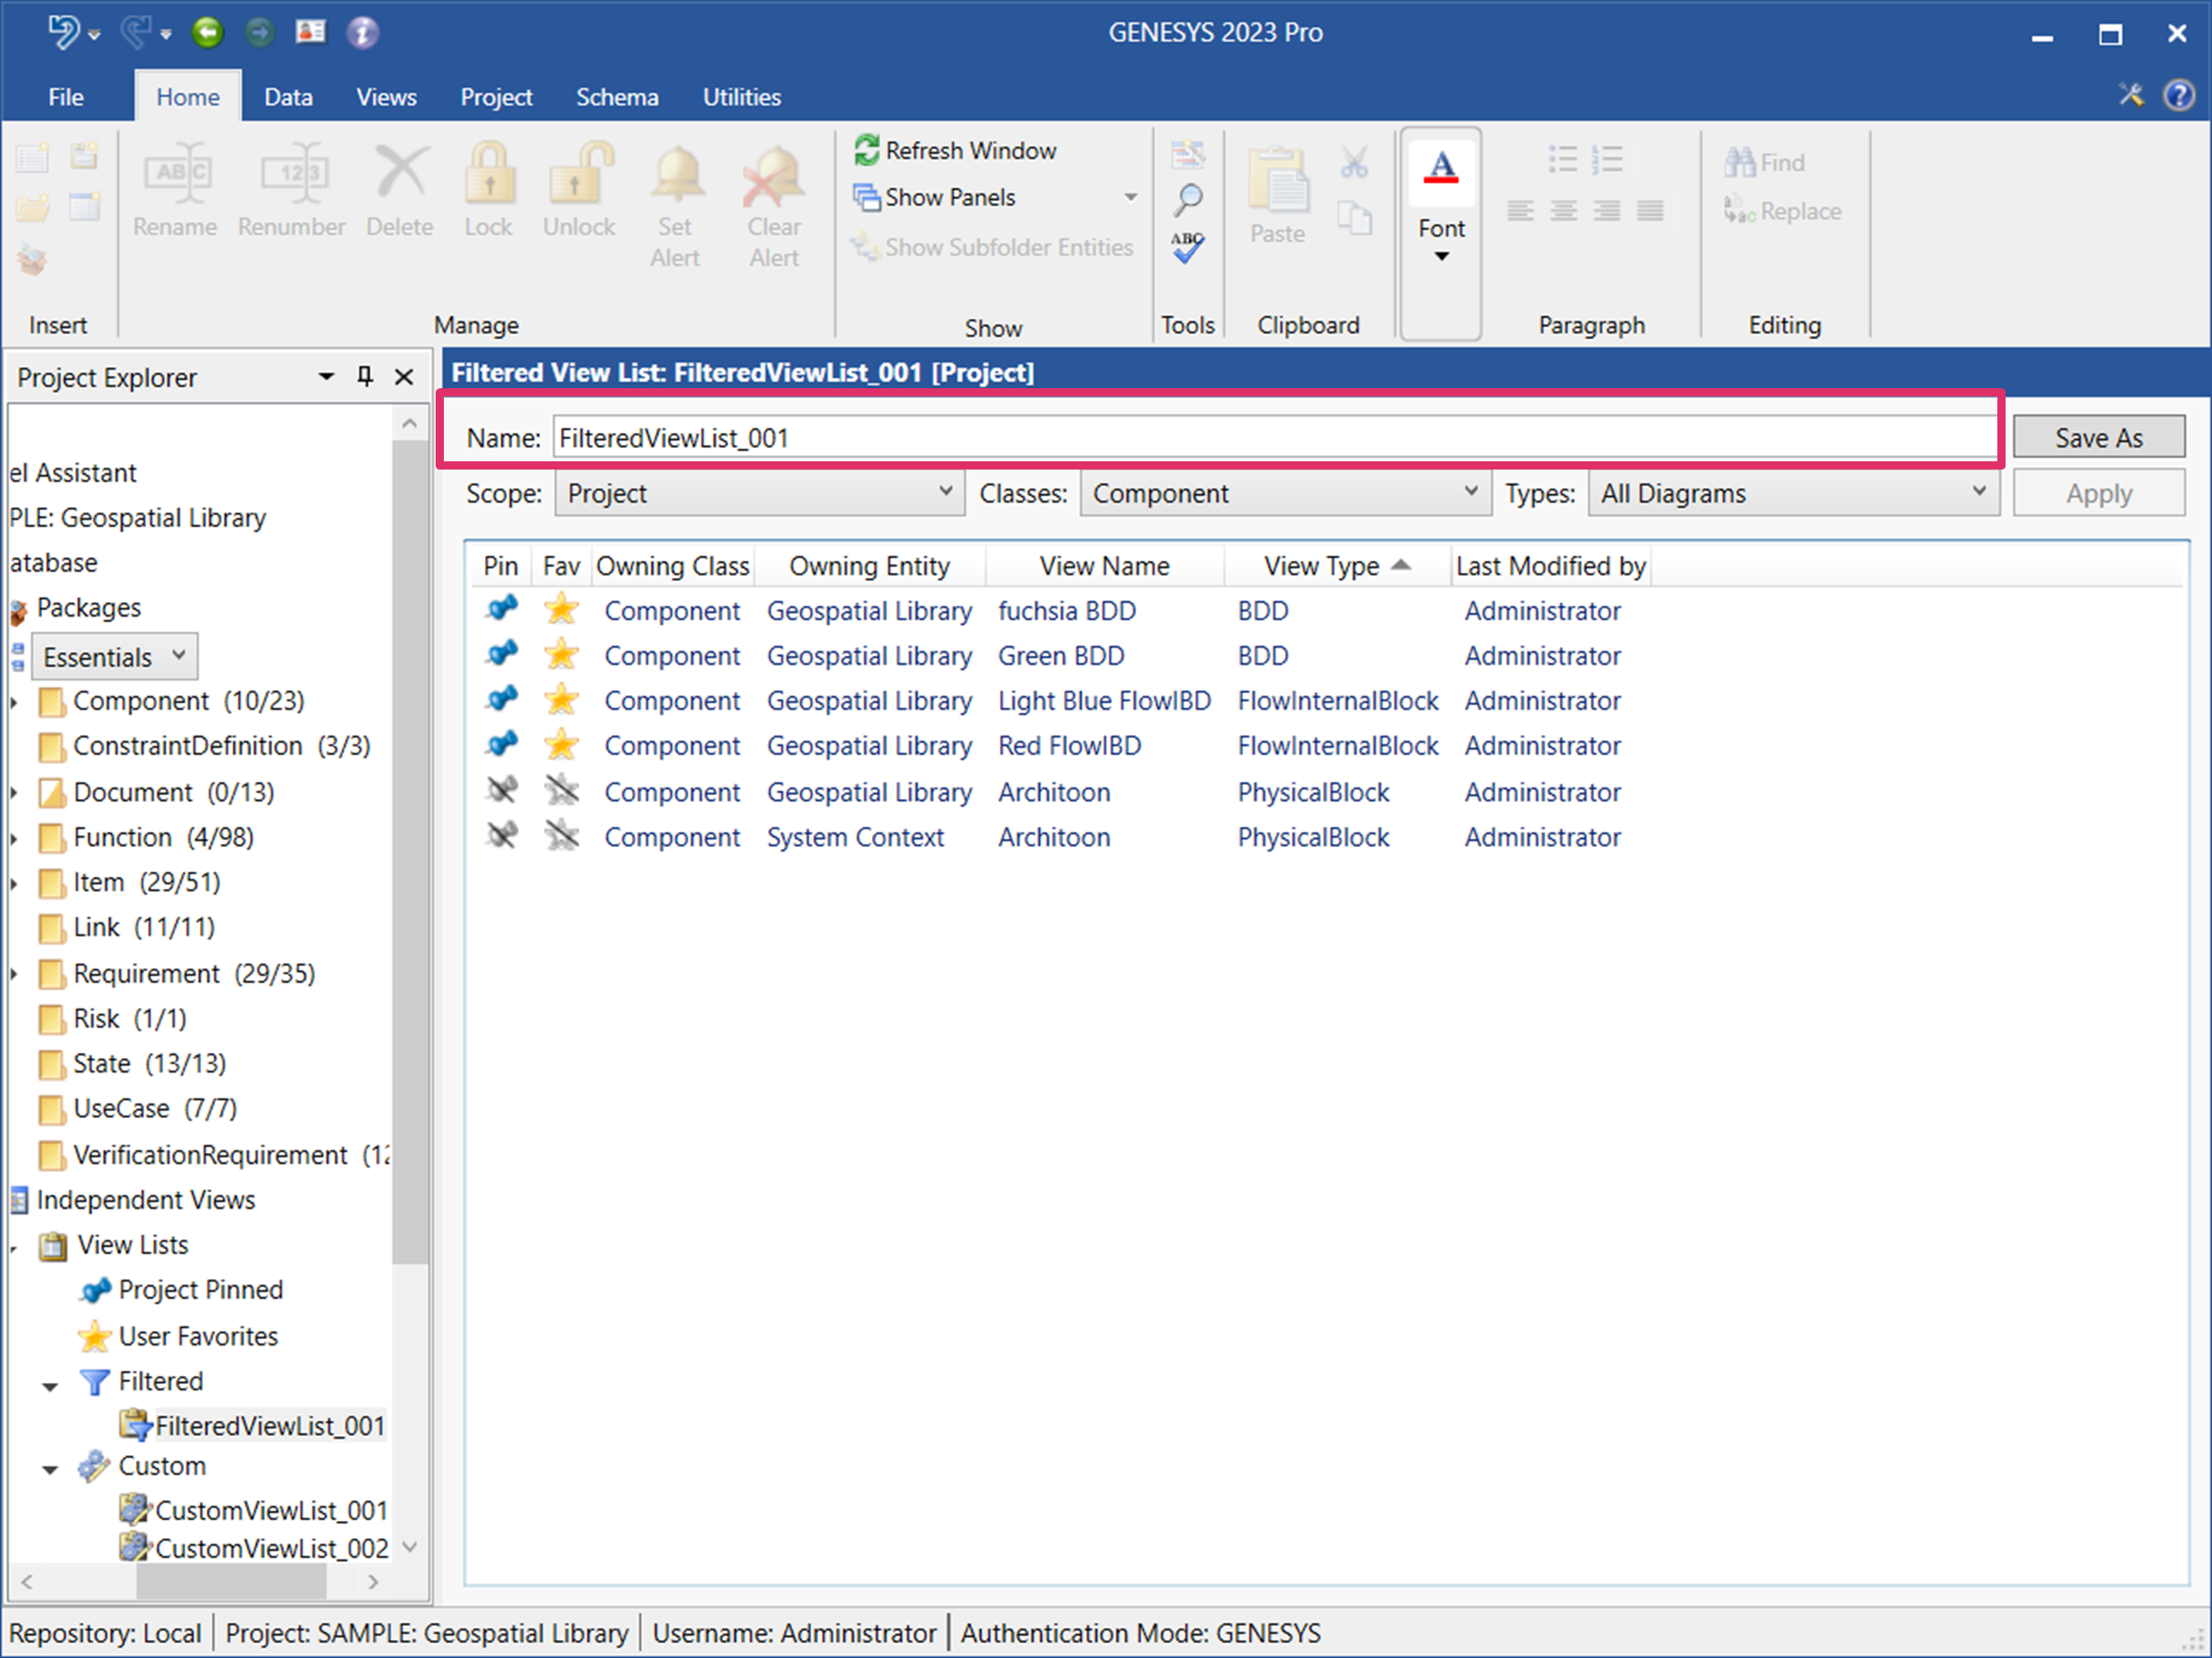
Creating a Filtered View List
1. To create a new Filtered view list, highlight Filtered under View Lists in Project Explorer and then select the New View List  button on the Home ribbon, or double-click Filtered, or right-click on Filtered and select New View List from the drop-down menu that displays.
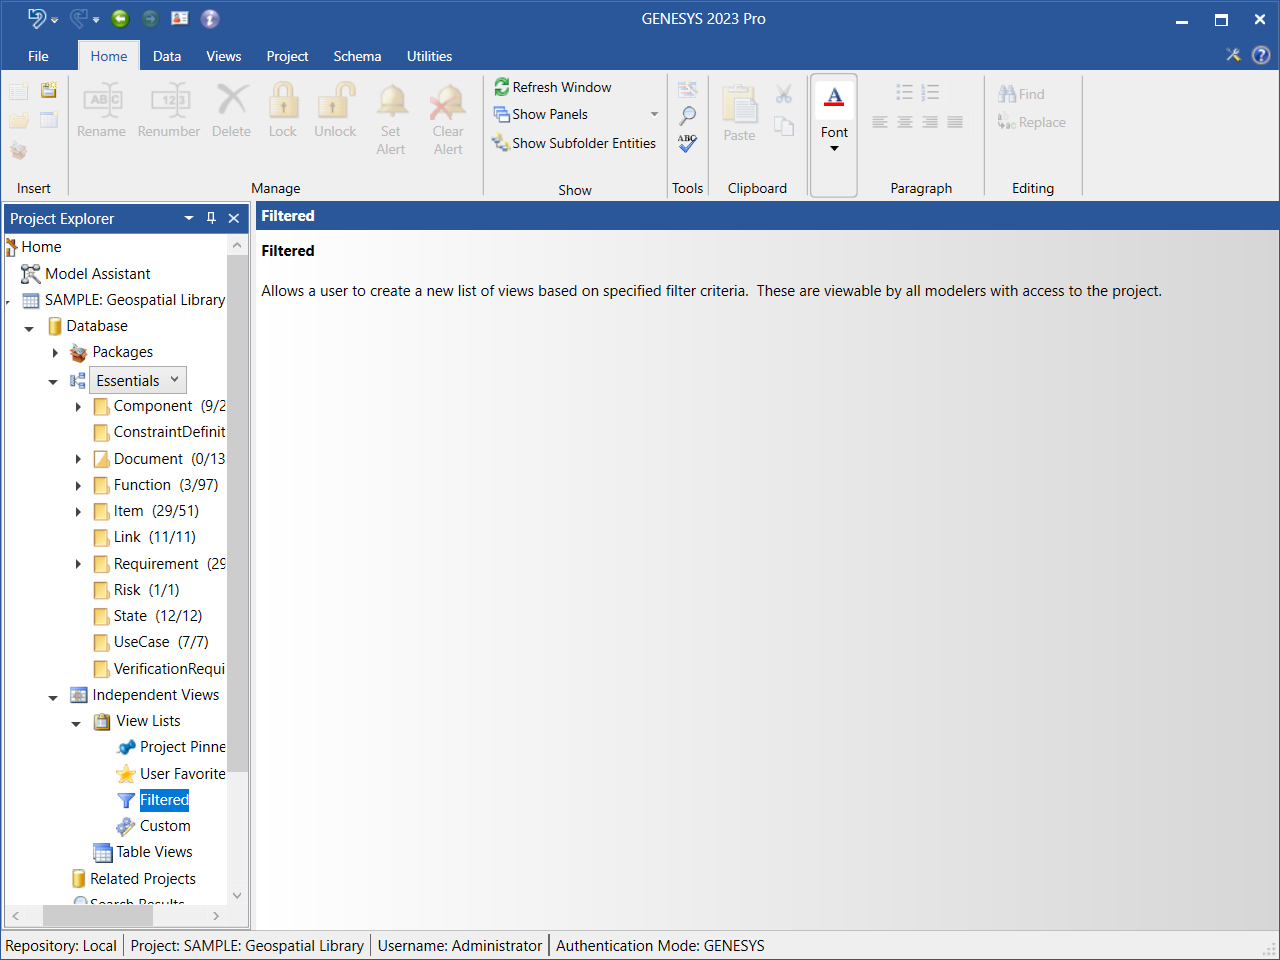
2. At the window that appears, enter a name for the new filtered view list or accept the default name.
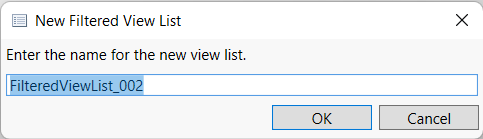
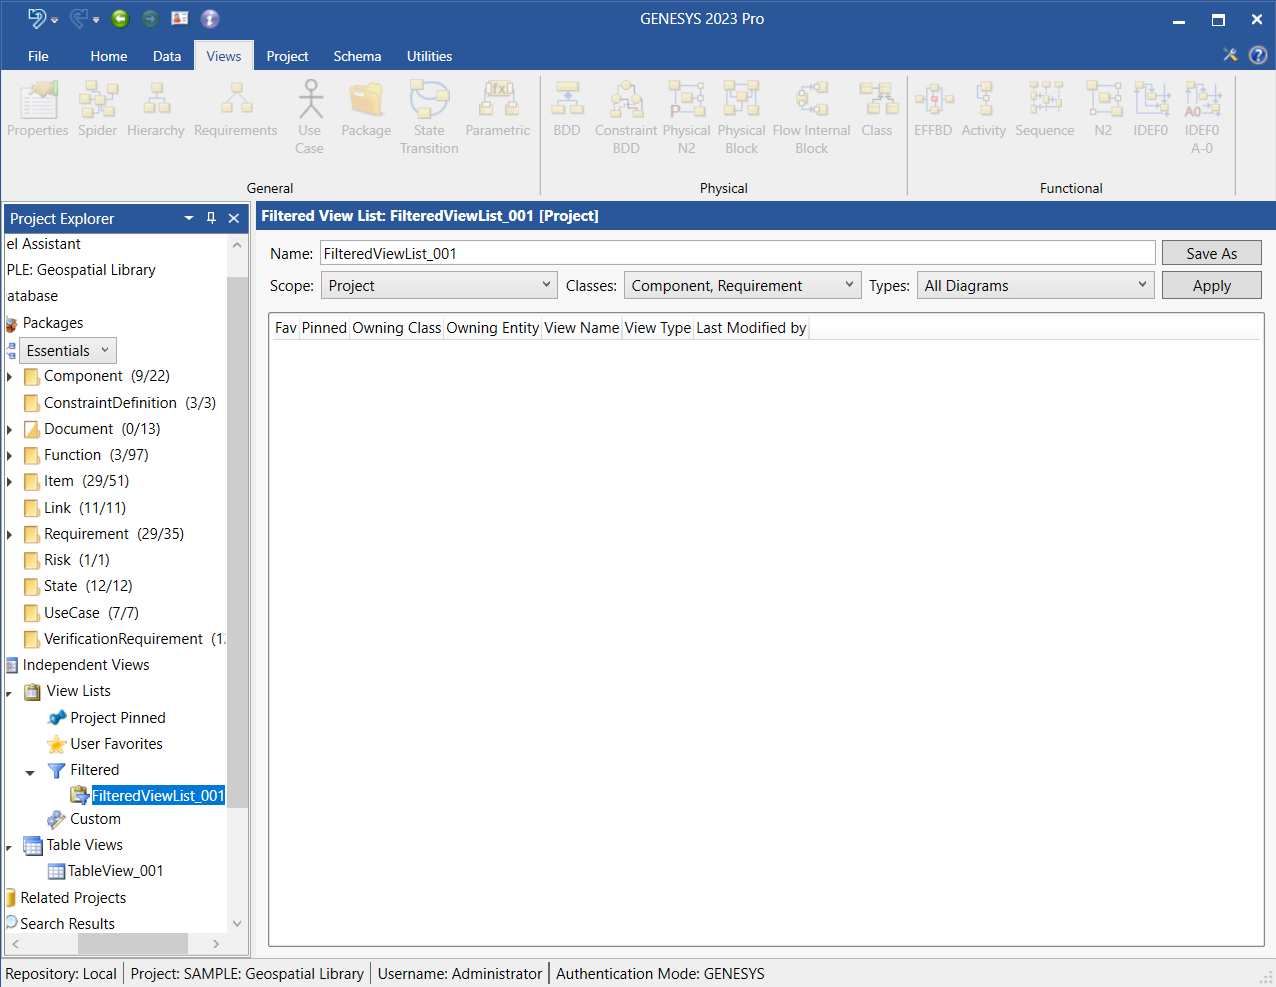
The new filtered view list appears listed under Filtered views in Project Explorer, as shown below.
|
NOTE: |
To save time creating Filtered view lists, GENESYS users can modify an existing Filtered view list and save it with a new name. They can create variants of lists for various applications of the modeling team. |
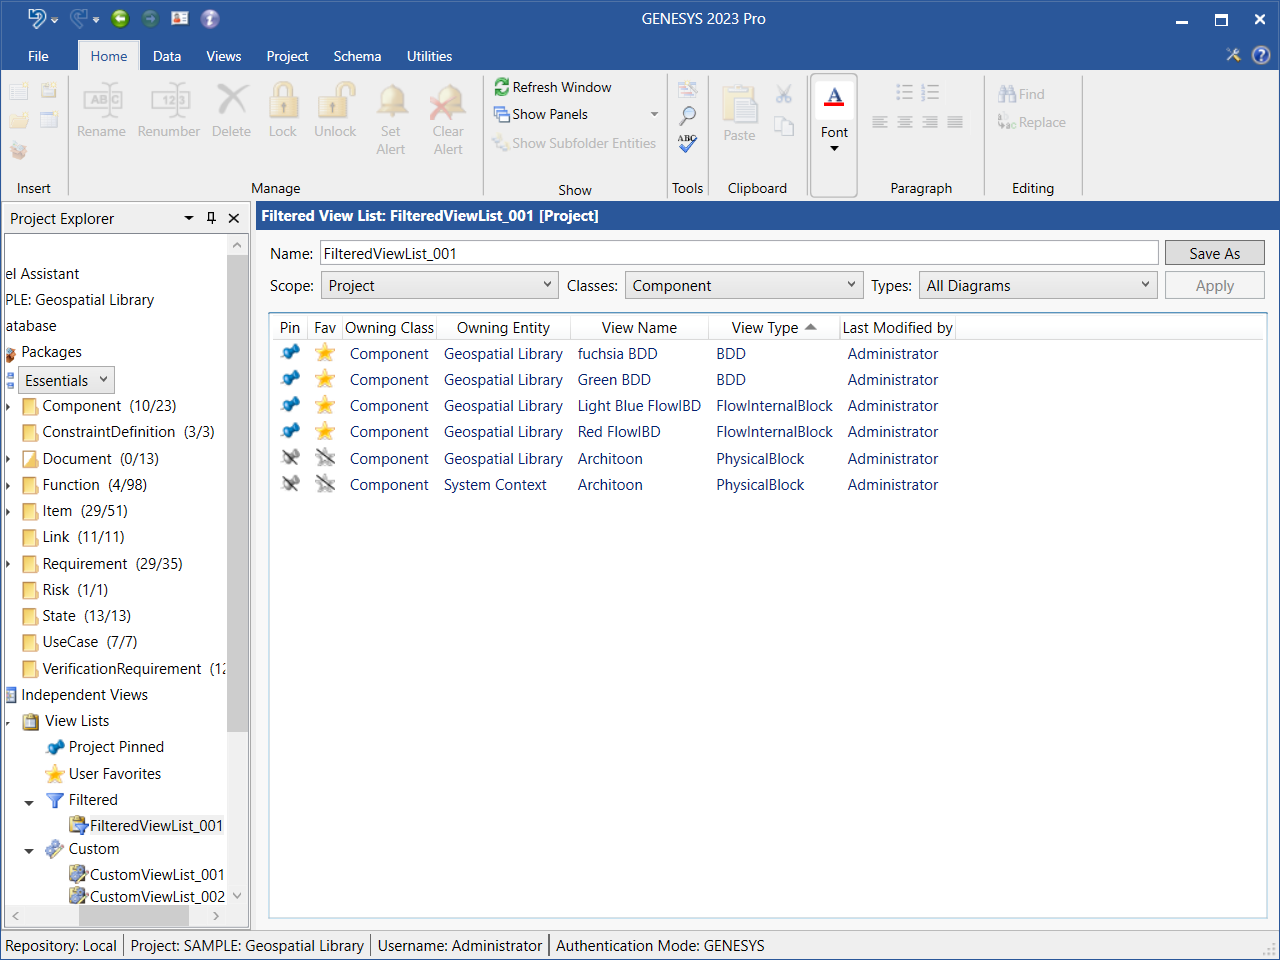
3. Select the Scope (Project, Package, or Folder), Classes, and Types from the drop-down menus at the top of the window on the right.
4. Click Apply and the list of views will display in the window.
5. Click Save As and enter a name to save the Filtered view list.
When selecting diagrams in the view list, holding down the Shift key selects multiple diagrams in a row at once, the Ctrl key selects multiple diagrams that are not in order at once, and the hot key Ctrl + A selects all of the diagrams in the window at once.
Double-click on a diagram in the view list to open it, or right-click on the diagram and select Open on the context menu that displays, as shown below.

Viewing the Diagrams in a Filtered View List
To view the diagrams in a Filtered view list, select Filtered under View Lists in Project Explorer and then select the name of the Filtered view list that you want to view.
The diagrams in the list display in the window, as shown below.

Removing a Diagram from the Filtered View List
To remove a diagram from the Filtered view list, highlight the diagram in the view list and on the right-click context menu that displays, select Remove.
To remove more than one diagram at once, hold down the Shift key if the diagrams are together in a row or hold down the Ctrl key if the diagrams are not together. To remove all of the diagrams in the view list at once, hit Ctrl+A.
Renaming a Filtered View List
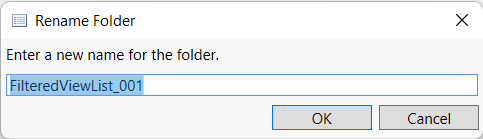
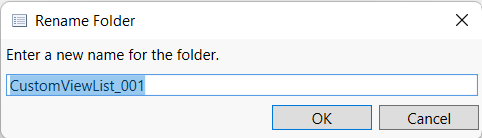
To rename a Filtered view list, right-click on the name of the list in Project Explorer and select Rename from the drop-down menu that displays.
At the window that displays, enter the new name for the Filtered view list and click OK.
Alternatively, you can change the name in the Name field at the top of the Filtered View List window.
The new name appears in Project Explorer.
Deleting a Filtered View List
To delete a Filtered view list, right-click on the name of the list in Project Explorer and select Delete from the drop-down menu that displays.
The view list disappears from Project Explorer. It is removed from the list but is still in the database.
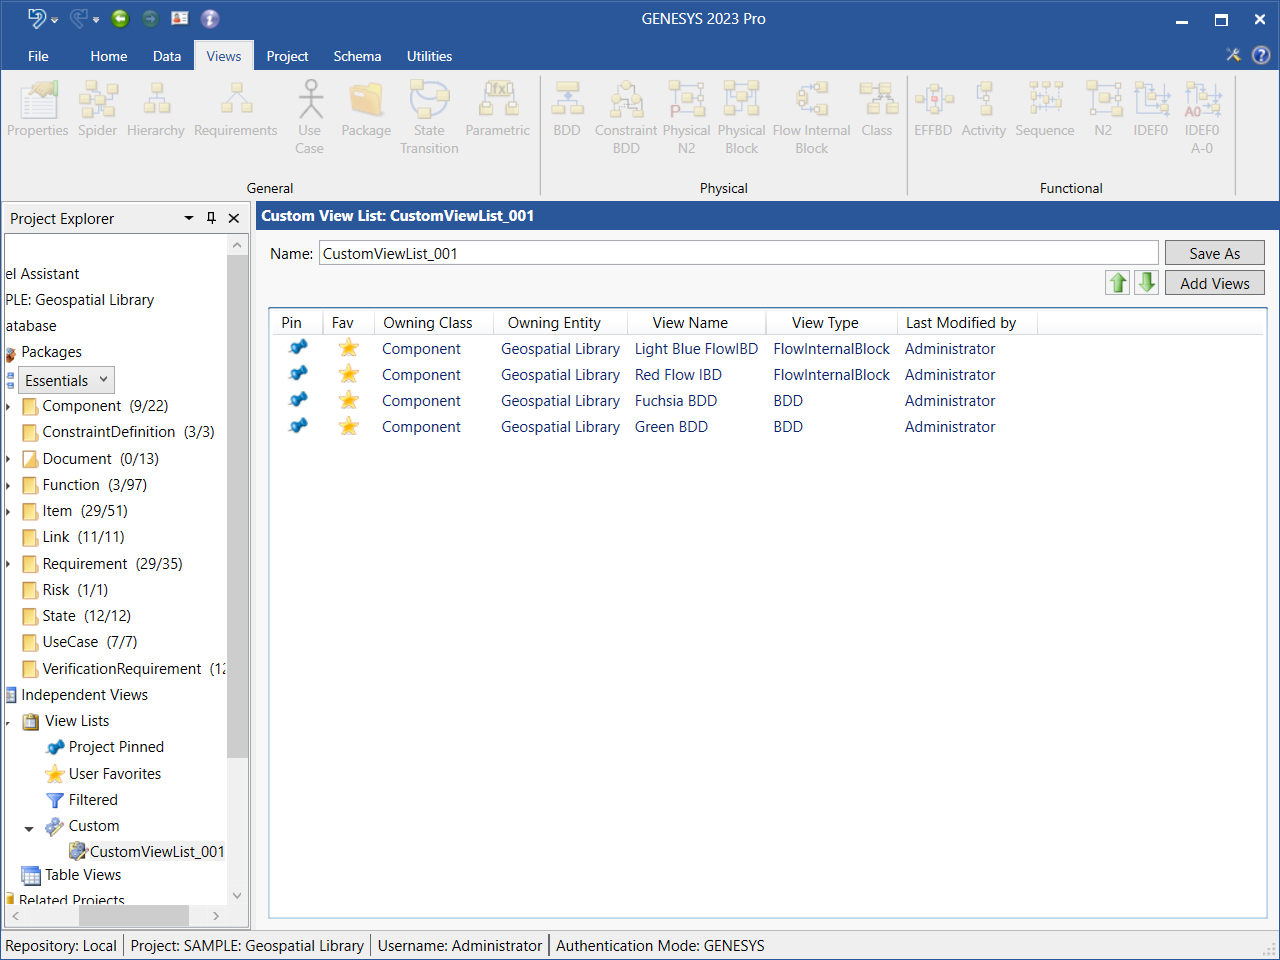
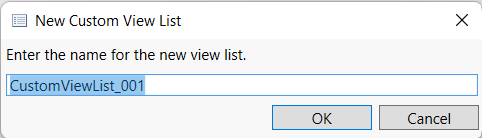
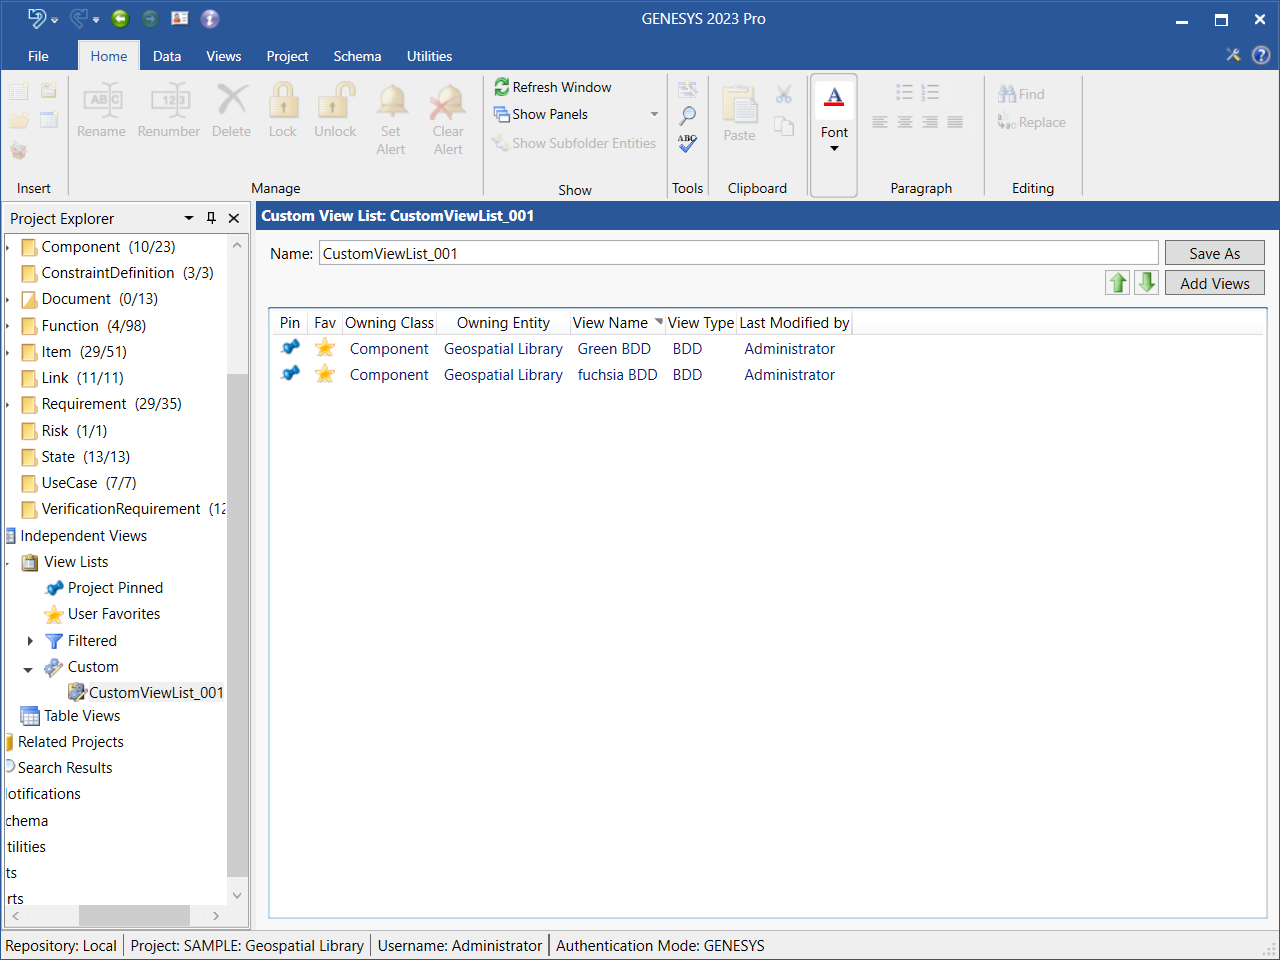
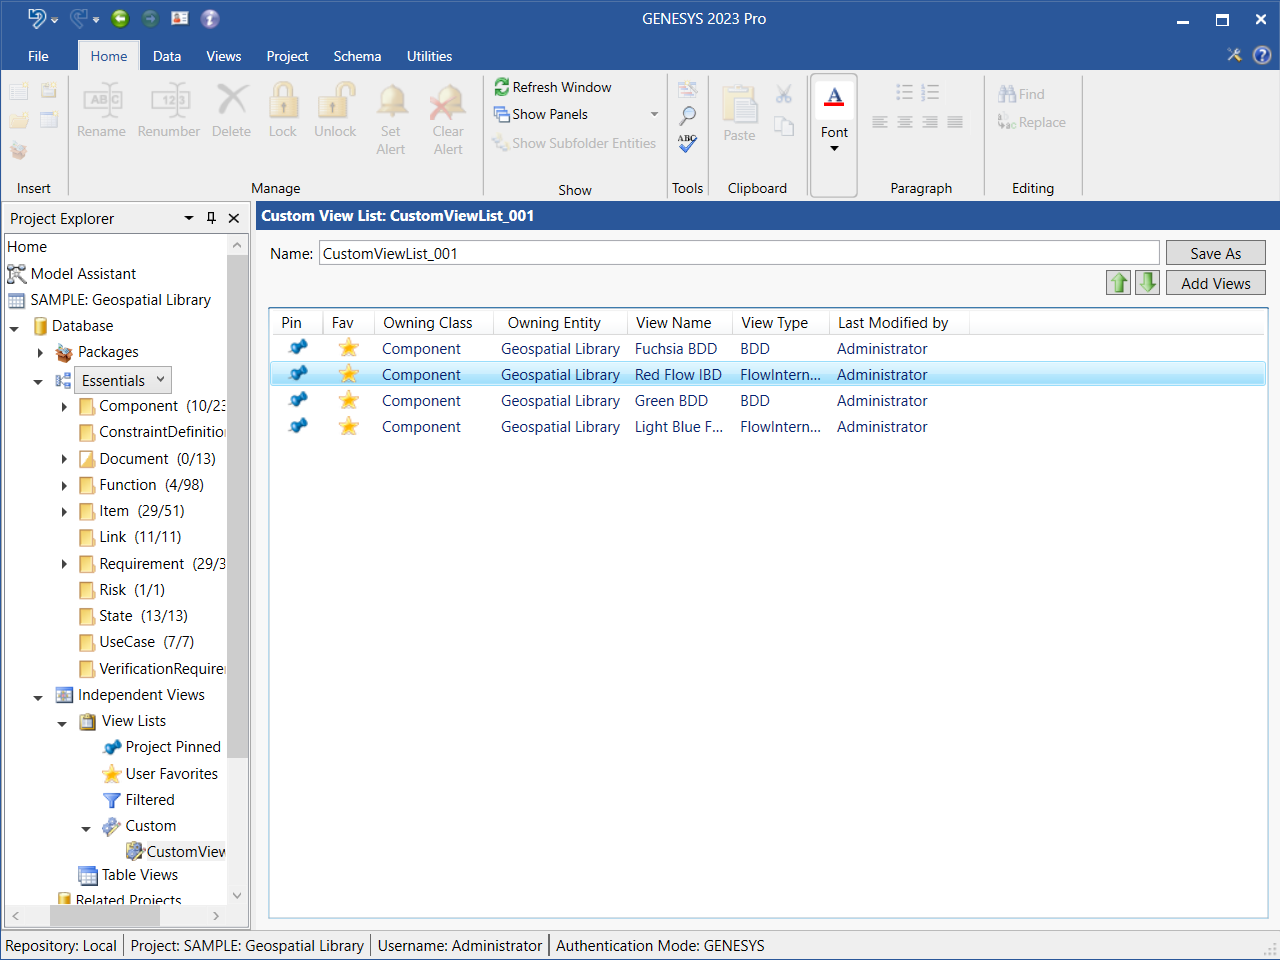
Creating a Custom View List
1. To create a new Custom view list, highlight Custom under View Lists in Project Explorer and click the New View List  button on the Home ribbon, or double-click Custom, or right-click on Custom and select New View List from the drop-down menu that displays.
2. At the window that appears, enter a name for the new Custom view list or accept the default name.
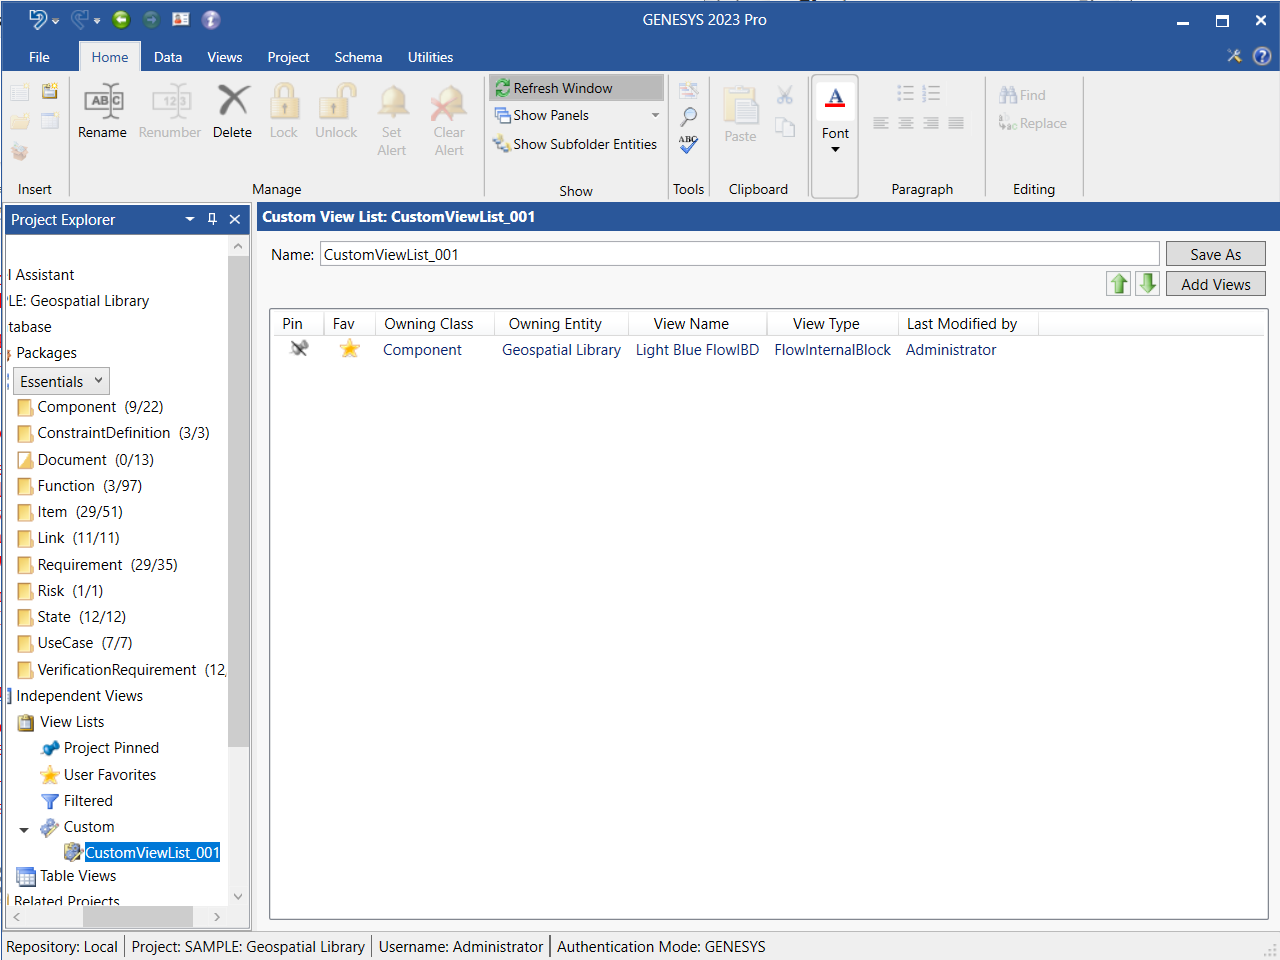
The new custom view list appears listed under Custom views in Project Explorer, as shown below.
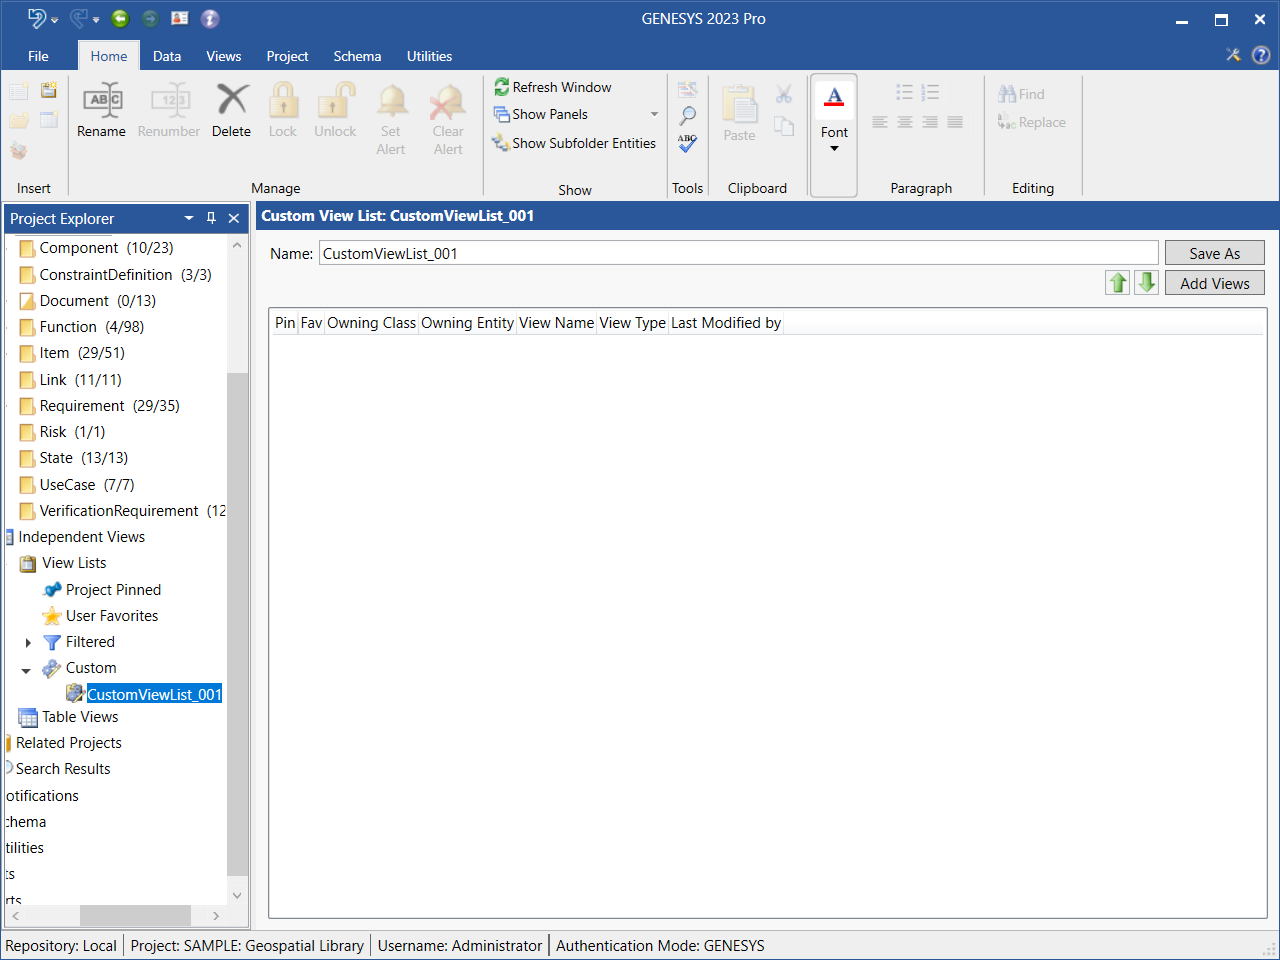
3. Click the Add Views button to add views to the custom list.
4. At the Select Views window that displays, select the Category (Entity or Table), Folder, Entity, and Diagram Type from the drop-down menus.
5. Click Apply and the available views will display in the window.
6. Select the diagrams that you want to add to the list, holding down the Shift key to select multiple diagrams in a row at once, the Ctrl key to select multiple diagrams that are not in order at once, or the hot key Ctrl + A to select all of the diagrams in the window at once.
7. Click OK on the bottom right side of the window to add the diagrams to the view list.

The views now appear in the list.
6. Click Save As and enter a name to save the Custom view list.
If another user adds a diagram to the Custom view list, the diagram will dynamically appear in the list.
To move a diagram up or down in the list, highlight the diagram and click the green Move Up  or Move Down
  arrow on the top right side of the window to move the diagram up or down, respectively, in the list.
Double-click on a diagram in the view list to open it, or right-click on the diagram and select Open on the context menu that displays, as shown below.
Viewing the Diagrams in a Custom View List
To view the diagrams in a Custom view list, select Custom under View Lists in Project Explorer and then select the name of the Custom view list that you want to view.
The diagrams in the list display in the window, as shown below.
Adding/Removing a Diagram from a Custom View List from the Diagram Ribbon
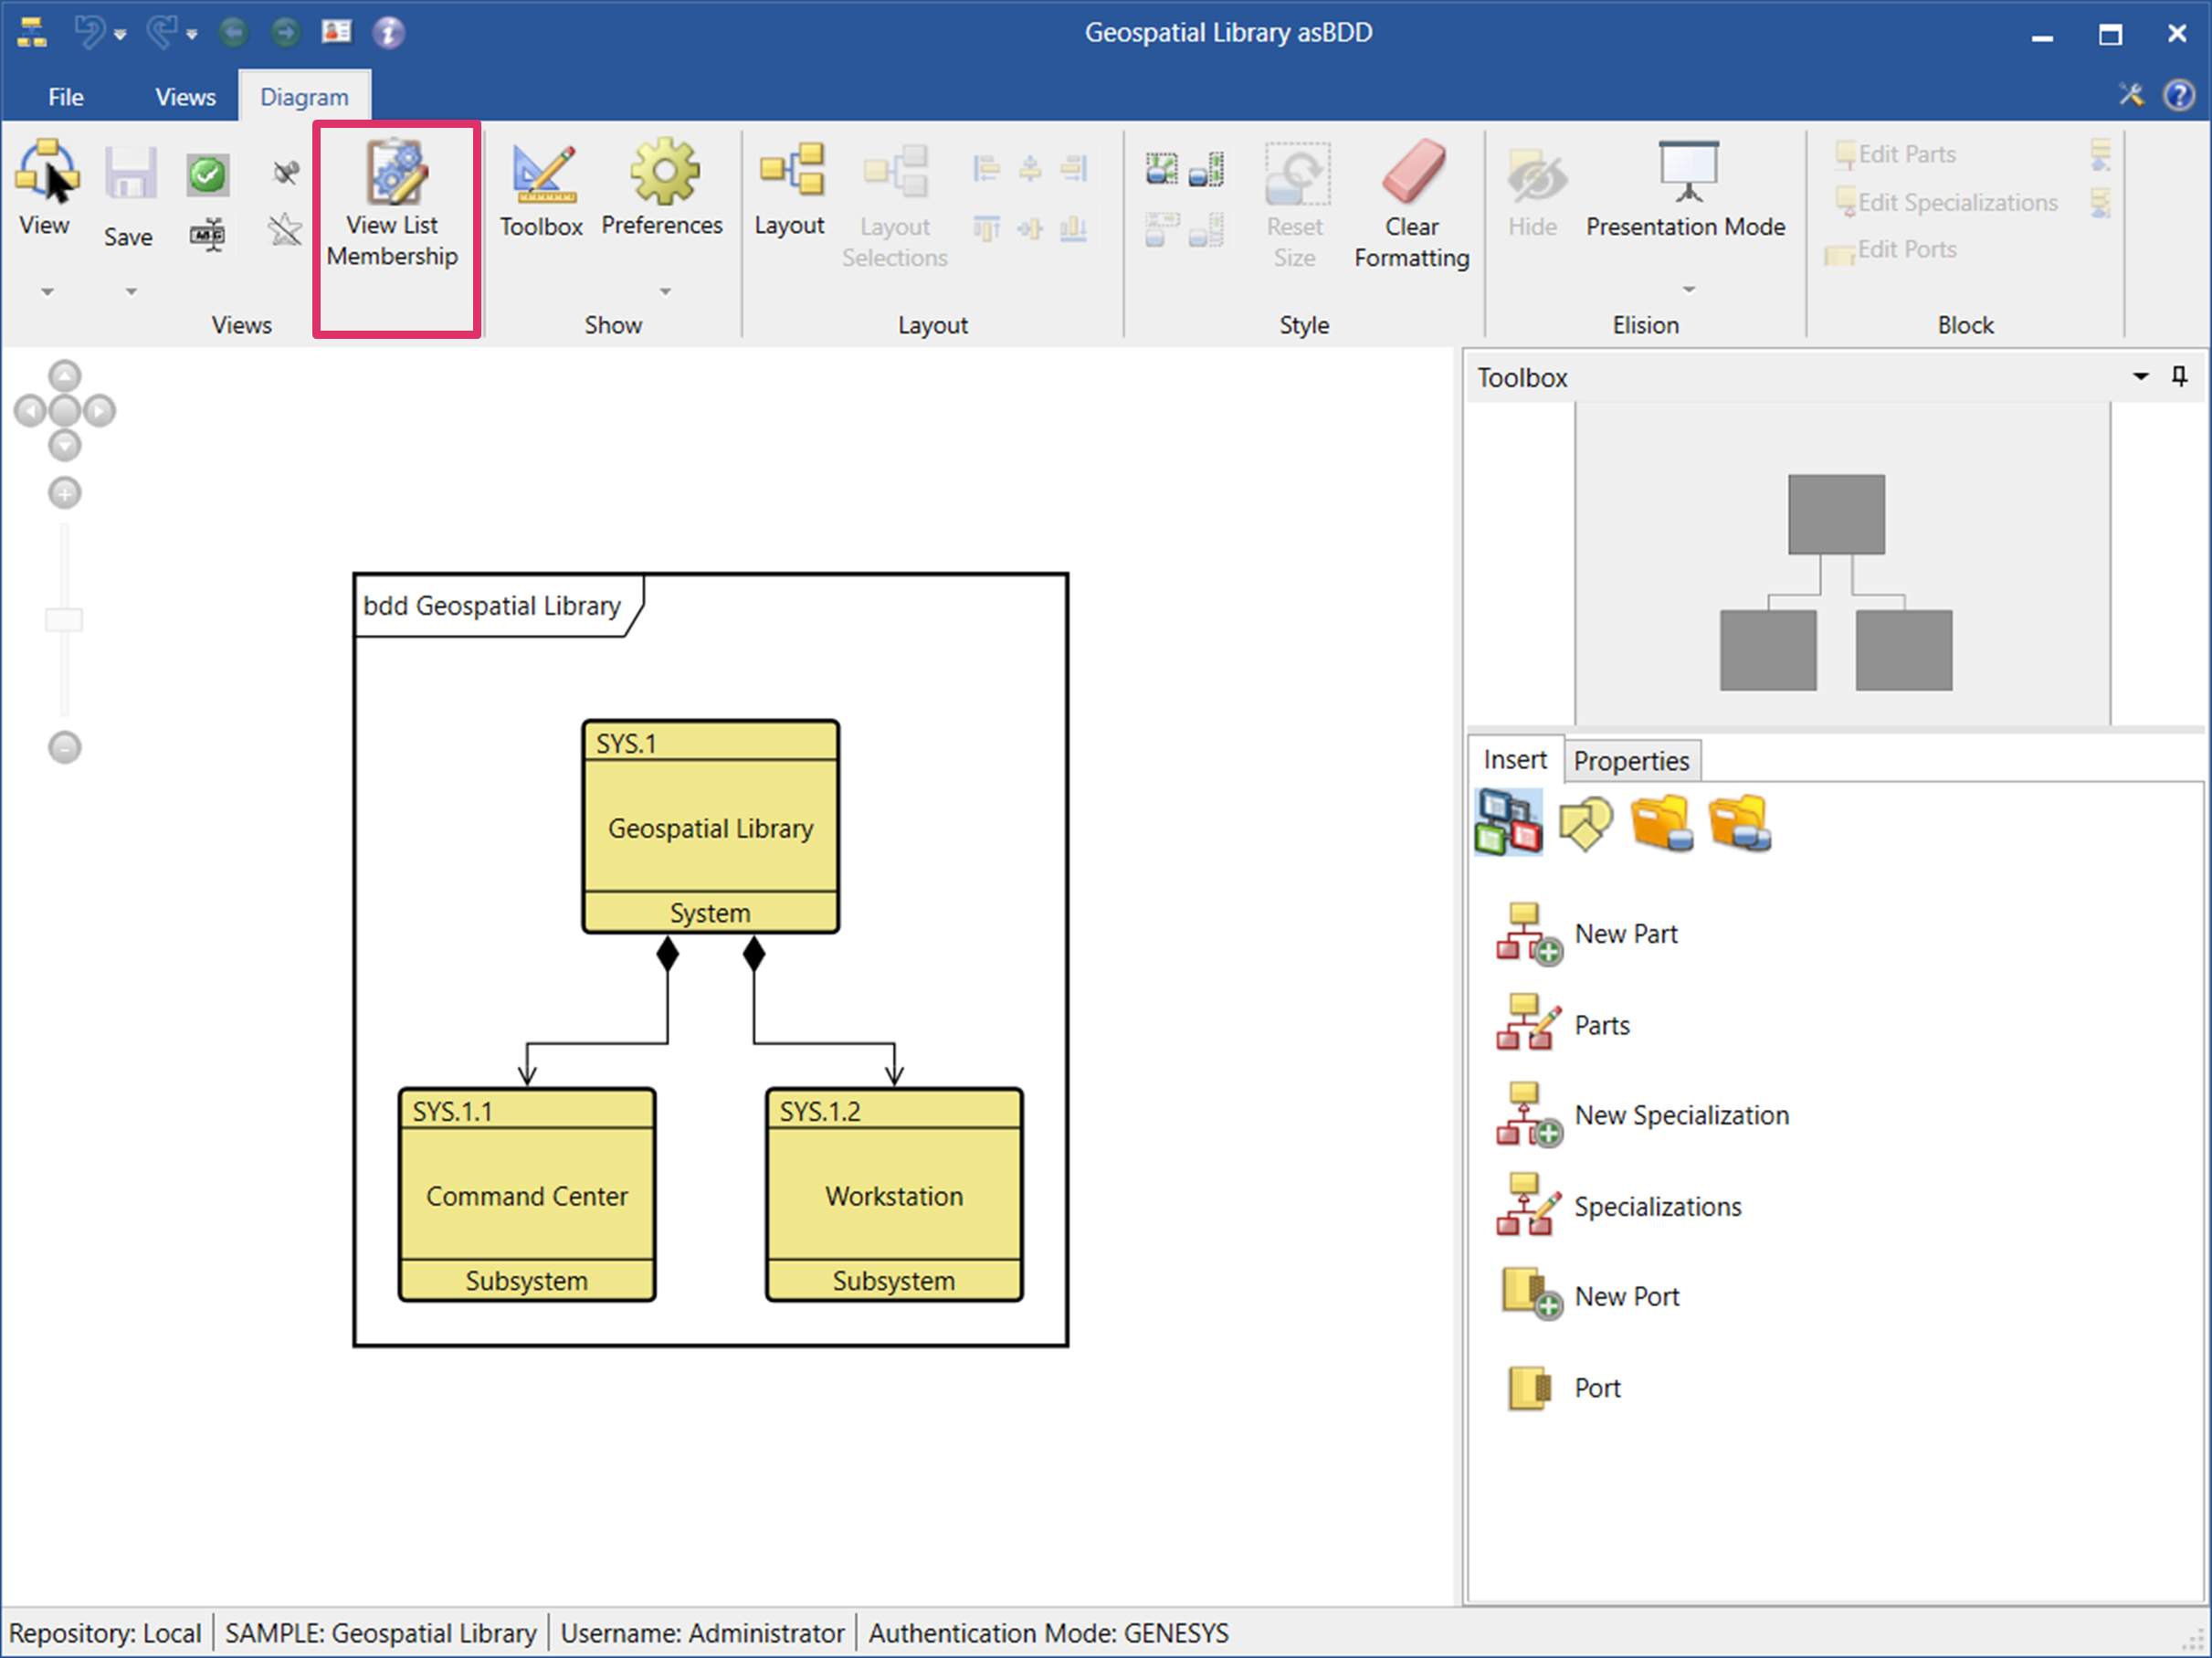
You can add the diagram that you are working on to a Custom view list by selecting the View List Membership 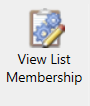 button on the Diagram ribbon.
1. At the window that displays, select the view list that you want to add the diagram to from the Custom View Lists Without View section on the left side of the window.
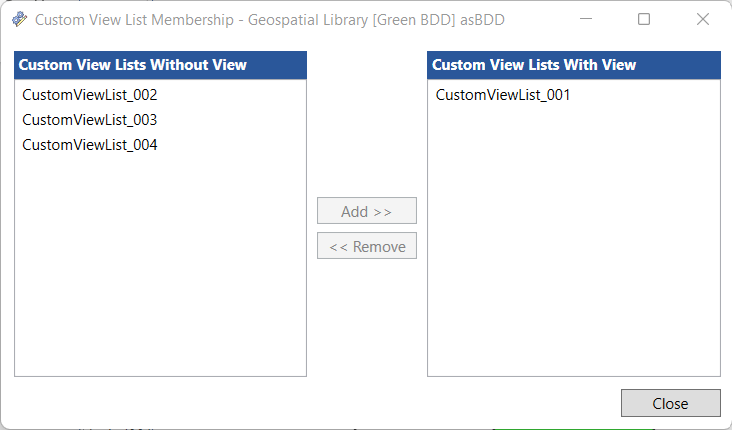
2. Click the Add button and the view list will move to the Custom View Lists with View section on the right side of the window.
The diagram will now appear in the Custom view list that you selected.
To remove a diagram from a view list listed in the Custom View Lists with View section of the window, highlight the view list and click the Remove button. The view list will appear again in the Custom View Lists without View section on the left side of the window, and the diagram will no longer appear listed in the Custom view list.
Adding a Diagram to a Custom View List by Drag-Drop from Another View List Type
You can add a diagram to a Custom view list by drag-drop from another view list type. In the example below, we drag-drop the Light Blue FlowIBD diagram from the User Favorites view list into an empty Custom view list in Project Explorer.
Highlight the Light Blue FlowIBD diagram in the User Favorites view list, and while holding down the left mouse button, drag it onto the Custom view list in Project Explorer.
To drag more than one diagram at once, highlight the diagrams and hold down the Ctrl key while dragging the diagrams into the Custom view list.
To drag all the diagrams in the view list at once, highlight a diagram and hit Ctrl+A, then drag the diagrams into the Custom view list.
The diagram appears in the Custom view list, as shown below.
Adding a Diagram to a Custom View List by Drag-Drop from the Views Tab
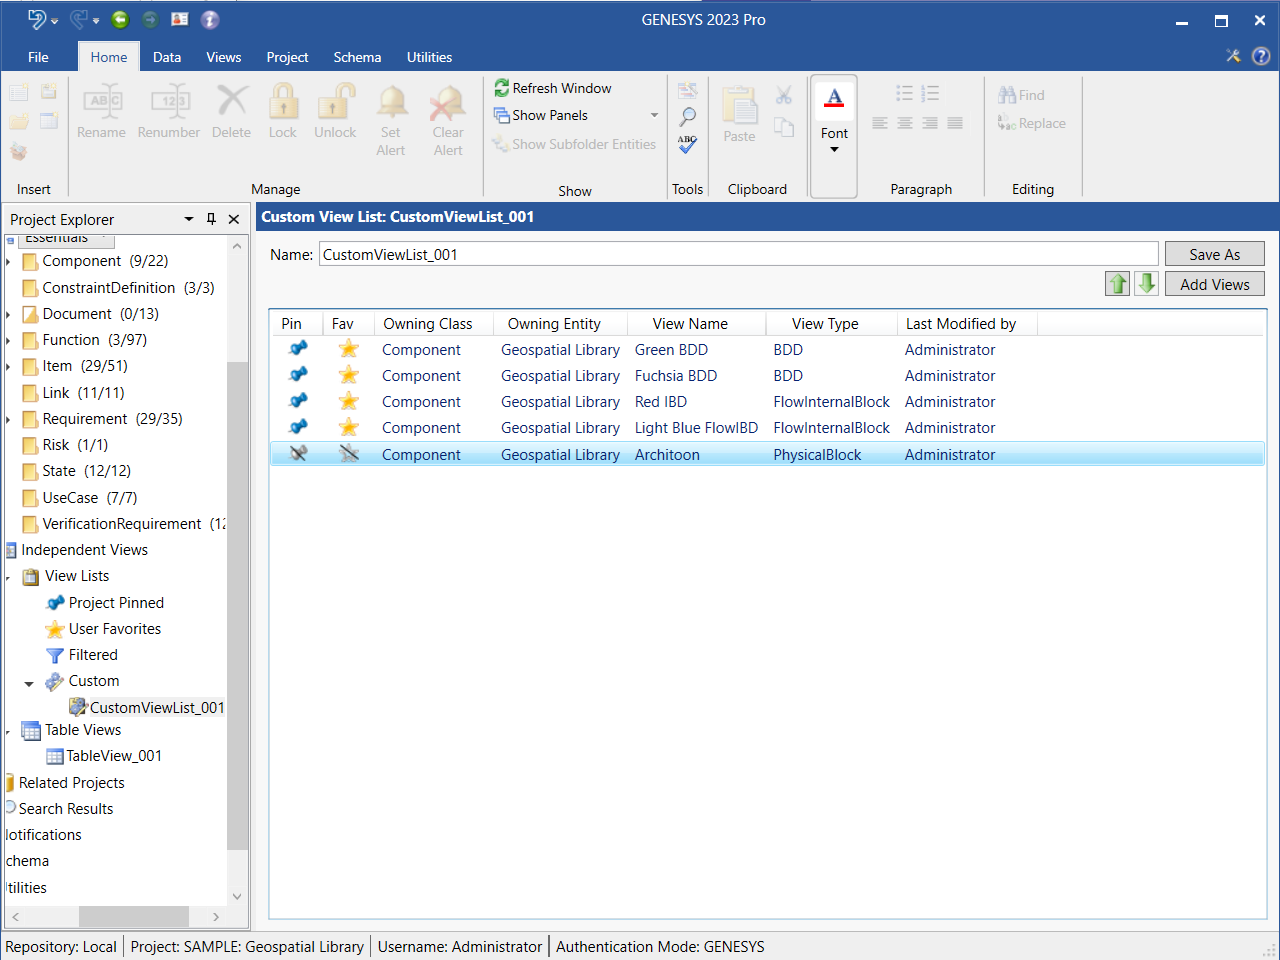
You can add a diagram to a Custom view list by drag-drop from the Property Sheet Views tab. In the example below, we drag-drop the Physical Block Architoon diagram onto the CustomViewList_001 in Project Explorer.
Highlight the Physical Block Architoon diagram in the Views tab, and while holding down the left mouse button, drag it onto the CustomViewList_001 in Project Explorer.
The diagram appears in the Custom view list, as shown below.
Removing a Diagram from the Custom View List
To remove a diagram from the Custom view list, highlight the diagram in the view list and on the right-click context menu that displays, select Remove.
To remove more than one diagram at once, hold down the Shift key if the diagrams are together in a row or hold down the Ctrl key if the diagrams are not together. To remove all of the diagrams in the view list at once, hit Ctrl+A.
Renaming a Custom View List
To rename a Custom view list, right-click on the name of the Custom view list in Project Explorer and select Rename from the drop-down menu that displays.

At the window that appears, enter the new name for the Custom view list and click OK.
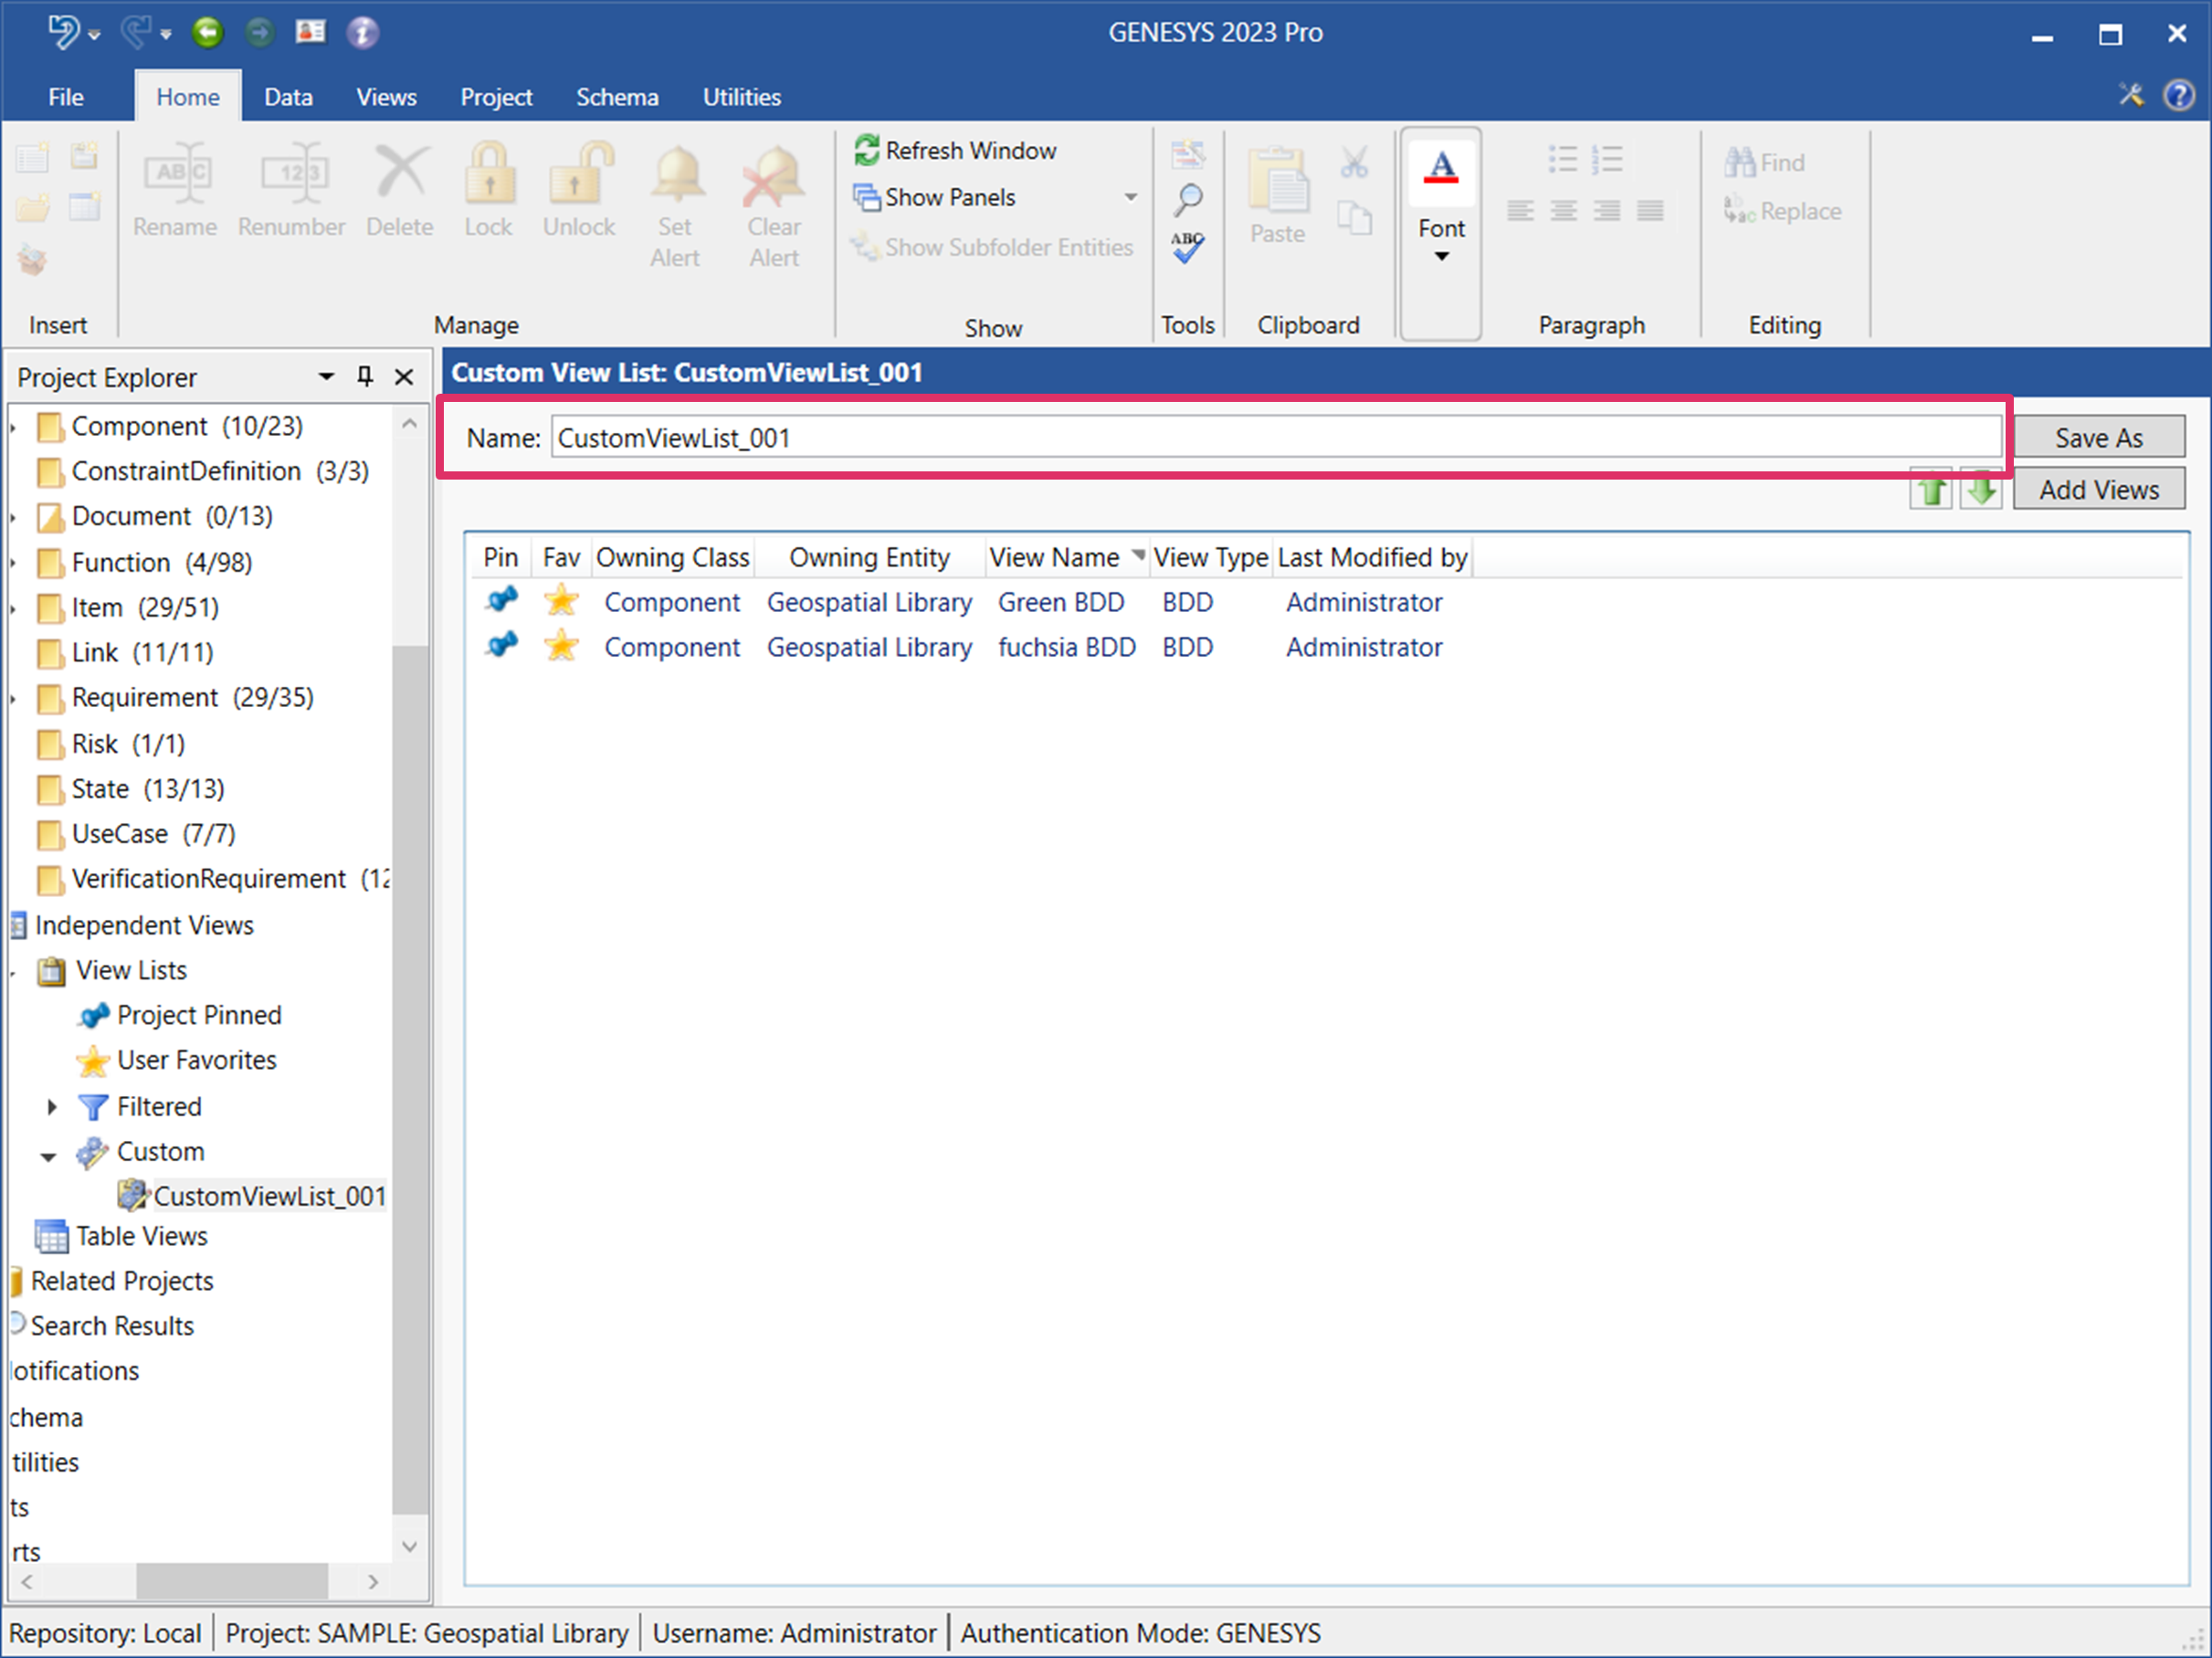
Alternatively, you can rename the view list in the Name field at the top of the Custom View List window.
The new name appears in Project Explorer.
Deleting a Custom View List
To delete a Custom view list, right-click on the name of the Custom view list in Project Explorer and select Delete from the drop-down menu that displays.

The view list disappears from Project Explorer. It is removed from the list but is still in the database.
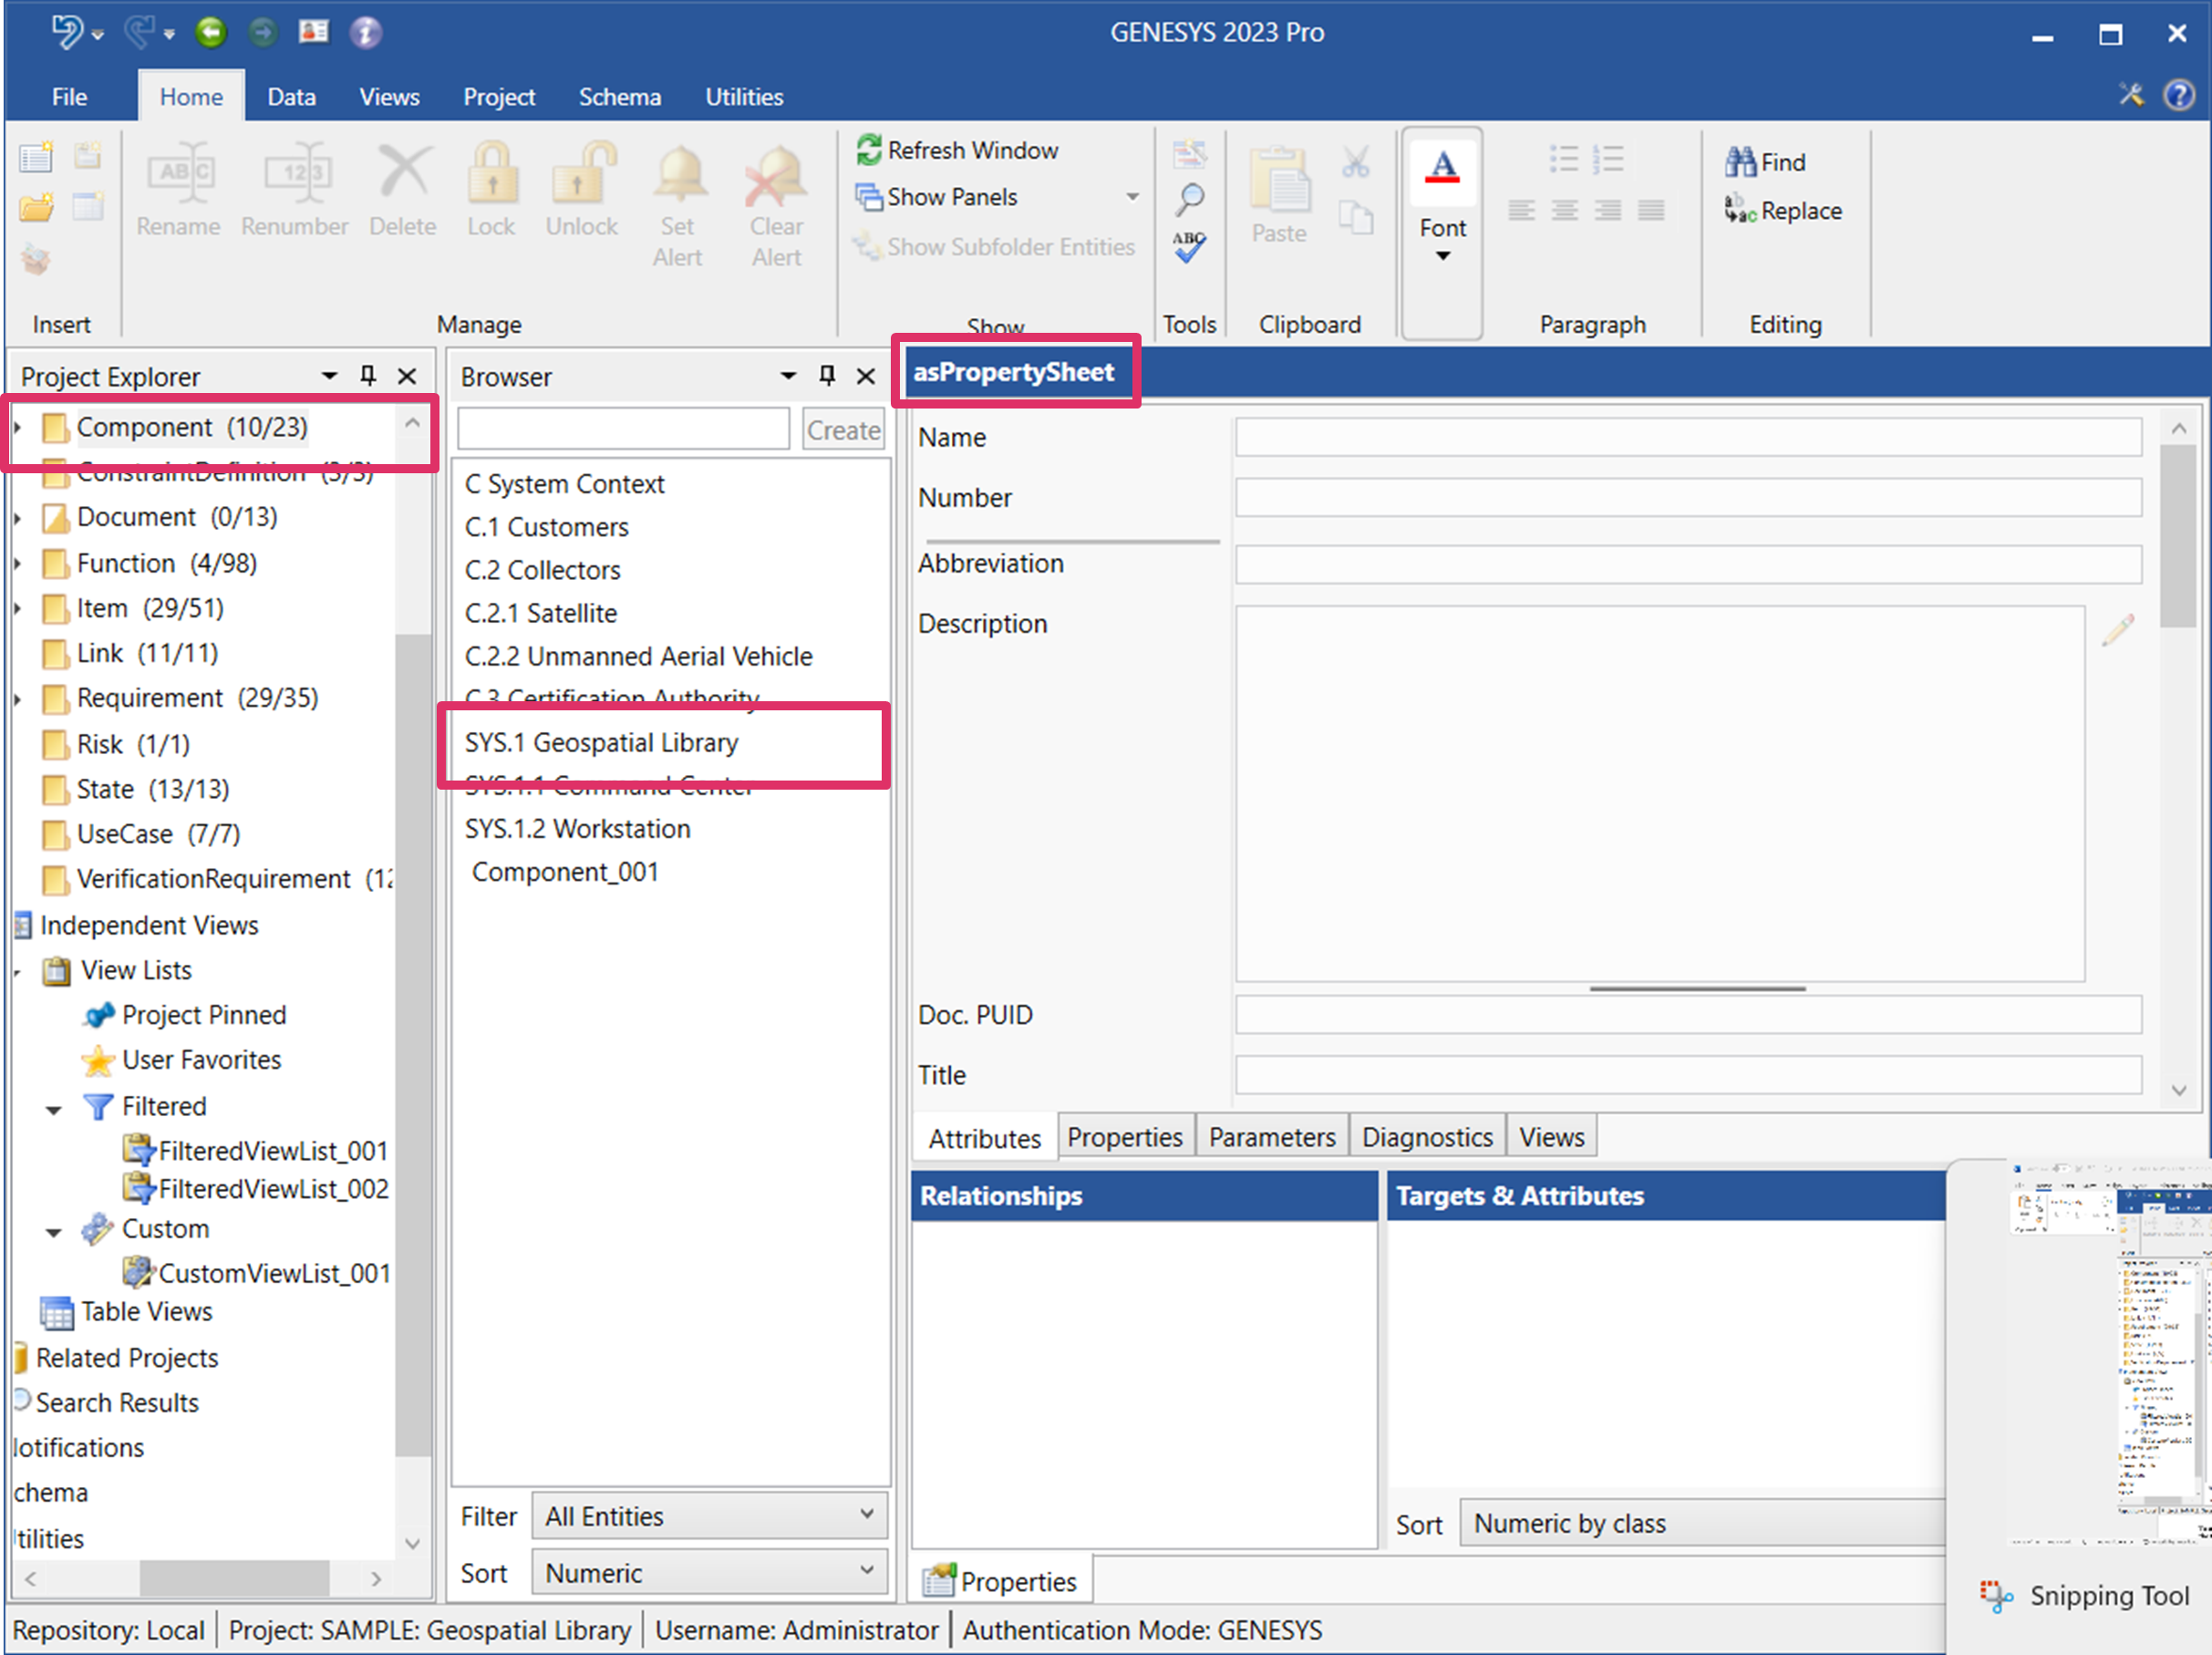
Jumping from a Diagram View List to the Related Entity in the Folder/Package in Project Explorer
For any of the four view list types, you can jump from the diagram view list to the related entity in the folder/package in Project Explorer by right-clicking on the diagram and selecting these options on the context menu that displays.
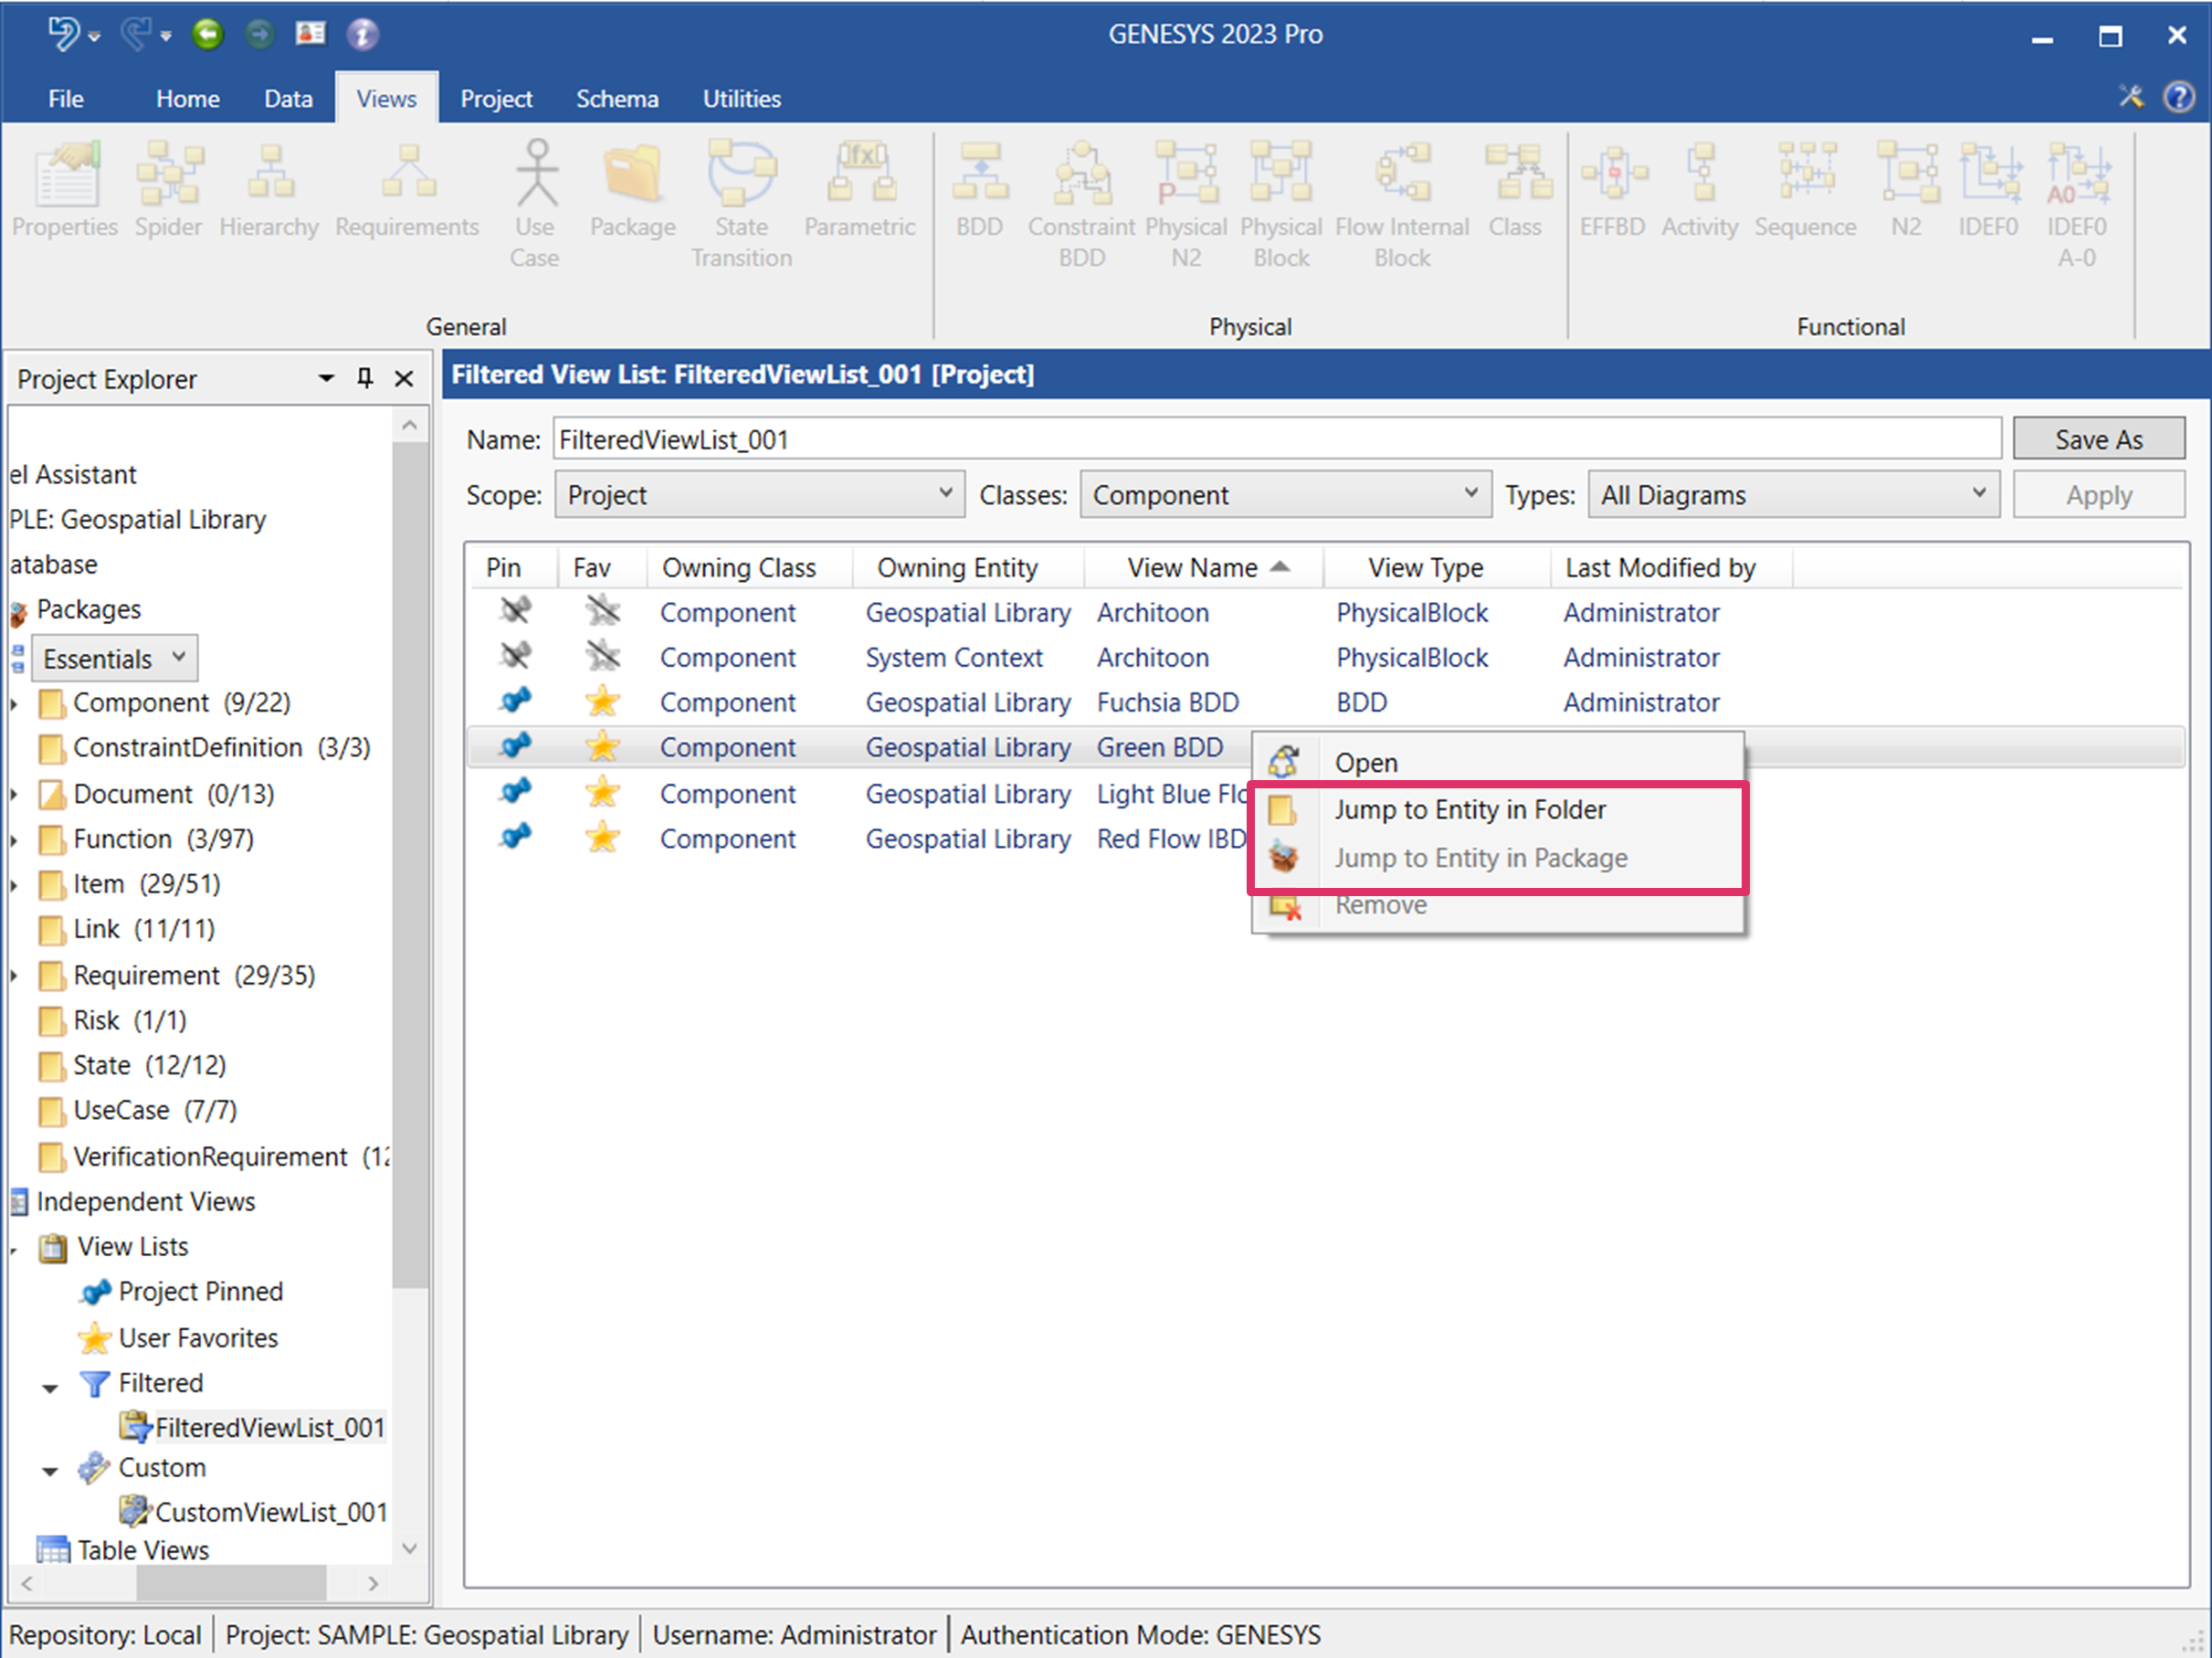
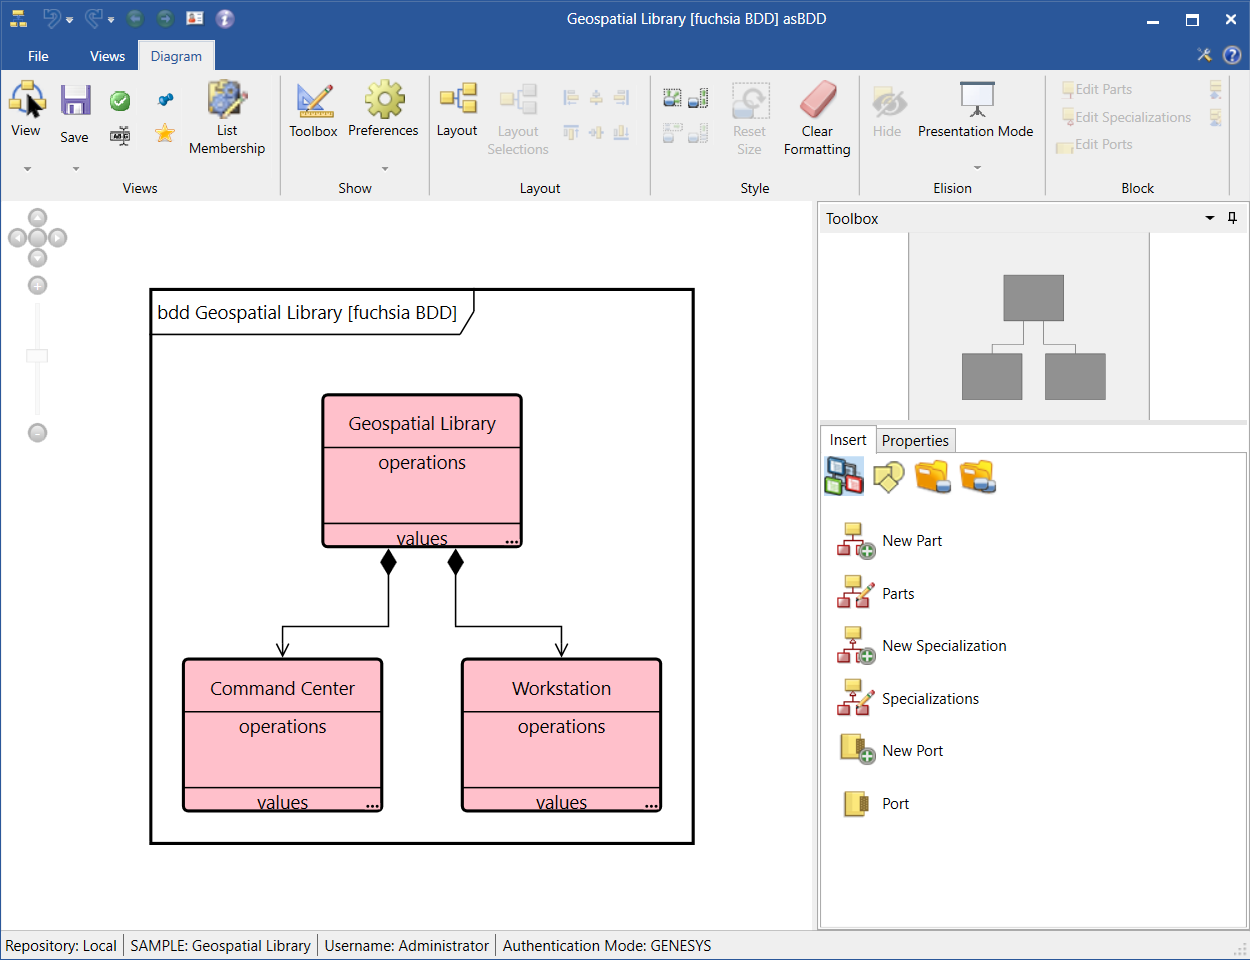
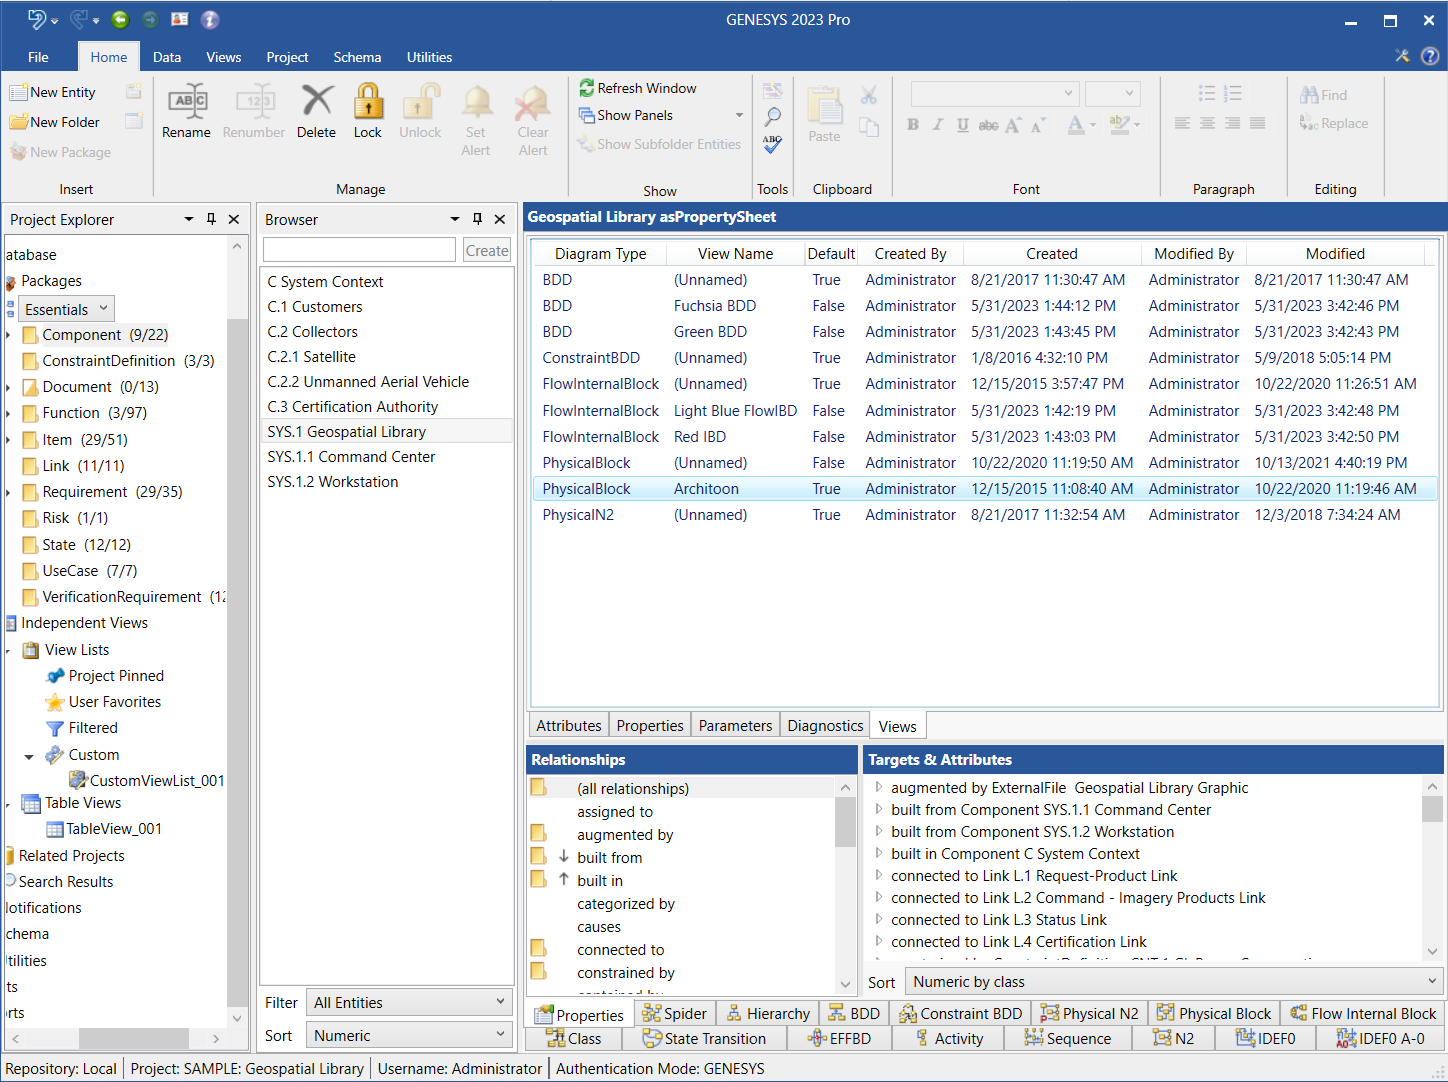
GENESYS takes you to the entity in the folder or package in Project Explorer associated with the diagram. It will highlight the folder/package in Project Explorer and the entity in the Browser pane and display the entitys property sheet on the right side of the window. In this case, it takes you to the Component folder and the Geospatial Library entity, as shown below.
Adding/Removing Columns from a View List
To add/remove columns from any of the view list types, click the ellipsis symbol ( ) at the top right corner of the view list and check/uncheck the columns that you want to add/remove, respectively, from the list.
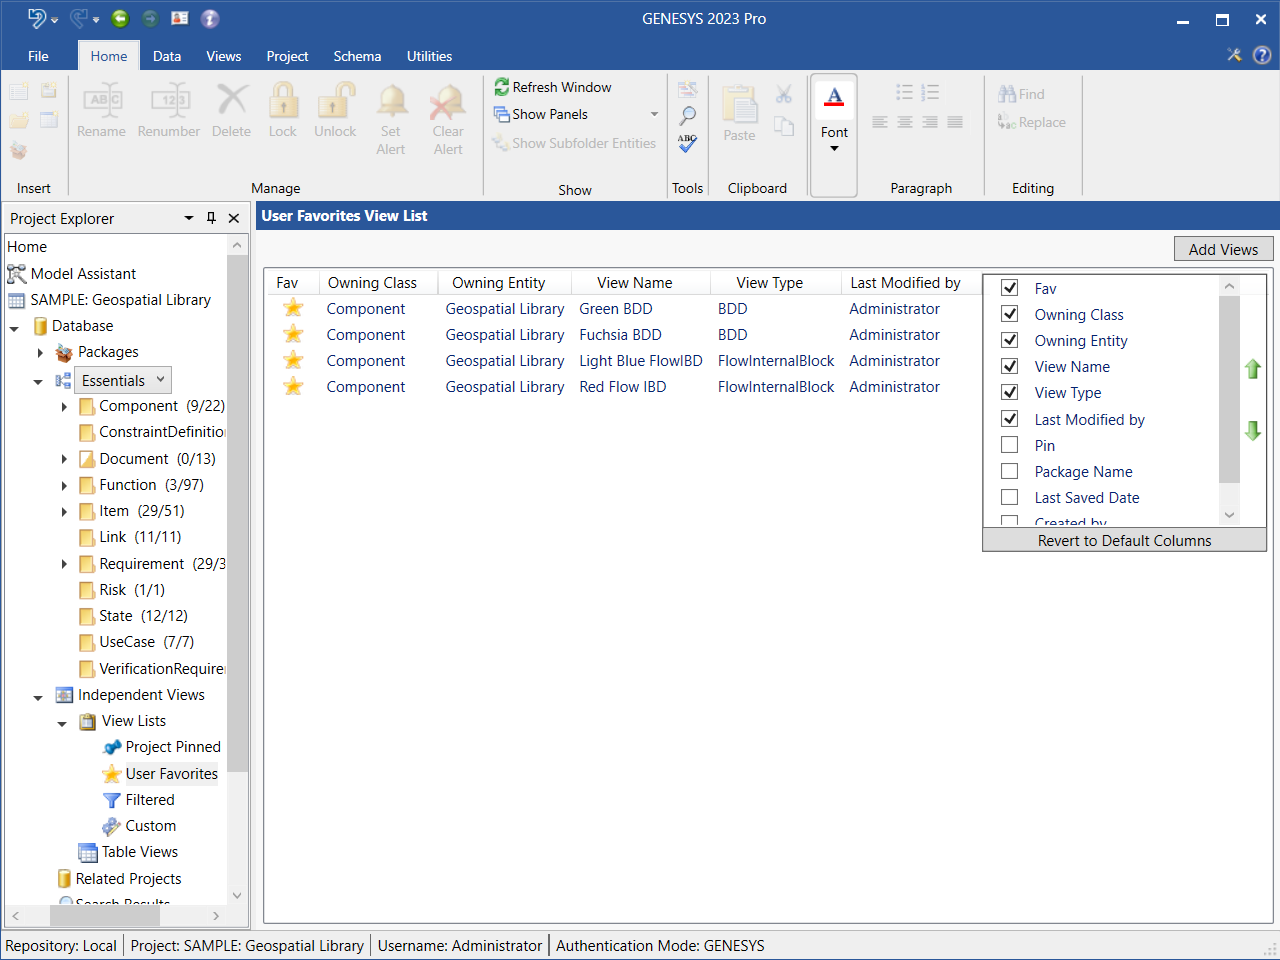
To revert back to the default view list columns, click Revert to Default Columns at the bottom of the column list that displayed.
An alternative way to add/remove columns on a view list is to right-click on any of the column headers and check/uncheck columns on the drop-down list that appears.
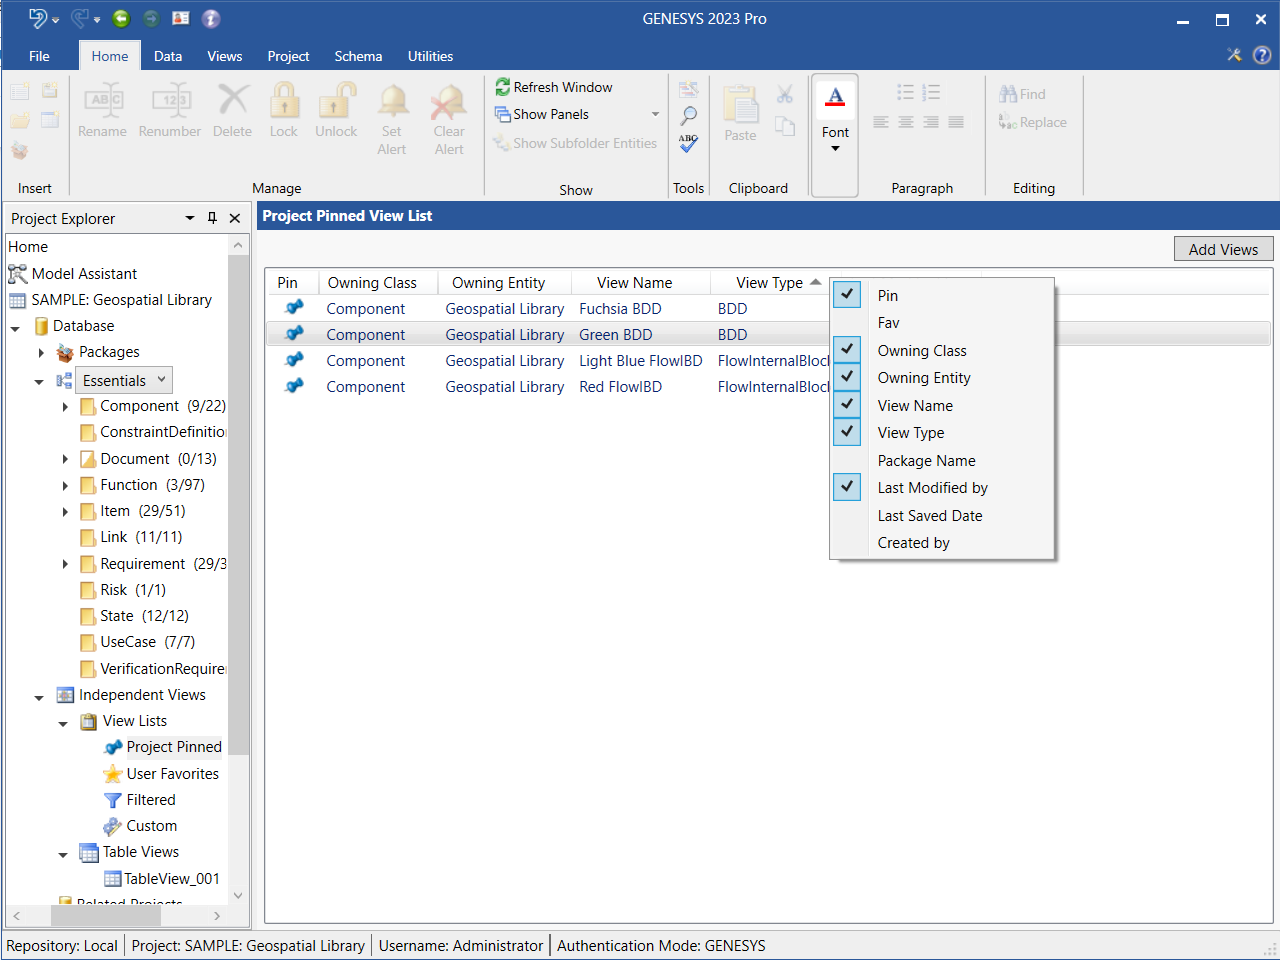
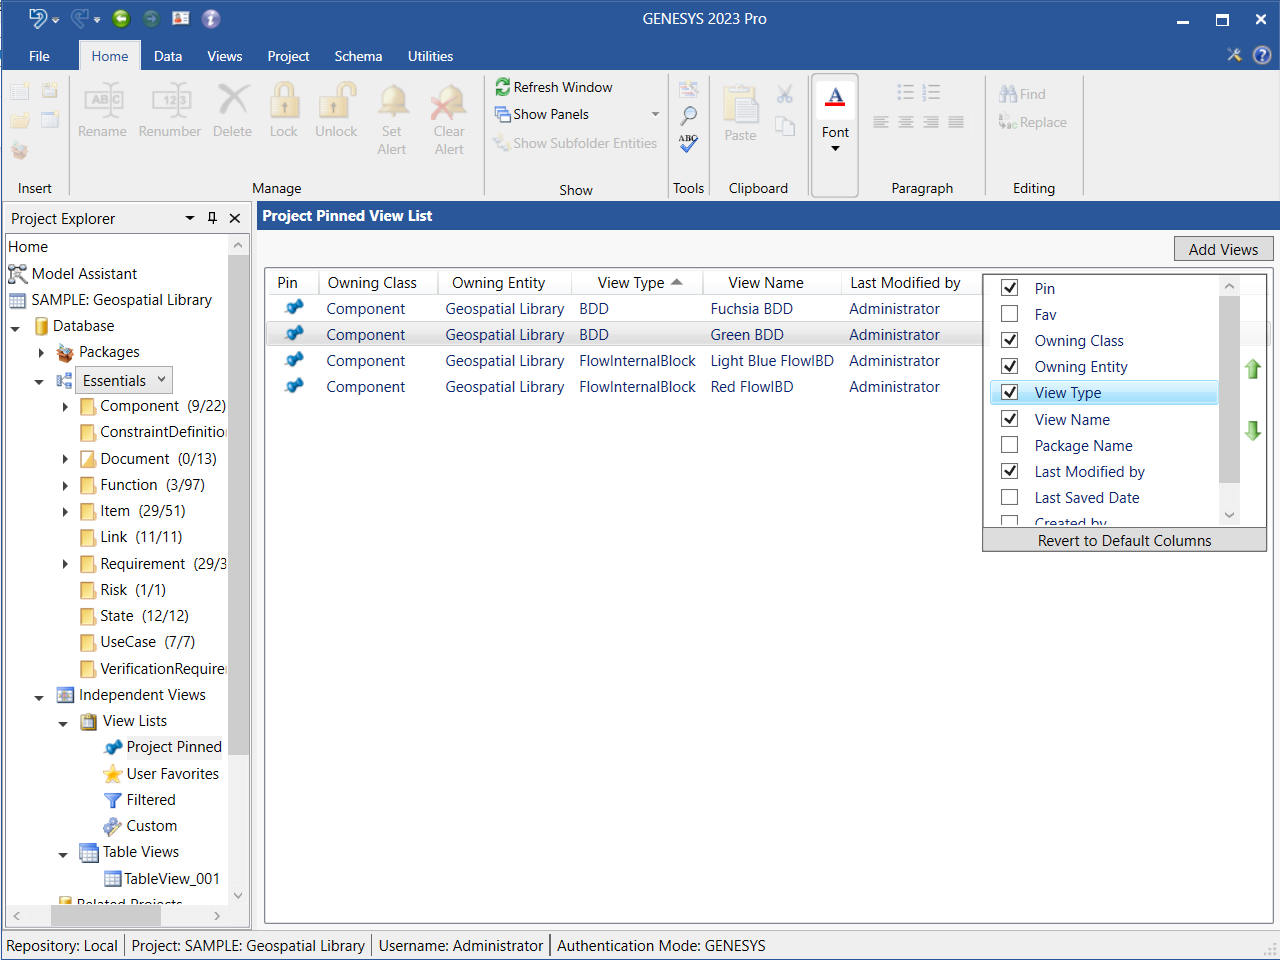
To move a column to a different order on the view list, highlight the column name on the ellipsis drop-down menu and then select the green Move Up  or Move Down
  arrow on the right side of the menu to move the column up or down, respectively, on the list. In the view list below, we highlighted View Type and selected the Move Up
  arrow to move the View Type column before the View Name column.
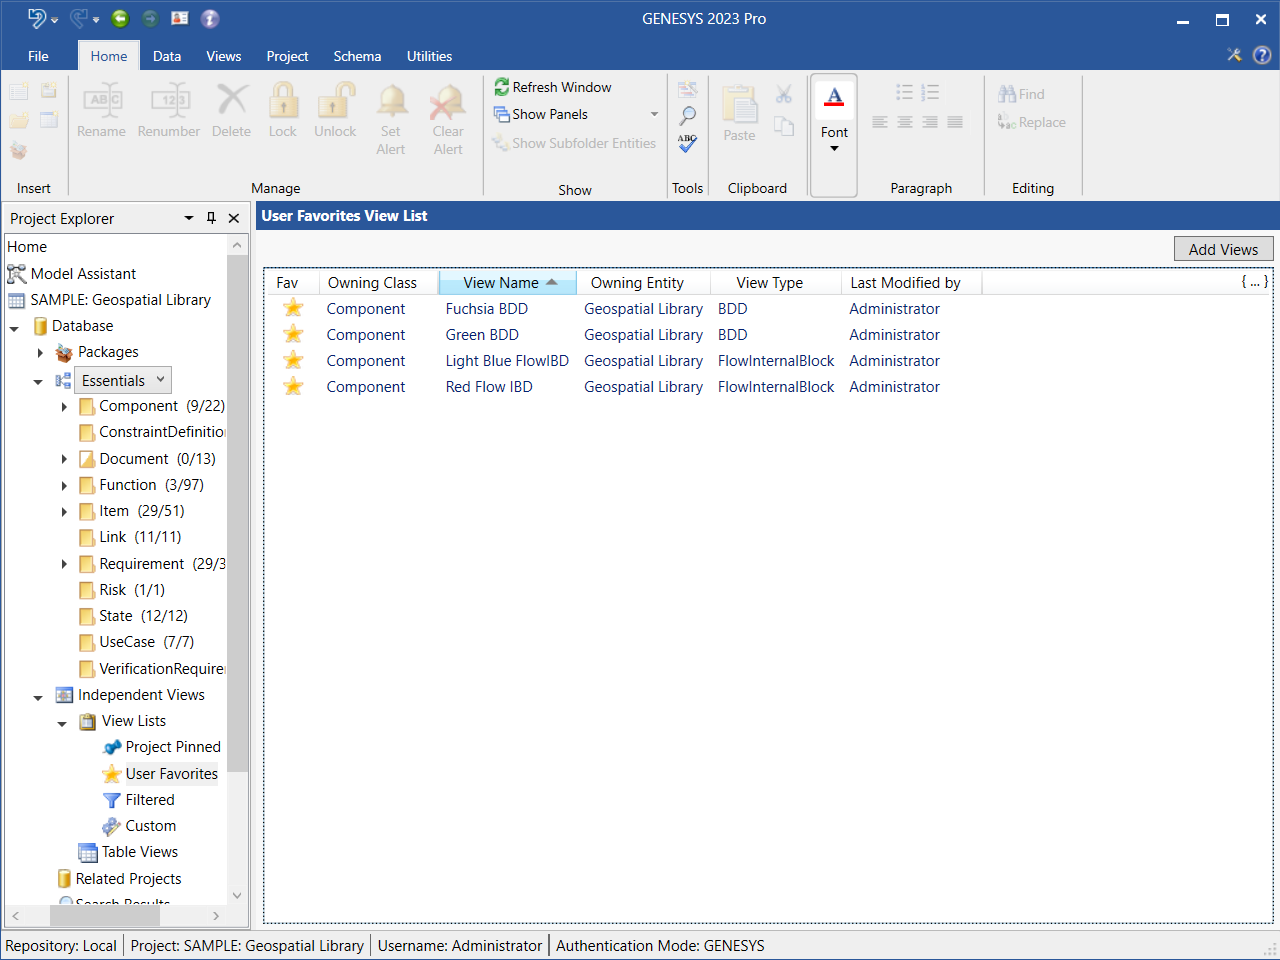
Reordering Columns by Drag-Drop in a View List
In any of the four view list types, you can re-order the columns by drag-drop in either direction. In the view list below, we re-ordered the View Name and Owning Entity columns.
Sorting Diagrams in a View List
To sort the diagrams in any of the four view list types by any of the columns, click on the column name. The column will sort in ascending or alphabetical order. Clicking on the column name again re-sorts it in descending or reverse order. The example view list below is sorted by View Name.

Reordering Rows by Drag-Drop in a View List
In any of the four view list types, you can drag-drop rows to re-order them. In the example Custom view list below, we move the Red FlowIBD diagram higher in the list.

Navigating Rows in a View List with Keyboard Arrow Keys
You can use the arrow keys on your keyboard to navigate up and down the rows of a view list.
Dragging View List Columns Wider/Narrower
In any of the four view list types, you can drag the columns wider/narrower by clicking on the right edge of the column while holding down the left mouse button. Dragging it to the right makes the column wider; dragging it to the left makes it narrower. In the example User Favorites view list below, we dragged the View Type column wider.
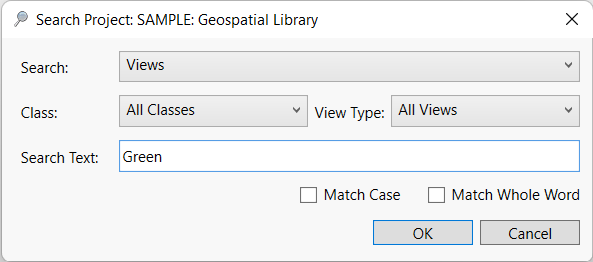
Searching for Views
Users can search for saved diagram views by diagram name, diagram type, and class.
1. To search for a diagram view, select the Search  icon on the Home ribbon. At the window that displays, select Views at the Search field, the diagram class or All Classes at the Class field, and the diagram type or All Views at the View Type field.
2. Enter a search term in the Search Text field.
3, Optionally, check the boxes if you want the search results to match the case or match a whole word.
4. Click OK to begin the search.
The search includes Table Views and in a future enhancement also Matrix Views.
The search results are saved in the Search Results section of Project Explorer, making them available for future reference and for easy access, as shown below.
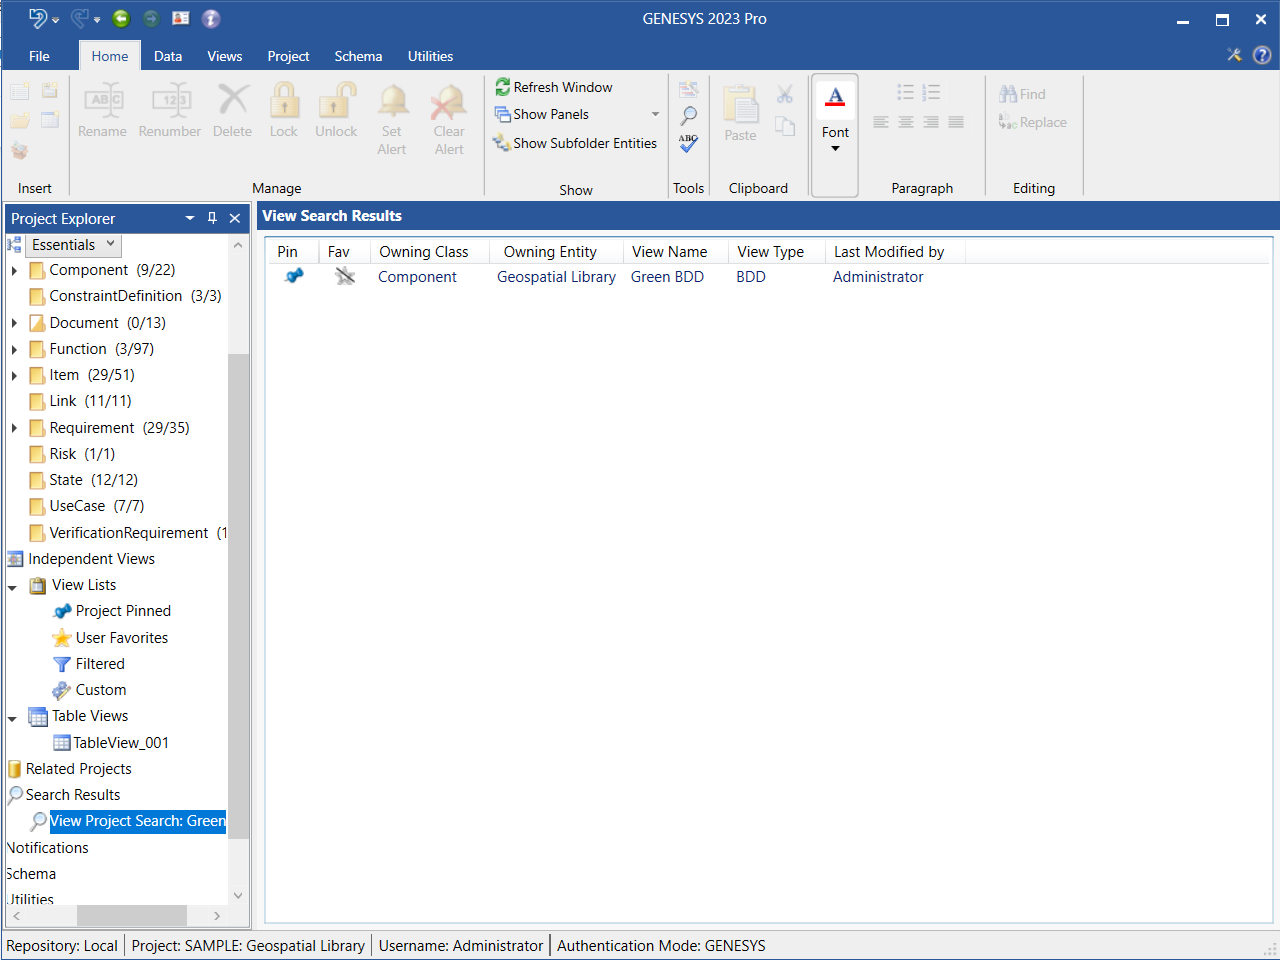
To clear the search results, right-click on Search Results in Project Explorer and select Clear Results from the drop-down menu that appears.
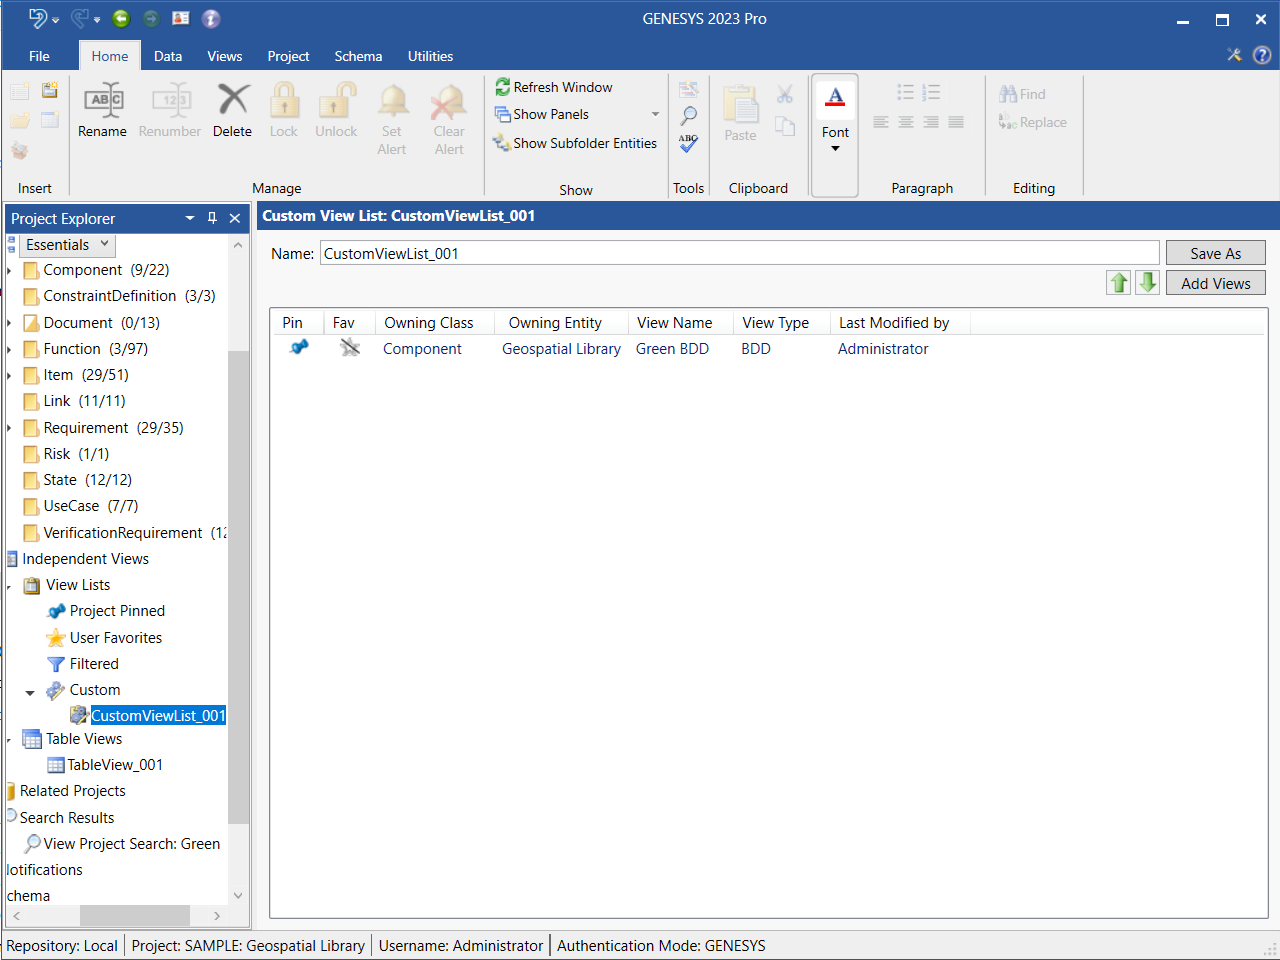
Adding Search Results to a Project Pinned/User Favorites/Custom View List by Drag-Drop from the View Search Results Window
Users can conveniently drag-drop search results from the View Search Results window to a Project Pinned/User Favorites/Custom view list. In the example below, we added the View Project Search: Green results to CustomViewList_001 by drag-drop.
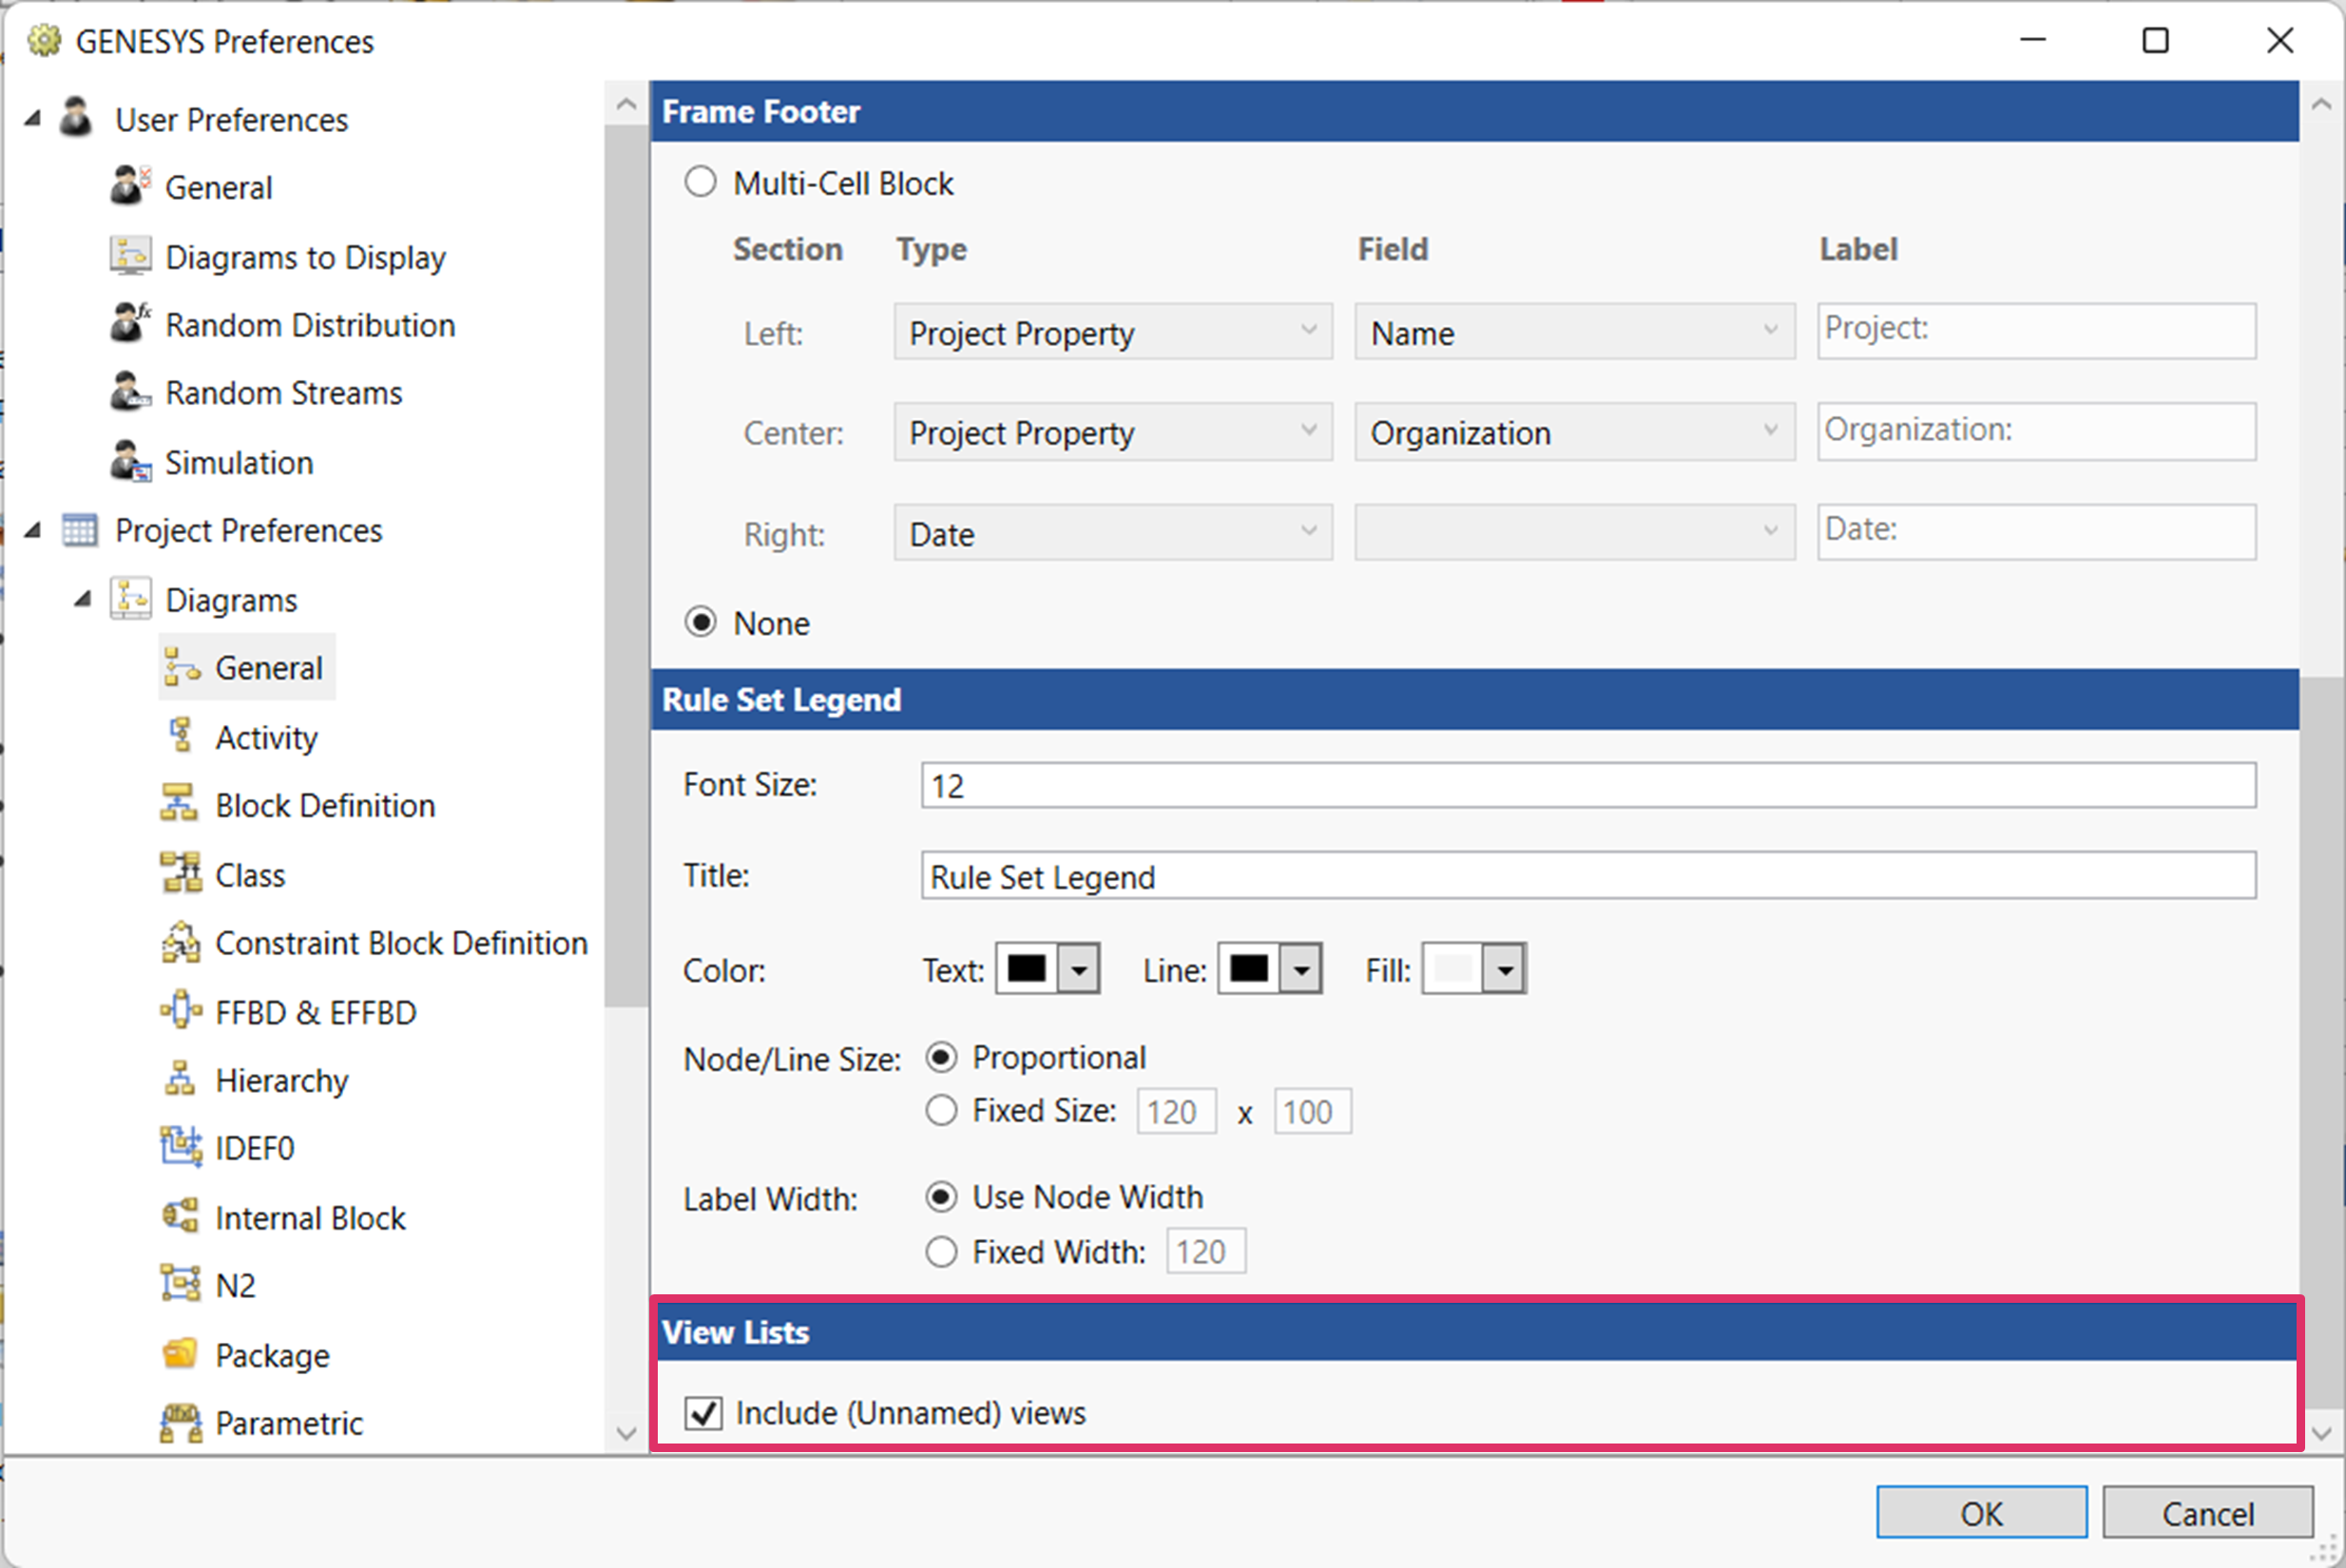
View List Project Preferences
Project Preferences in GENESYS includes the following option:
Include (Unnamed) views
This option enables users to save a view list without a name, resulting in the list having the label Unnamed.
To access this option, select the File menu, click the Preferences button on the bottom right side of the menu, then select Project Preferences, Diagrams, and General. Check the box next to the option to select it. Including Unnamed views is the default option.
|
NOTE: |
As a best practice, Vitech encourages GENESYS users to save diagrams with explicit view names. |