Create Global or Local Mapping Item
To create a new global or local mapping item:
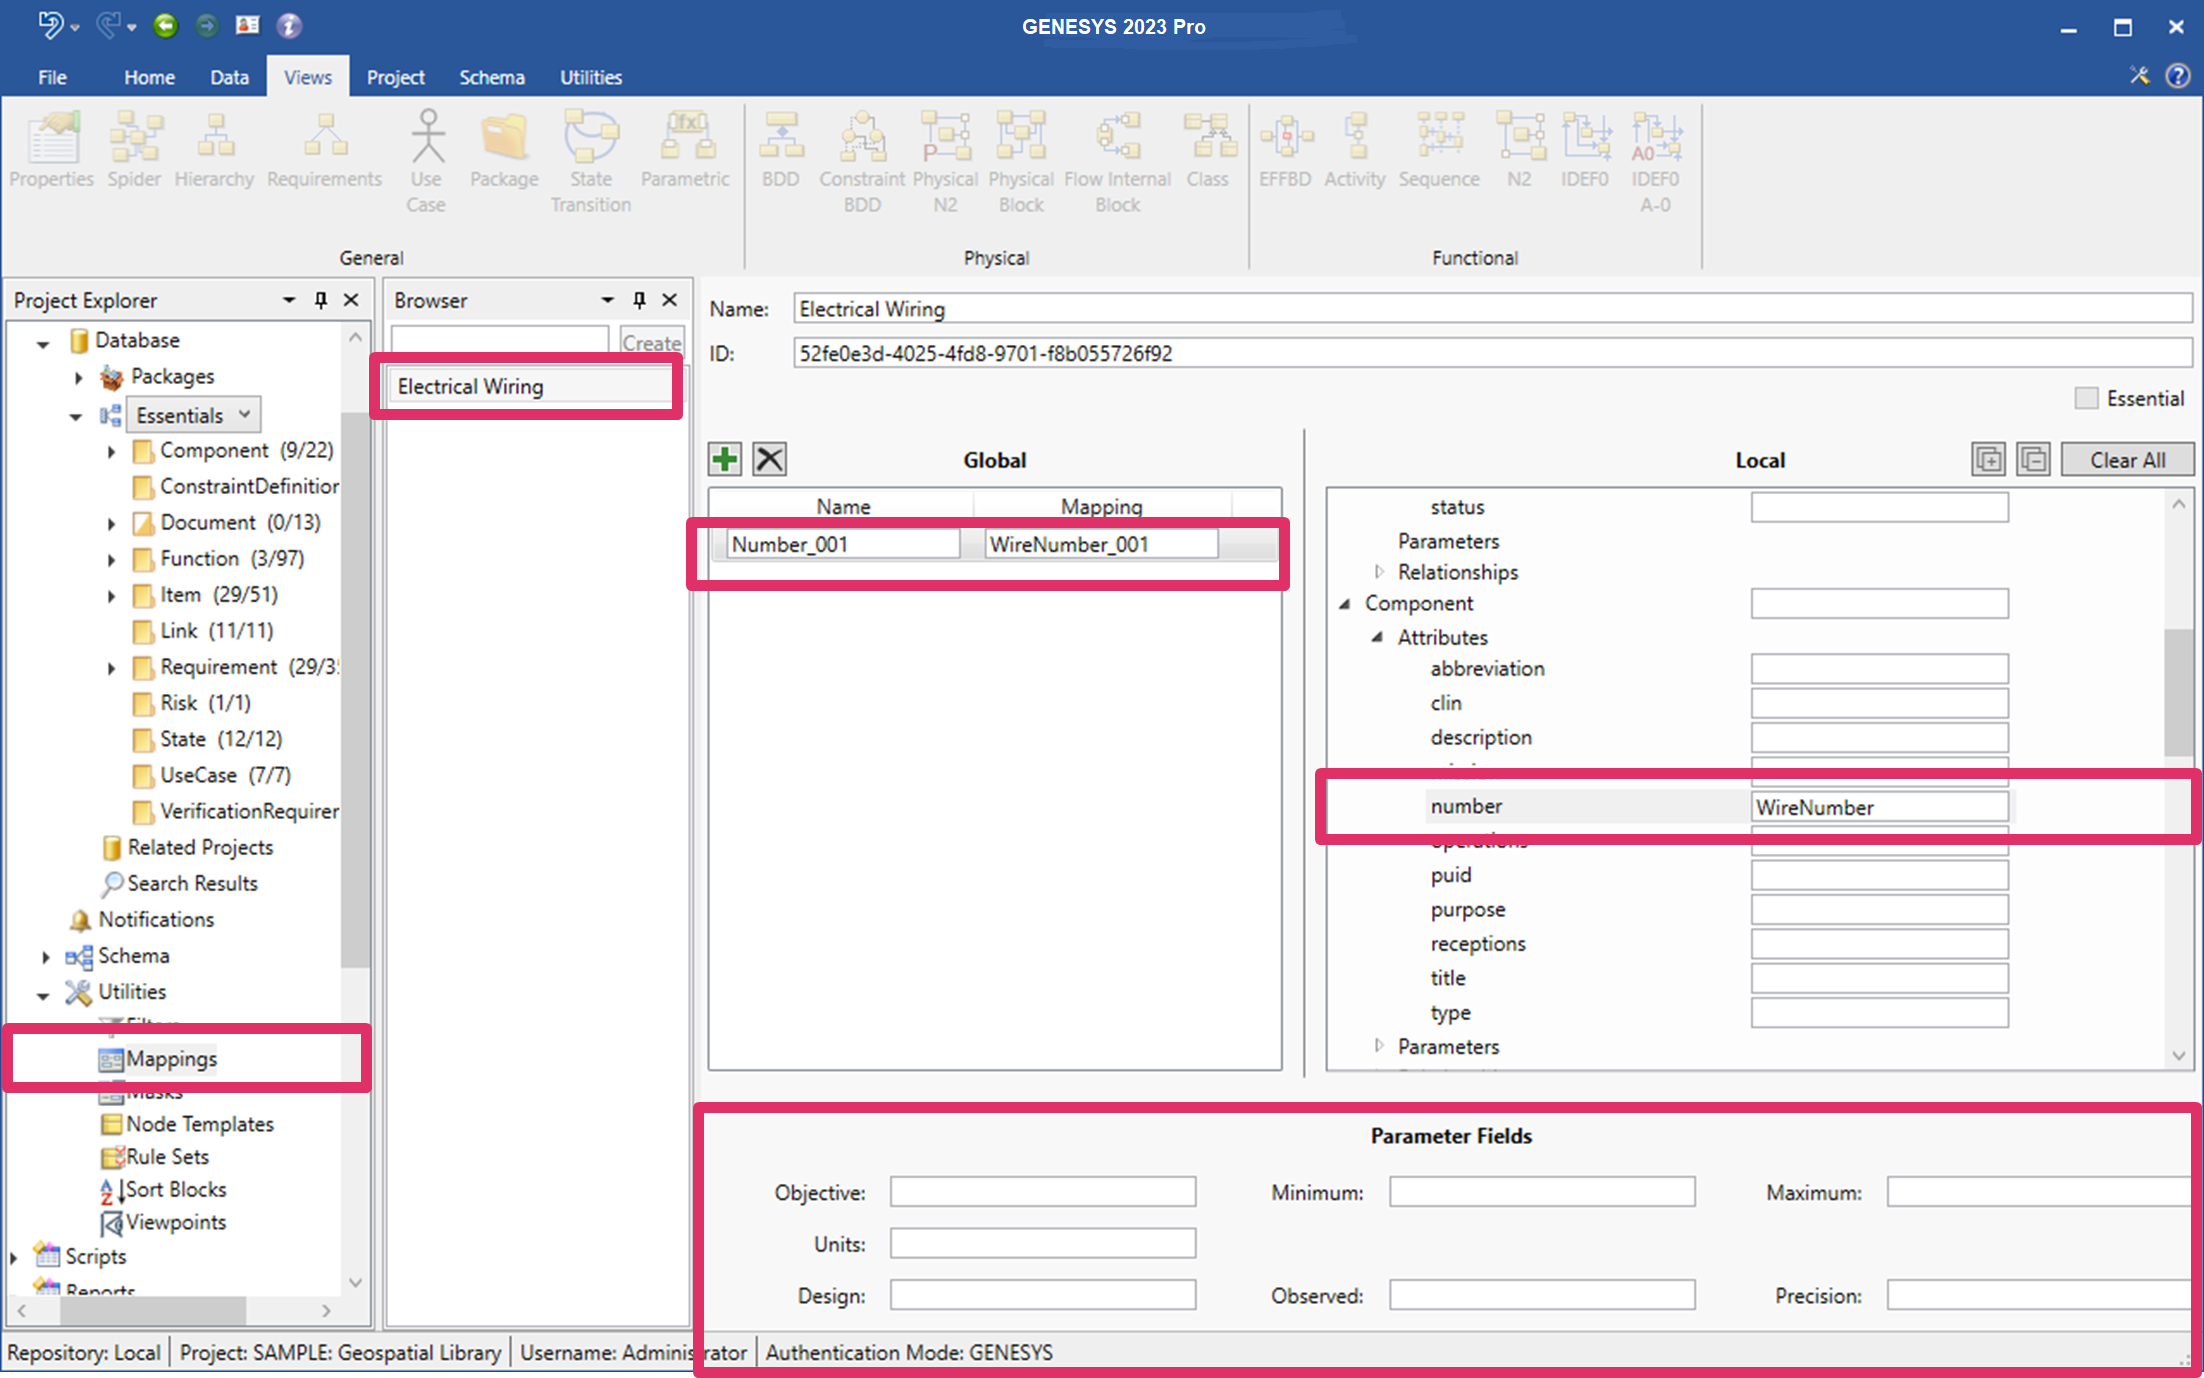
1. Select the green Insert ![]() icon at the top of the Global pane in the center of the window. A new mapping item appears in the pane. The original name for the item appears on the left side and the new mapping name appears on the right side. You have the option to keep the default name for the mapping item, Mapping_###, or rename it. This section of the window is for specifying global mappings that will globally replace the specified definition names every place that they appear in the viewpoint.
icon at the top of the Global pane in the center of the window. A new mapping item appears in the pane. The original name for the item appears on the left side and the new mapping name appears on the right side. You have the option to keep the default name for the mapping item, Mapping_###, or rename it. This section of the window is for specifying global mappings that will globally replace the specified definition names every place that they appear in the viewpoint.

2. You can also specify local mappings that take precedence over the global mappings and apply only to the specified definition. In the Local pane on the right side of the window, click the arrows next to the items that you want to map and next to any attributes, relationships, etc. under these items. To define a local mapping, scroll through the GENESYS items and rename any of them with specialized language. In the example above, we renamed number to WireNumber in the Electrical Wiring mapping.
To expand all of the items in the Local section at once, click the Expand All ![]() icon on the top right side of the window section, or to collapse all of the items, select the Collapse All
icon on the top right side of the window section, or to collapse all of the items, select the Collapse All ![]() icon.
icon.
To clear all of the items that you selected, select Clear All on the top right side of the window section.
3. You also have the option to rename any of the parameter fields in the Parameter Fields section at the bottom of the window.