Insert Rule
To insert a new rule:
1. Make sure that the rule set for which you are creating a new rule is highlighted in the Browser pane.
2. Select the Diagram Rules, Node Rules, or User Rules tab at the bottom of the Rules pane, to create a diagram rule, node rule, or user rule, respectively.
3. Select the green Insert ![]() icon at the top of the Rules pane, or right-click on a rule listed in the pane and select Insert from the drop-down menu that appears.
icon at the top of the Rules pane, or right-click on a rule listed in the pane and select Insert from the drop-down menu that appears.
A new rule appears in the pane with the default name Rule_###.
4. In the Diagram/Nodes/User Rules section on the right side of the window, enter a new name for the rule or keep the default name.
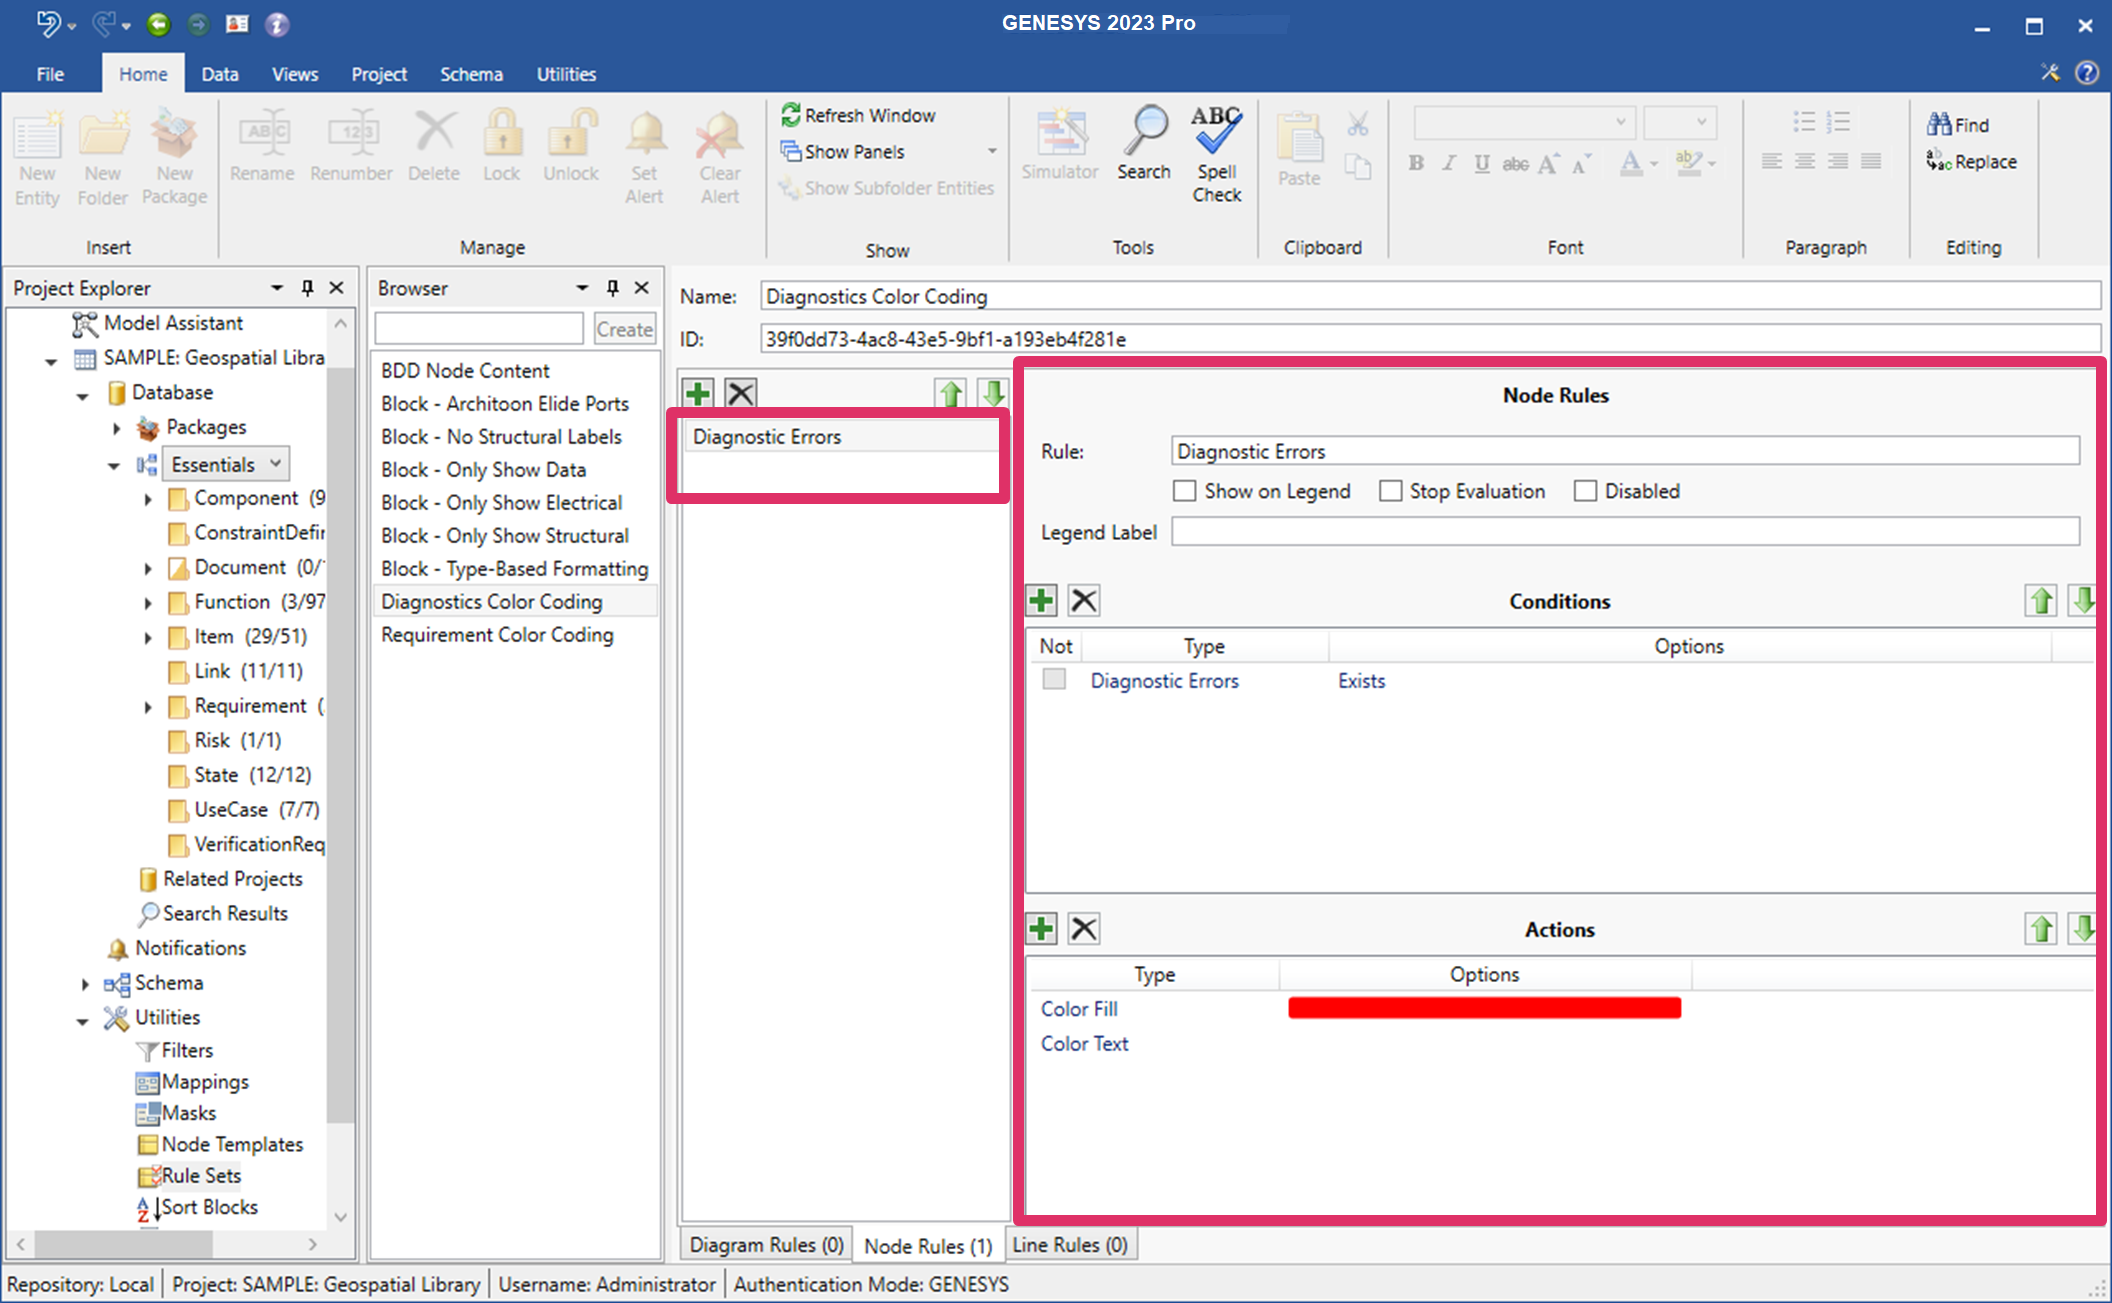
5. Select the checkboxes next to Show on Legend, Stop Evaluation and Disabled, for any options that you want.
6. If you select, Show on Legend, enter a label for the legend in the Legend Label box.
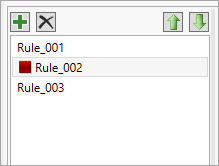
If you select Stop Evaluation, the rule will appear with a red block next to it in the window. Since the rules execute in the model in the order that they are listed in the window, this indicates that the rules will stop executing after Rule_001.
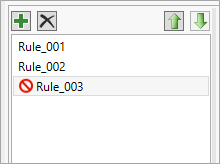
If you select Disabled, the rule will be disabled and will appear with a red circle with a line through it in the window.
7. Add a Condition to the rule by selecting the green Insert ![]() icon in the Conditions section of the window, or right-click on a condition listed in the window and select Insert from the drop-down menu that appears.
icon in the Conditions section of the window, or right-click on a condition listed in the window and select Insert from the drop-down menu that appears.
The condition portion of the rule is made up of one or more statements which are tested when the rule is activated. If more than one statement, these condition statements all have to be true in order for the action to be taken. The rule conditions are the collection of statements that have to evaluate to true in order to take the Rule Action specified.
There is also a Not column that reverses the evaluation making Always true and Not Always false.
8. To construct the condition, first select the Type from the drop-down list. Options include: Always, Attribute, Class, Construct, Diagnostic Errors, Node Type, Parameter, Target, or Target Entity.
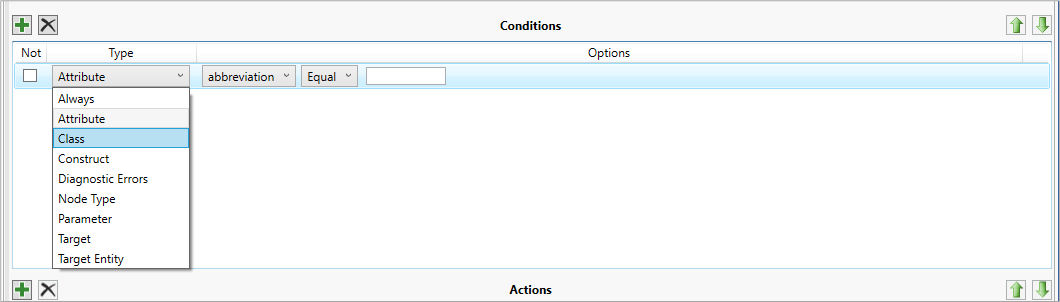
9. Then, depending on what option you selected, select additional options or operators from the drop-down lists to construct a conditional expression that determines what automatic formatting will be applied to the items you selected.
10. Add an Action to the rule by selecting the green Insert ![]() icon in the Actions section at the bottom of the window, or right-click on an action listed in the window and select Insert from the drop-down menu that appears. Then select the Type from the drop-down list. Options include: Border/Line Style, Border/Line Weight, Color Fill, Color Line, Color Text, Elision, Node Image, Node Shape, Node Show Image, Template, Text Bold, Text Italic, or Text Strikethrough. Depending on what option you selected, select any additional options.
icon in the Actions section at the bottom of the window, or right-click on an action listed in the window and select Insert from the drop-down menu that appears. Then select the Type from the drop-down list. Options include: Border/Line Style, Border/Line Weight, Color Fill, Color Line, Color Text, Elision, Node Image, Node Shape, Node Show Image, Template, Text Bold, Text Italic, or Text Strikethrough. Depending on what option you selected, select any additional options.
The rule actions are the collection of diagram effects that are taken when the Rule Conditions are true.
By combining conditions and actions and multiple rules, GENESYS users can automatically format many items in their models.
A few examples are below:
- Show the computer nodes as computer
 images on the diagram.
 - Show mechanical nodes in the diagram in purple and electrical nodes in yellow.
- Show external nodes in black.
- Show the nodes and connecting lines in green if the Cost attribute for the nodes is < $300,000.