
The Connect Node To command opens a connections window on the selected node to show any previously connected nodes. From this window you can edit existing node connections or create new ones.
The many variants of block diagrams (interface block diagrams, and internal block diagrams) all represent connectivity between components. In the case of these diagrams, the lines connecting two nodes actually represents an element - either a logical interface or a physical link. This differs from most diagrams where lines simply represent relationships. Therefore, the connections dialog offers additional power when connecting a node.
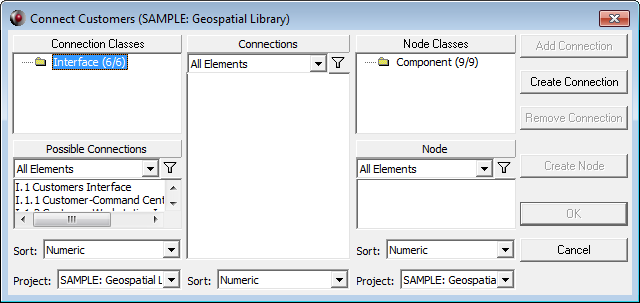
As with a traditional target window, the left panes display the possible target classes and targets for the relationship. Double-clicking a possible connection or clicking the Add Connection button will show the interface or link in the Connections pane in the middle of the window. On the right, you see the other end of the connection - the other component or node that you wish to connect to. Selecting the desired node and clicking OK will establish the appropriate relationships between the original node, the interface / link, and the new node.
 |
Tips and Tricks While the Connect Node To command allows you to establish all of the necessary relationships in a single window, many users find it easier to separately assign connections and then assign the other end of the connection. This can be accomplished most quickly by dragging and dropping from the diagram palette. First, drag the Connections construct from the Constructs tab or the specific interface / link from the Key Entities tab onto the original node. Then, drag the Nodes construct from the Constructs tab or the specific component from the Key Entities tab onto the newly established connection. |