
The Export to Word command generates a formatted Microsoft Word® table representation of a project, package, or folder. The export allows you to quickly generate stylish tabular outputs, either ad hoc to meet an immediate need or a repeated table generated throughout your project. The Export to Word command leverages the same table definitions used by the CSV and DOORS import / export mechanism enabling a "define once, reuse many times" mentality.
The Export to Word command uses a wizard to guide you through the process.
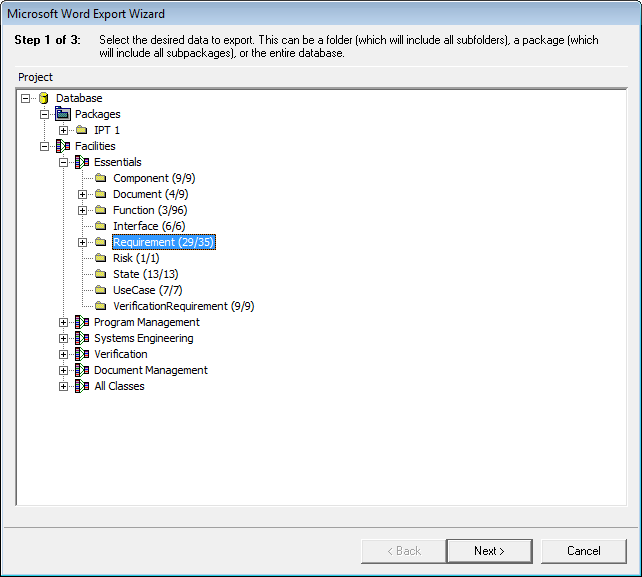
The first step in the export process is to select the desired data to export. Using the standard tree view, you can select:
the database to export all elements in the project
a package to export all elements in the package and all subpackages
a folder to export all elements in the folder and all subfolders
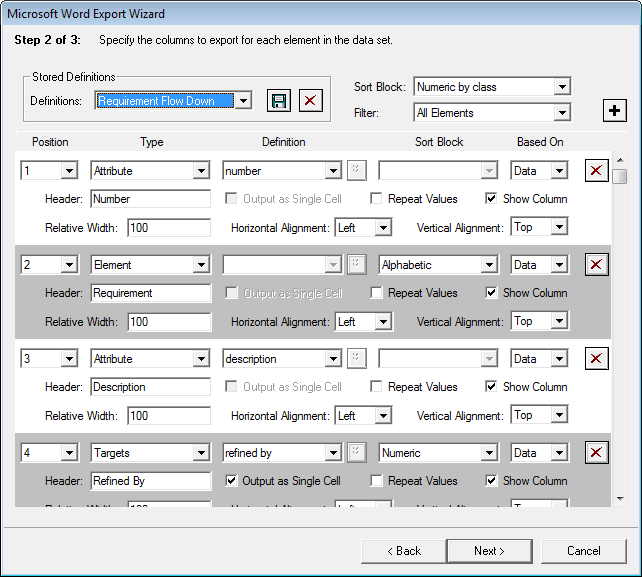
Using the same table definition dialog as other tabular imports and exports, define the columns in your table. In the case of the Export to Word command, the column definitions have addition options available to format the output exactly the way you want it with no post-processing required.
Relative Width - specifies how wide the column should be compared to the other columns in the table. This specification is purely relative. Specifying 300 simply means that you want this column to be three times as wide as a column with relative width 100. When CORE lays out the table in Word, it computes the available width (based upon paper size and orientation) and then scales the columns according to the relative widths.
Horizontal Alignment - within the cell, align the value left, center, or right. The default value is left.
Vertical Alignment - within the cell, align the value to the cell top, middle, or bottom. The default value is top.
 |
Though these options are not visible when using the table definition dialog for CSV and DOORS imports and exports, the same values are there and are stored as part of the table definition. They are simply hidden in the GUI. This allows you to define the table for one purpose and reuse it across the many import/export connectors. |
The final step in the wizard is to specify the desired options:
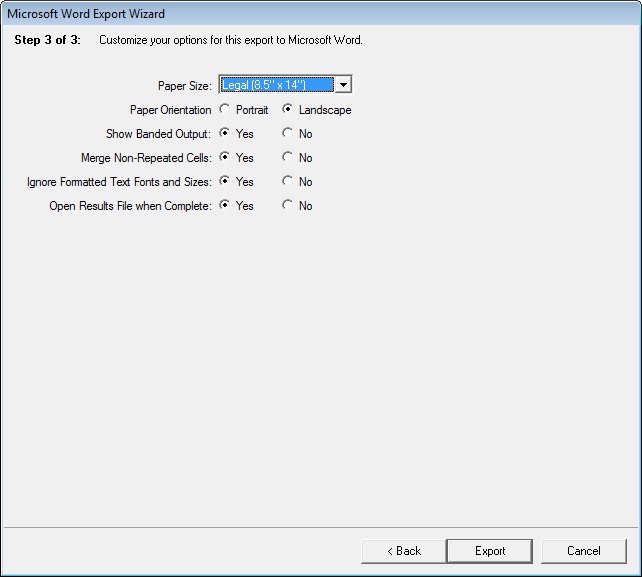
At this point, the wizard completes and you will be prompted to specify an output file. Generating a Word table of arbitrary complexity directly from your CORE data is that simple.